Search This Blog

Showing posts with label Bacon. Show all posts

Monday, 27 September 2021

Iceland/Ed's Easy Diner Selection

I've been a bit of a fan of Ed's Easy Diner since a friend dragged me into one some years ago. I'd seen them around - frequently wandering past a London branch while on the way somewhere - but, having eaten in a few diners of that style while on holiday in the States, I had been understandably reluctant to sample a British attempt at replicating the classic American Diner experience. Seemingly Ed's Easy Diner has had some financial difficulties in recent years, and it appears all the London branches have now closed... So perhaps it's fortuitous that Iceland have partnered up with them to create a line of microwaveable foodstuffs from their diner menu.

I picked up an initial selection of these almost two weeks ago, and had planned to write about each one individually, but ended up losing momentum and deciding to make a single, collective post instead. Unfortunately, in the meantime, popular YouTuber and microwave gourmet, Stuart Ashen has already covered some of them.

Still, this is snacks & the single man, so I'm pretty much obliged to mention them, if only to break the excessively long hiatus I've had from this blog.

'Breakfast' Options
3 Pancakes with Bacon & Maple Syrup
I'd always been a bit dubious about the sweet-savoury combination that is pancakes with bacon topped with maple syrup but when I tried it for the first time while while on holiday, as a hotel breakfast, I loved it. Pancakes, bacon and maple syrup shouldn't work, but it does... and the same - more or less - can be said about this frozen option. It works as pretty much a simple 2-stage process in terms of 'cooking' (technically reheating), with the pancakes going in separately, side-by-side, then the bacon going on the side with the pancakes stacked. Once everything's cooked, the bacon gets put on top and the maple syrup poured over the top.

I don't think I've ever had microwaved pancakes before (then again, I wouldn't necessarily know, in some diners) but these were surprisingly good, if perhaps a touch soggy due to condensate. The bacon is a little undercooked by my standards, and not especially flavourful, but I wouldn't tend to expect much from microwaved bacon. The maple syrup is actually genuine maple syrup rather than maple syrup-flavoured goo, and a decent amount is provided. Perhaps not enough for everyone, but certainly sufficient for me. I think my only real complaint would be that there's really not enough bacon... but, as a snack breakfast/brunch/lunch option plucked from the freezer and prepared in so short a time in the microwave, it's better than I'd expected.

A pretty good start to my experience of this new selection, overall, though my second experience of this was somewhat less positive due to the very much not-crispy bacon being, in fact, rather rubbery.

Breakfast Muffin with Hash Brown & Sausage Pattie
This was in my second sampling of the Ed's Easy Diner range, and I had my suspicions that it ran the risk of being pretty plain even as I picked it out of the freezer cabinet. It's literally just a single hash brown, a sausagemeat pattie and a muffin. Frankly, I was surprised that no sauce of any kind was included and somewhat concerned by the absence of any form of egg. Hell, even Iceland's own brand had a mini-omelette. A hash brown is nice, but it ain't a proper breakfast muffin without some egg. Cooking is another multi-stage affair, with each part getting some time in the microwave prior to final assembly.

The end result doesn't taste bad - the sausagemeat pattie is a touch plain, and the hash brown lacks any seasoning, but both came out moist after being blasted in the microwave. Even the muffin survived quite well, without becoming overly soggy at the bottom. However, the absence of any condiment, some egg, or even a slice of burger cheese, renders this a very dull snack. Pretty sure that, if this is on the menu at Ed's Easy Diners, there'd be a bit more to it than this. 

Burgers & Hot Dogs
Mac'n'Cheese Burger With Bacon
Here's where the selection started to go a little downhill, for several reasons. I have to admit that I wasn't sold on the idea of a burger with added bacon and mac'n'cheese that had to be prepared in a microwave, but this thing let me down before I even started cooking it. It's supplied with the bun frozen together, the tiny portion of bacon frozen to the underside of the bun, the burger stuck to the bacon and the most miserly portion of mac'n'cheese you'll ever see, taking up less than half the capacity of the plastic bag it's supplied in.

Trying to separate the bun led to the top half breaking. Microwaving led the bun to become dry and crumbly. The mac'n'cheese just gets dumped in a bowl of hot water to thaw, then heated briefly in the microwave, while the burger and the bacon worked about as well as could be expected in a microwave. Assembling the finished burger probably would have been easier if the bun hadn't broken.

However, since the burger is part beef, part chicken, it looks anaemic and has very little flavour - some additional seasoning may have worked wonders, but an increased beef content would have been preferable. The mac'n'cheese isn't so vile an addition to a burger as I'd expected, but it's both unseasoned and not particularly cheesy. The main disappointment was that there was barely enough bacon to add any flavour to the finished burger.

There are instructions included for part-cooking this (basically just the bun) with a toaster rather than the microwave but, personally, I'd say the better option would be to set the bun aside ahead of time to thaw on its own. Toasting it at that point might prove more effective, but use of a microwave is absolutely not recommended for the bun.

Chilli Dog
This is another one I didn't have high hopes for, not least because my relationship with hot dogs generally hasn't been great. I like the idea of hot dogs - particularly the smokiness of a really good one - but some of the ones I've had, even in bricks-and-mortar diners, let alone from supermarkets, have been pretty awful. Add to that, my experience of any chilli other than freshly-made has been diabolical, and so-called 'nacho cheese sauce' is frequently vile.

So imagine my surprise when this turned out to be pretty delicious... Although, thinking back, I can't say that any individual component was outstanding. The sauce is fairly inoffensive, pretty bland, even. The chilli is a little thin, but the flavour is OK and, coupled with a halfway decent hot dog, it works quite well. The main downside - and this is kind of a running theme with the line - is that the bun doesn't do well in the microwave. The outside becomes dry and flaky, and the cut for adding the hot dog isn't really deep enough so I ended up cutting it a little deeper before loading it up.

This one had also cooled down quite a bit before I took my first bite - I wasn't very organised, and didn't bring a camera into the kitchen until after I'd assembled the hot dog. These kinds of things really have to be eaten piping hot, lest the unnatural textures and weak flavour become too apparent.

Classic Hot Dog
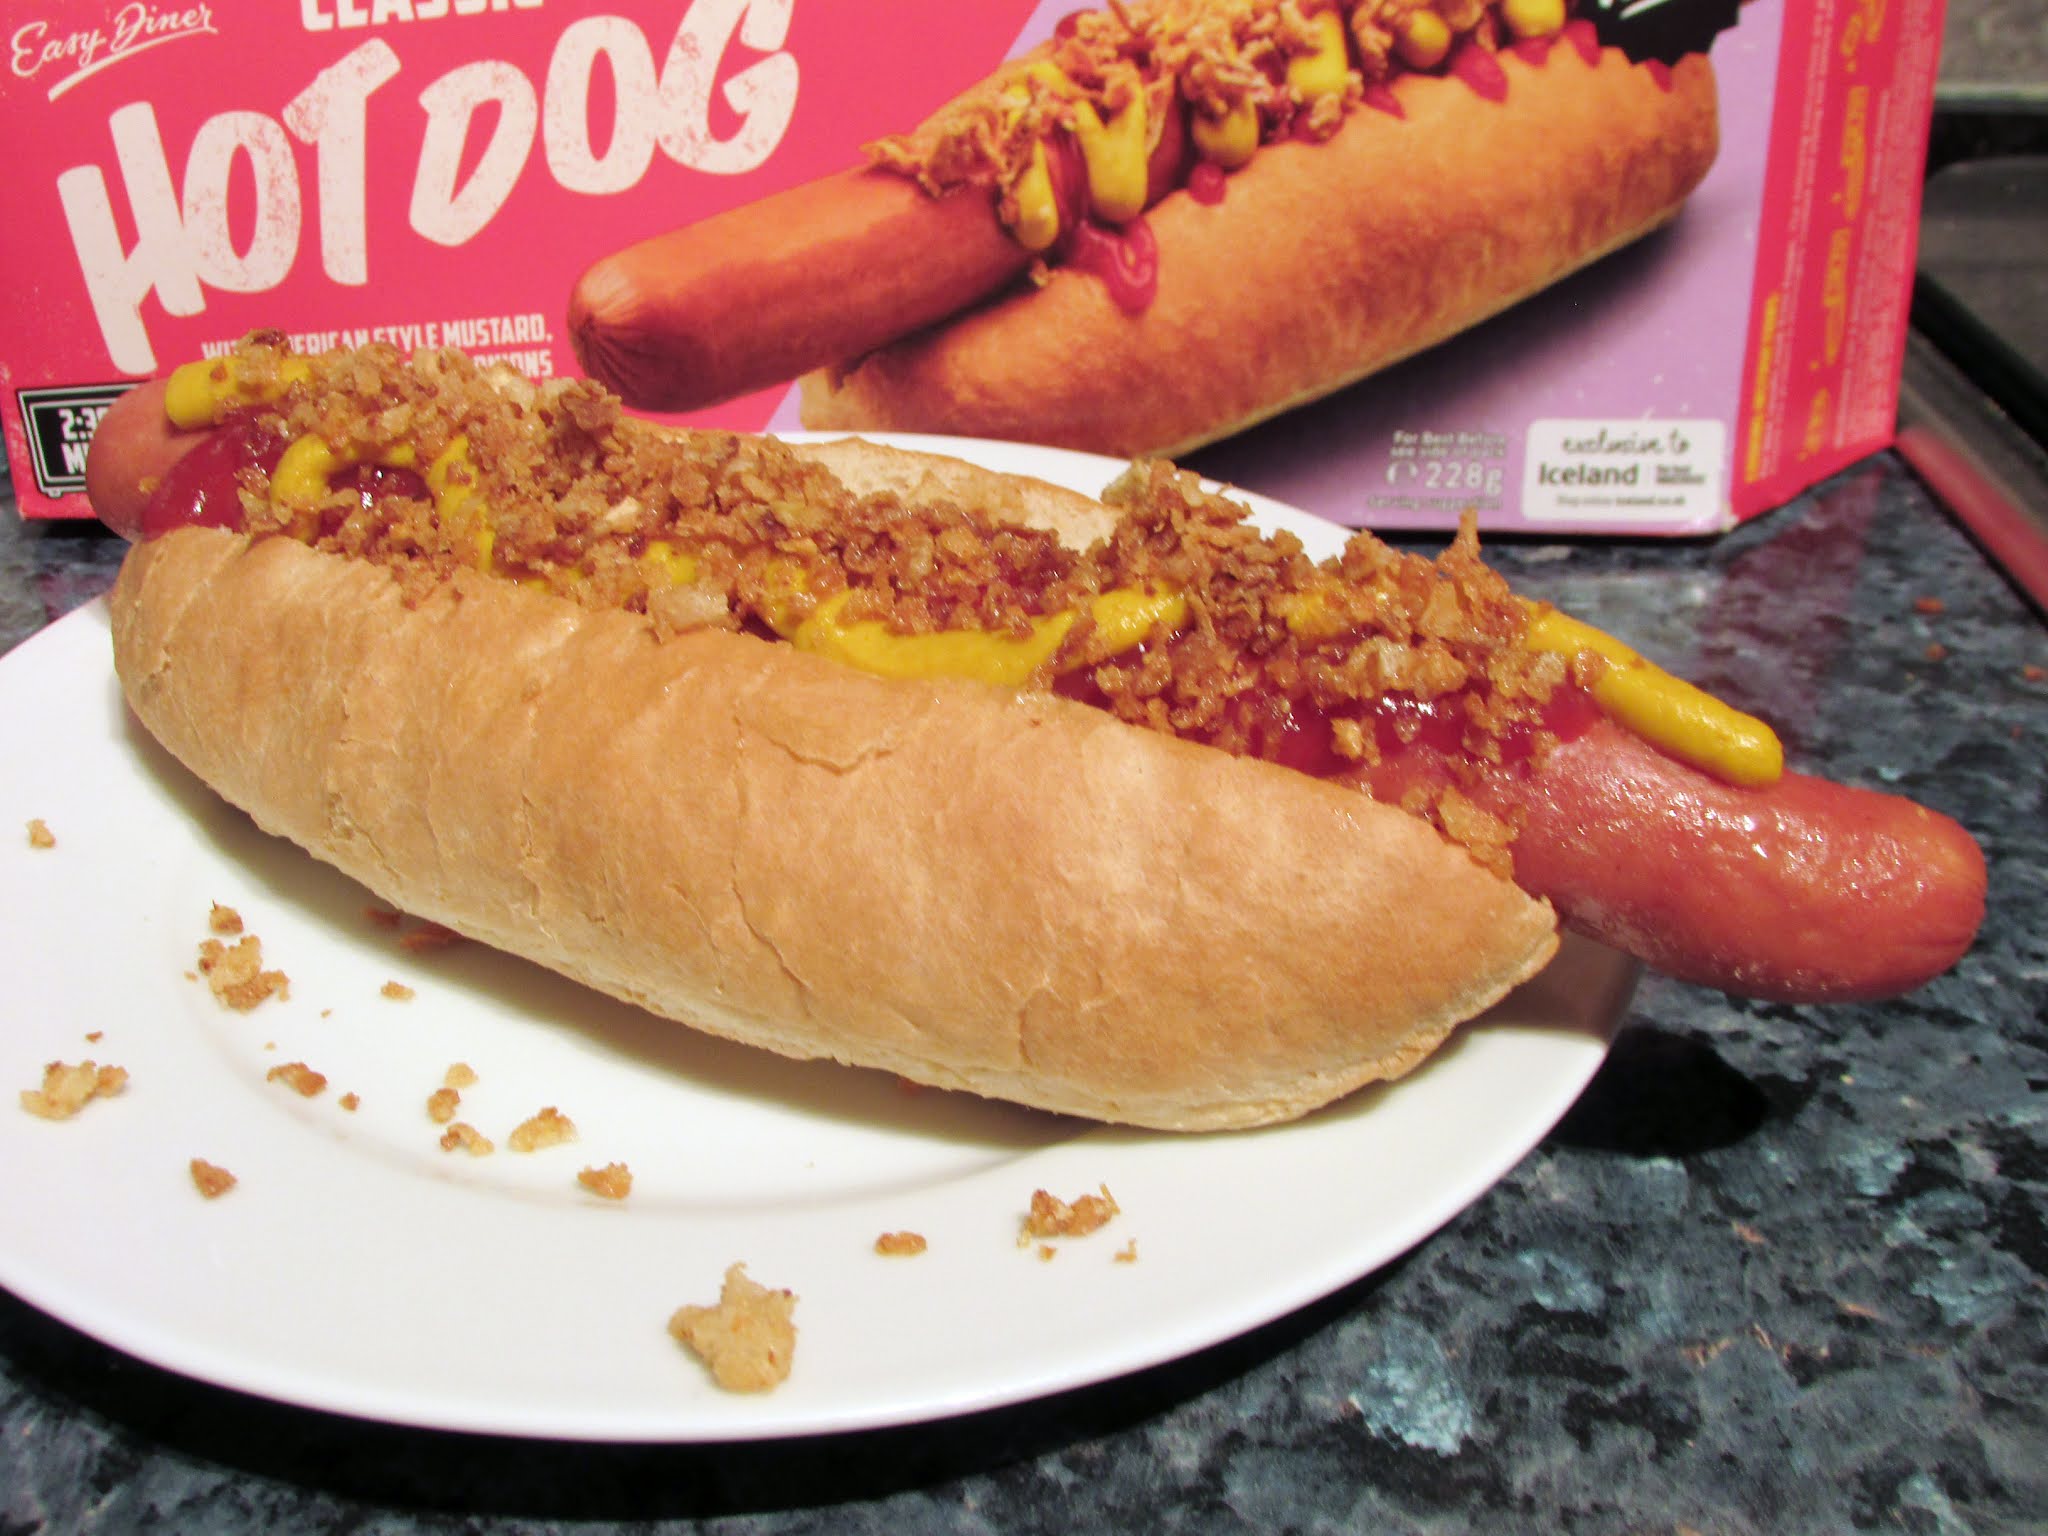
My subjectively positive experience with the Chilli Dog encouraged me to give this version a whirl, since it's a more traditional, simple hot dog. Coming just with a sachet each of mustard and ketchup and a sachet of crispy onion pieces, its preparation is far simpler - thaw the sauces, irradiate the bun, then the hot dog, put the two together, add the sauces, and then sprinkle over the onion...

...Unfortunately - and surprisingly, given that the hot dog itself is surely identical to that included in the Chilli Dog box - this one really didn't work for me. The bun dried out so much that it just broke in half when I tried to put the hot dog into it, the sauces were beyond bland, the onion was virtually flavourless and not remotely crispy, while the hot dog had the consistency (and something approaching the flavour) of rubber. I was able to finish it, but it's left me less enthusiastic about picking up the Chilli Dog again, in case I just got lucky with the first.

Pizza
Pepperoni Stonebaked Pizza
While I'm a conscientious objector when it comes to microwaving pizza (with the exception of leftovers from the night before - they're fair game), I'm quite a fan of frozen pizza generally, even though the excessive oiliness of some - Iceland's own brand in particular - can sometimes upset my stomach. My first impression of this, just going by the box, was that it was small to the point of being wholly inadequate as anything other than a snack, or as just one part of a larger meal. Opening up the box revealed - to no-one's surprise - that the pizza itself is appreciably smaller than the box, not least in terms of height when laying flat... You could probably fit three of them in the box, two at least.

Nevertheless, after a brief burst of microwave radiation, I'd have the describe the pizza as reasonably competent. Naturally, it's more base than topping, and there's a paltry fraction of the cheese depicted in the product shot on the box. Naturally, the act of microwaving it leaves the underside a little sweaty, but the same can be said of any and all microwave pizzas.

Taste-wise, it's certainly not bad, though I found the pepperoni a little anaemic, lacking the punch even of some of Iceland's own brand products, and certainly not as good as the Chicago Town 2-pack mini-pizzas or pizza subs which, I would say, are one of this product's closest analogues. As expected, though, I was still rather hungry after polishing this off.

Desserts
2 Waffles with Chocolate Sauce
I had a great sense of foreboding about this since, when microwaving things from frozen, there's a certain inevitability of one of two outcomes: it'll be too dry (like the burger and hot dog buns above) or it'll be desperately soggy... and neither is conducive to the enjoyment of waffles.

Granted, as with the burger buns - and even the pancakes - there's the option to heat them in the toaster and, upon reflection, that would seem to be the better - perhaps only - method for this dessert. Because, following the microwave instructions to the letter here, the end result was droopy, soggy waffles. Sure, they tasted OK, but part of the waffle experience is the delightful, subtle crunch surrounding the still-moist innards, and the way they soften as the sauce or ice cream start to soak in. There's something truly sad about a waffle that sags, since their lattice structure is intended to keep them rigid while minimising the amount of mixture needed to make them.

The only other let-down was the chocolate sauce, which was very, very sweet and not particularly chocolaty. This is fairly common with things called 'chocolate sauce', which can sometimes be so sugary they burn the back of my throat. This was was just a bit gunky, so I'll probably give the version with salted caramel sauce a go at some point... Making sure I cook the waffles in the toaster.

The Ed's Easy Diner range presents very much a hit-and-miss selection, not just in its individual products, but in repeat experiences of those products. Having now had a second set of the pancakes'n'bacon, I've been put off trying them again because the fat on the bacon was like chewing gum. I wouldn't touch most pre-packaged burgers with a bargepole simply because my experiences of supermarket meat-based burgers have been largely regrettable. I may try the Chilli Dog again but, having disliked the 'Classic' version so thoroughly, I'm not convinced it would be worth the risk, even at the typically low Iceland price.

The bottom line, I guess, is that none of these would be especially difficult or time-consuming to make from scratch, seasoning to taste, and adding such condiments as are desired. Hell, I've already done it myself. The Breakfast Muffin was particularly dull and, given that sauces were included in pretty much every other product, it's baffling that there wasn't even a sachet of ketchup included.

Your mileage may vary. Your experience and expectations of burgers, sausagemeat patties and hot dogs may be very different from mine. However, I can be reasonably certain that either thawing the buns naturally, rather than relying on a microwave, or using the toaster where possible, would yield better results.

Monday, 28 December 2020

Christmas Dinner... Burger-style!

I have to confess that, despite largely eschewing this blog this year, in favour of quick-and-easy, hashtag-enhanced Instagram posts, I'd thought my Christmas Dinner pizza was a more recent event than it actually was... Perhaps my recollection had become 'slightly' skewed by the emergence this year of Pizza Hut's take on my idea (which is heartily recommended, BTW - the Red Wine Gravy base alone is delicious, though the use of rotisserie chicken rather than turkey makes it a little less authetic), but it was way back in 2014... and I didn't even get round to writing up my 2016 magnum opus, the salmon en croûte with cream cheese, cranberry sauce and orange zest that Courtney and I made for my parents as Christmas Dinner that year.

Nevertheless, it had occurred to me a month or so back that it'd be nice to follow that up with another form of junk-food-ised Christmas Dinner, and the most obvious option seemed to be burgers... While Courtney and I have eaten fewer burgers at home this year than previously, I did end up visiting the McDonald's round the corner from my last Temping placement, in Islington, a little too frequently while I was there.

She was very much on board with the suggestion, so I went ahead and started looking into how best to make turkey burgers from scratch. In the end, largely through lack of care and attention, I made the most basic option in the world - just turkey mince (500g of 2% fat turkey mince from Tesco), seasoned only with salt and pepper, and formed into two patties. These were pan-fried, one at a time, in a little vegetable oil, with the use of a meat thermometer to ensure they were properly cooked all the way through, since I couldn't easily eyeball it.

Turkey is only part of a good Christmas Dinner, though. I also wanted to add a patty of stuffing and a Christmassy hash brown at the very least, while thoughts of cranberry sauce and lightly toasted slices of Brussels sprouts seemed to round off the concept nicely. Courtney mixed up a red cabbage coleslaw, because we had some red cabbage, and it went well with her planned vegetarian option.

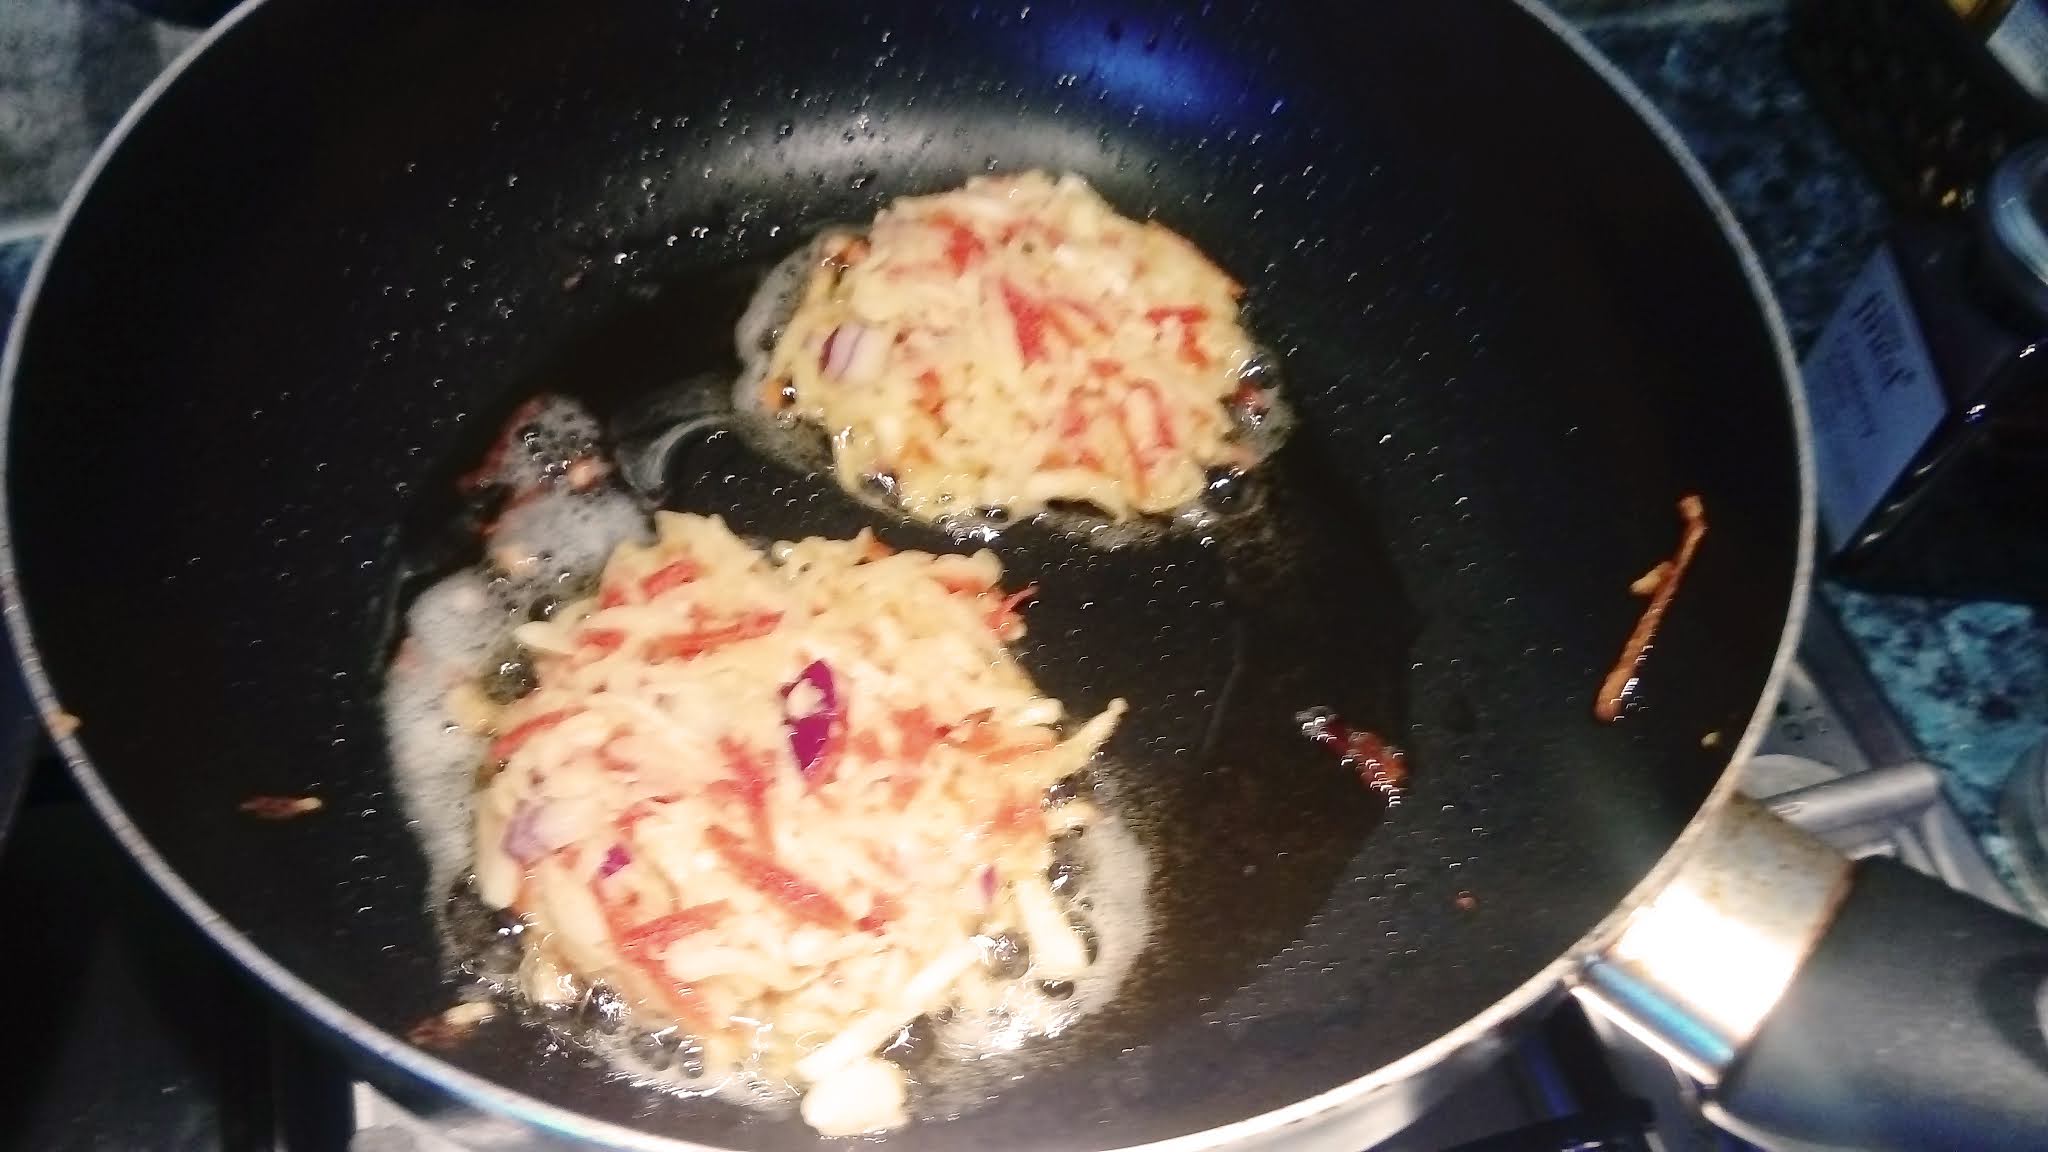
For the stuffing patties, I had the option of going for something simple, like sage and onion, but ended up choosing a pork, chestnut and onion stuffing from the Tesco Finest range - a 400g pack divided up into four patties. The hash browns were home made, using a mixture of parsnips, rainbow carrots, onion and potato with egg and potato flour added to aid binding. These were pan-fried and still didn't hold together especially well, but the rainbow carrots added some seasonal colour to what could otherwise have been quite anaemic hash browns (hash beiges?). The sprout slices were simply chucked in the oven, unadorned, alongside my stuffing patties and Courtney's vegetarian sundries, while the hash browns and burgers were being cooked on the hob.

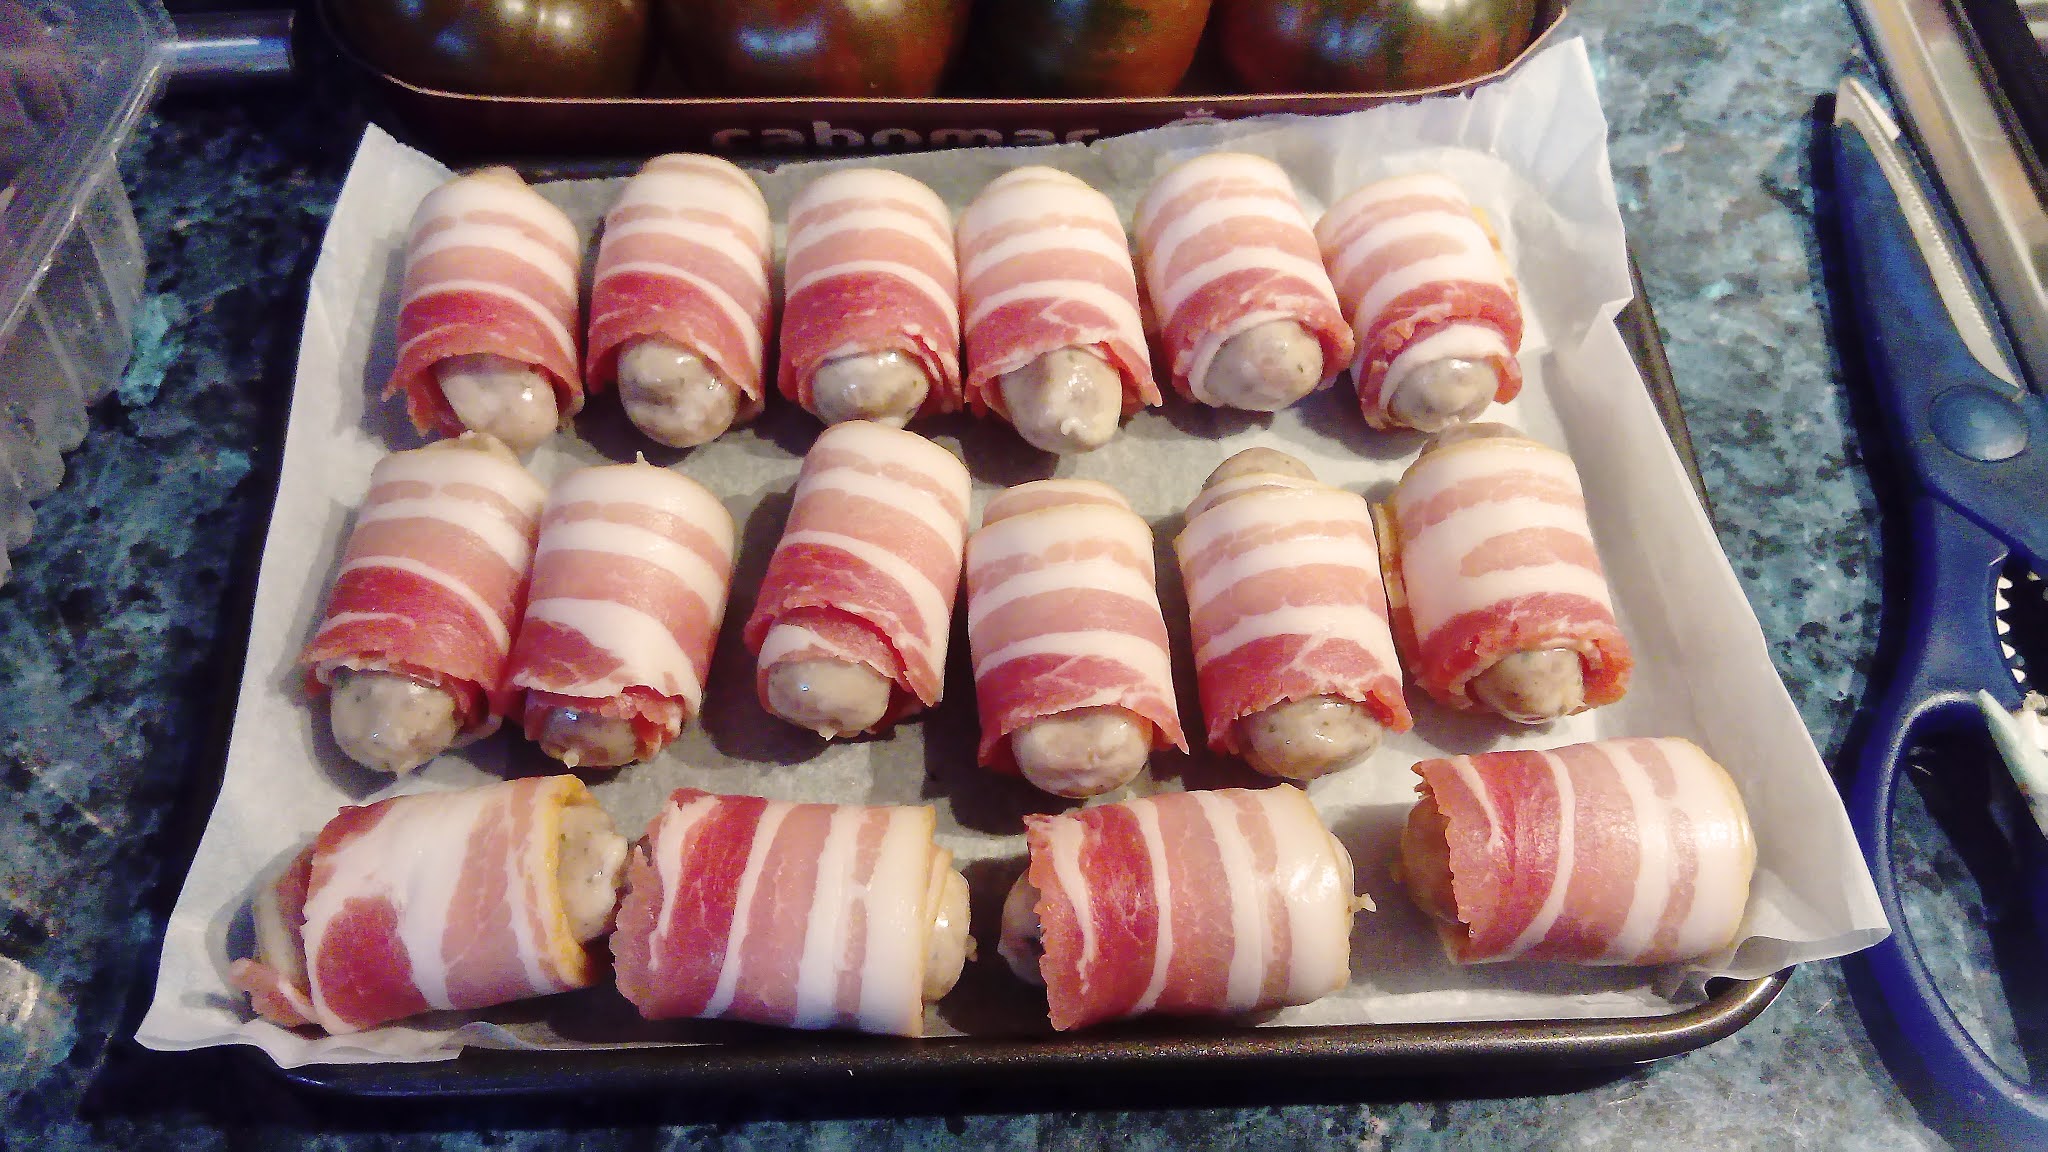
Of course, it wouldn't be Christmas without pigs in blankets and, rather than buy them oven-ready, I decided to piece together my own using a combination of Pork and Caramelised Onion cocktail sausages and Chestnut Smoked Streaky Bacon, both from the Tesco Finest range. Weirdly, the packs were of different sizes - 18 cocktail sausages versus 16 slices of bacon - so I ended up with a couple of unwrapped sausages. However, about 30-35 minutes in the oven created a tray full of pigs in blankets, with enough leftovers to cover my lunches for the following couple of days.

Bun-wise, I'd originally ordered a pack of Warburtons' Brioche Burger Buns but, with the only delivery slot available to us being the 18th December, these would have been out of date and probably growing stale before Christmas Day, so we ended up using them for other things and buying a pack of standard sliced buns locally, a couple of days ahead of time.

The buns were assembled with a helping of Courtney's red cabbage 'slaw on the bottom, the stuffing patty, the turkey burger, some cranberry sauce, and the toasted sprout slices substituting for that old burger staple, the pickled gherkin slices. I only got one of the hash browns, because Courtney miscounted, and they hadn't held together very well anyway, so much of the mixture ended up in a pile on her plate. I served my pigs in blankets on the side, and nicked one of her Brie Bites (Tesco's own brand) for a bit of variety, since my plate was largely made up of meat.

The results were a little mixed... and, unfortunately, my hastily taken, blurry, poorly-lit photos don't help...

The pigs in blankets were excellent and, for once, I was able to taste the difference between fancily-smoked bacon and the normal kind, these rashers having a pleasantly sweet, spicy edge to them rather than just being super-salty.

The stuffing patties tasted great, but I misjudged their size before baking them: their circumference shrank, while their height increased - I'll know to take that into account if I try this again in future, and make them shallower and wider before putting them in the oven... though the chunks of chestnut might make that a bit tricky. Courtney's red cabbage 'slaw was nice on its own, but ended up becoming rather overwhelmed by the rest of the burger, including the bun itself. The hash browns turned out really well other than their tendency to fall apart - we'll really need to research how to make them stay together... Personally, I suspect a mold may be used for the shop-bought kind or, at least, some sort of press to compact them together rather more before they're cooked.

Less impressive were the turkey burgers, since they ended up very dense and very dry. I'd definitely like to try making them again, but actually following one of the myriad recipes out there, in the hope of a more succulent result. At the very least, there should have been some additional seasoning - I had been reluctant before starting, since the other contents of my burger were, theoretically, going to be seasoning of a sort. Some of the recipes available online also feature things like egg white and breadcrumb, and these may have helped considerably. Part of the problem, though, was that I split a 500g pack of minced turkey into two 250g patties, which ended up being far too large in and of themselves. Considering a Quarter Pounder burger would only be a little over 100g, I really overdid it. Another part of the problem is that minced beef - the main constituent of a normal burger - would tend to comprise more than 2% fat... and the leanness of this minced turkey contributed to the dryness of the end result. Topping the burgers with cranberry sauce added surprisingly little to the flavour but, again, a smaller burger may have made all the difference.

Possibly the most disappointing part was the toasted sprout, which ended up getting utterly lost in the burgers. In retrospect, I suspect they should have been seasoned and oiled... So I'll know better for next time.

We're already considering options for next year's non-traditional spin on the traditional Christmas Dinner, and a curry is the front runner. We just need to look into how things like nutmeg, cinnamon and ginger into a curry sauce that can accommodate both turkey and whatever vegetarian substitute Courtney ends up using...

Monday, 8 June 2020

Beaver Tails with Maple Buttercream Icing

Sometime after my girlfriend moved in with me, we started introducing each other to things like our favourite movies, books, TV shows and YouTube channels. In the latter category, one of Courtney's favourites is Simply Nailogical - ostensibly a nail art channel which has more recently branched out into a nail varnish brand (Holo Taco) and a stream-of-consciousness/discussion podcast (SimplyPodLogical). This may seem like a strange subject to bring up on what is technically still a food blog (even though it's been without updates in over a year because I started using Instagram for the majority of my foodie output), but there's a connecton, honest.

Basically, one of the recent episodes of SimplyPodLogical was devoted to discussing some common Canadian stereotypes and, during the course of the conversation, Cristine and Ben mentioned a chain of pastry shops called 'BeaverTails'. They are purveyors of what is essentially a flatbread version of the classic fried doughnut, with a variety of toppings on offer, from classic cinnamon sugar to various types of icing, chocolate spreads, crushed biscuits, fruit, etc.

Naturally, I was hooked.

Since they don't have any UK branches (and, y'know, there's the Lockdown to consider anyway) I looked into recipes for making Beaver Tails myself, and realised it was something I could probably manage quite comfortably, despite the fact that I've done very little cooking from scratch in ages, and what little I have done used recipes from Gousto, where all the ingredients came supplied in the proper, premeasured quantities, and the instructions were given in clear, simple stages. I've not bothered writing those up here because it seemed a little rude (not to mention legally shaky) to recreate their recipes, and because it worked better to simply photograph and Instagram the results.

But Beaver Tails... They're precisely in line with the raison d'être for this blog, so I couldn't resist going the longform option... Not least because I can demonstrate how adaptable these fried delicacies can be.

Ingredients:

Maple Buttercream
  • Room Temperature Butter, salted or unsalted - I used salted (225g)
  • Icing Sugar (120g)
  • Maple Syrup (120ml)
  • Vanilla Extract (2 teaspoons)
  • Salt (a pinch, only if using unsalted butter)
Preparation Time: 5-10 minutes

Beaver Tails
  • Hot Tapwater (60ml)
  • Sugar (50g)
  • Yeast (7g)
  • Milk (60ml)
  • Butter (3 Tablespoons)
  • Egg (1)
  • Salt (1 Teaspoon)
  • Plain Flour (335g)
  • Oil for Frying
  • Topping (cinnamon sugar being the usual recommendation)
Preparation Time: Approx 2 hours, including resting

Tools Required:
  • Large Mixing Bowl (for the dough)
  • Medium Mixing Bowl (for the icing)
  • Small, Microwave-safe Bowl
  • Stirring Implements, eg. spoon, spatula, whisk (some form of electric mixer is recommended for some parts!)
  • Sharp Knife
  • Rolling Pin
  • Frying Pan or Saucepan (of sufficient size to accommodate at least one portion of the dough)
  • Tongs (because you don't want to burn your fingers with hot oil!)

The Process:
Let's start by making the buttercream, because doing that after making the Beaver Tails could be problematic. Cube the butter and dump it into the medium-sized bowl, then add the icing sugar and start to stir. While I'd heartily recommend some sort of electric mixer (either a stand mixer or an electric whisk), it's best to start this process off manually, either with a spoon or spatula, because the icing sugar will be inclined to puff out all over the place under the influence of an electric mixer. Once the icing sugar is at least partially bound into the butter, it'll be safe to switch over to electric. Add in the Maple Syrup, the Vanilla and, if using unsalted butter, a pinch of salt. Personally, I found it perfectly acceptable to cut out the middle-man and simply use salted butter - the combination of icing sugar, Maple Syrup and Vanilla is easily sweet enough to take the edge off the saltiness of the butter, and vice versa. Keep mixing till everything is as smooth as possible, then set aside.

Note that this mixture will be inclined to separate over time, and may not even bind into a particularly smooth consistency in the first place. This is a common issue with adding liquids to buttercream, but we're aiming for an authetic Maple Syrup flavour, and genuine Maple Syrup is very much a liquid. As long as you're not seeing clumps of butter, it's probably good to go, and will just need a little extra stirring before it's applied to the Beaver Tails.

Making the dough for the Beaver Tails themselves is rather more complicated a process than I've encountered for bread and cakes, largely because I've normally only dealt with ready-made mixtures. I think the only other time I've used yeast anywhere on this blog was in my failed attempt at crafting home-made Cream Soda, but we seemed to have some more recently-purchased yeast in our cupboards.

Start by pouring the hot tapwater into the larger mixing bowl with a teaspoon of sugar (this can be taken from the measured 50g - that still leaves plenty for the remainder of the recipe), add the yeast, stir and set aside for a few minutes so it can proof. What you'll end up with is an off-putting, yeasty-smelling, frothy beige mess. Believe it or not, this is a good thing.

Add the butter, milk, and the remaining sugar to a small bowl and microwave (carefully!) to melt it all together. Stir it up and allow it to cool for a few minutes before adding to the yeast mixture in the large bowl - it needs to be hotter than room temperature, but if it's too hot it could ruin the yeast. Stir the two mixtures together, then crack in the egg, add the salt and whisk together. Start slowly adding in the flour, a little at a time, and keep stirring until a dough is formed. Knead this for a few minutes, adding flour as necessary. The end result should still be quite sticky, but very definitely a dough rather than a paste.

Cover the bowl - if it has a lid, so much the better, otherwise cling film will do the job - and leave it aside somewhere warm to allow the dough to rise. About an hour should be sufficient, but I had to make way for Courtney to take an online cookery class at this point, and only returned to my dough quite late in the afternoon, by which time it was very puffy and smelt strongly of yeast. Beat the dough back down to its original size, then divide into eighths - I rolled mine into a fat cylinder, as that seemed the easiest way to cut it into portions semi-accurately. Roll these out flat, to something in the region of half a centimetre in depth, then set aside for frying. Just for fun, I cut a grid pattern on one side of mine... Not sure why, but the idea had occurred to me, and I was curious to see how they'd end up after frying.

Fill your chosen frying pan or saucepan with cooking oil, just enough that the dough sections will be able to float, then put on what's described as "a medium heat". I gather from the recipes I found online that you'd be aiming for about 180°C/350°F, but it's a tricky thing to judge because hobs aren't marked that way, and they often have different sized burners available, each offering a different range of temperatures. For me, "a medium heat" usually seems to be the lowest setting on the mid-sized burner, but that isn't entirely consistent so your mileage may vary. I ended up tearing off a small chunk of the dough and using that to judge whether the oil was hot enough.

Place the dough pieces into the oil carefully to avoid spitting or splashing. Depending on the size of your chosen vessel, you may have to do them one at a time, or you may fit two or three. Fry each side till golden brown - depending on the vaguaries of the hob and the actual temperature of the oil, this may be anything between 30 seconds to a couple of minutes... though I suspect I may have overdone a couple of mine. Once done, pick them out of the oil (allowing the excess to drain off) and add the topping of your choice while they're still warm.

The Results:
To be honest, this went better than I'd expected, albeit perhaps not perfectly. For starters, I didn't get all my ingredients ready and set out before waking up the yeast, so that was left going rather longer than recommended in any recipes (maybe about 15-20 minutes, while I got everything else together?). I'm not sure if there's an ideal point in the proofing process, after which something can go wrong... but certainly nothing exploded. I actually started the yeast off in a tiny bowl of its own rather than in the large mixing bowl and, by the time I started bringing everything together for the dough, it looked as though it would have overflowed if I'd left it there much longer.

Still, the dough came together very well, but it did leave me coveting those mixers with dough hook options, because mixing what ends up as quite a tough, sticky dough was not fun with a standard spoon. I also had trouble with the dough's stickiness... Sure, it's described as "sticky" in recipes, but how sticky is that? Once I'd mixed in all the flour and started kneading, quite a bit of the dough stuck to my hands. I suspect I should have added a little more flour at that point, but didn't want to overdo it. This is probably something I'd know better if I made bread regularly (and from scratch). Nevertheless, it rose very well in its covered-over bowl... and ended up being left for several hours rather than the recommended "one hour or so". Whether or not this worked in my favour, I'm still not sure. Beating it down and dividing it up was easy enough, so I figure I can't have gone too far wrong. My only concern was that there was a very strong yeasty smell to what was supposed to be quite a sweet dough - or so I thought.

Frying went well, but I'm still pretty vague on hob temperature settings, particularly with large quantities of oil. Plus, the dough had a habit of developing pockets of air underneath, so some of the individual doughnut-things ended up with patches on the underside that looked undercooked. Still, they puffed up nicely, and I was pleased to find that my grid patterns looked pretty good after frying. I tried one 'bare' after letting it cool a little, and have to admit that the yeasty smell persisted after I tore it open. It was light and fluffy, though, so a coating of cinnamon sugar would probably have overpowered whatever yeastiness was left.

I was aiming slightly higher than mere cinnamon sugar, though... and my Maple Buttercream icing made for an excellent topping. However, I'd got a bit of a bee in my bonnet about the icing the day before I started making the dough. I first tried a small batch using a fraction of the necessary ingredients, and that turned out OK... But then I decided to make the full batch late in the evening, because I realised that my time in the kitchen would be interrupted by Courtney's cooking lesson, and I figured getting the icing done ahead of time would help. Storage presented a problem that I hadn't fully considered, though. I didn't want to leave it out overnight, so ended up stuffing it in the fridge. This naturally made it harder to dole out, even after stirring it thoroughly again to undo the separation that occurred, and it never quite became as smooth as one would normally expect of a buttercream icing.

I think I was a little hyperactive for a while after eating a completed Beaver Tail slathered with icing, so I didn't have a second. Later on came the sugar crash, which left me feeling a little unwell and headachy for part of the evening. The four Beaver Tails left after dinner were boxed up and stuck in the fridge, with the excess icing (because there was quite a lot!) scooped into a small plastic tub for storage in the freezer.


Not even the threat of another sugar crash was enough to deter me from having one of the remaining iced Beaver Tails for breakfast, and chilling them overnight certainly took the cloying edge off the icing, though the Beaver Tail itself had become a little dry and hard. They're definitely a dessert to be best enjoyed when fresh.

At Courtney's suggestion, I had another one - topped with three rashers of unsmoked bacon - for lunch, since the concept wasn't too far removed from some of the breakfast/brunch options I've seen available in American hotels. This, too, turned out to be delicious... and I'm not normally one to mix sweet and savoury on a single plate.

Thursday, 5 November 2015

Morrisons Kitchen Made to Share Selection

Well, who'd have thought it? Another Thursday, another post about guilty pleasure foodstuffs. Generous readers might be tempted to credit me with foresight, or think I actually planned this.

Truth be told, when I picked out a selection of (reasonably) quick and easy things from the Made to Share range at my local Morrisons, my girlfriend did suggest I could write it up for this 'ere blog but, since the last choice in my "3 for £5" selection was their Smoky BBQ Mini Ribs, there seemed a strong chance I was in for a very disappointing meal and I'd basically decided there would be no write-up. After all, long-term readers if this humble blog will know that my experience with ribs in the UK has been decidedly mixed.

The full Made to Share snack dinner I cooked just for myself this evening, aside from the ribs, featured the amusingly alliterative BBQ Pulled Pork Pockets and the old favourite Loaded Potato Skins. Setting them all up to cook should have been very easy, but my attention lapsed on the final stage and, having timed everything carefully up to that point (25 minutes for the ribs on their own, adding the potato skins for two minutes, then finally adding the pockets for the remaining 13 minutes of the 40 minute total) I neglected to activate the kitchen timer and had to guess when the final 13 minutes had elapsed. If anything, it all stayed in the oven a little too long, though. On the upside, I did notice that the instructions for the ribs state that they should be allowed to stand for a minute before serving. I doubt that's where I've gone wrong in the past, but it's something I'll look out for in future.

As far as the Loaded Potato Skins go, there's really not much to say... They never work especially well when home-cooked, often sticking to the baking tray and splitting apart when removed. They're ultimately just slightly hollowed out thick slices of potato filled with cheese and bacon and, in the case of this package, supplied with a soured cream and garlic dip. This kind of this is good and filling, but never really outstanding in any way.

The BBQ Pulled Pork Pockets were something reasonably new... kind of like miniature Cornish pasties, but filled only with pulled pork. I can't say the BBQ aspect was particularly impressive, but the pockets were at least properly full... if rather small. Probably the most outstanding feature of the pack was that it contained nine pockets - I guess they're acknowledging that a pack of these might actually be bought as part of a selection to be shared between three people, rather than the more usual two or four...

And so we come to the ribs... which were actually pretty good. Each rib had a decent quantity of meat attached and I didn't find any large blobs of gristle or fat (though there were one or two bone fragments). The meat looked good - with none of the rubberiness, toughness or over-dryness that can occur with supermarket ribs - and, while it didn't actually melt off the bone, it tasted more or less as I'd expect pork ribs to taste. The sauce was even fairly impressive for a supermarket own-brand product - not the strong barbecue taste that I prefer, but certainly not the disappointing non-flavour that is so often applied to this kind of thing. It was possibly a little oversweet, given the lack of full-on smoky flavour, but it wasn't sickly. Had I actually set them out in a more sensible ovenproof container than the small, circular Pyrex bowl I pulled out of the cupboard, so that they were all laid out flat rather than jumbled up, and given equal access to the sauce, they might even have turned out the way they look on the packaging photograph. As it was, the sauce didn't have much of a chance to crisp up anywhere. It did actually adhere to the ribs fairly well, though, and I didn't have to scoop the sauce out of the bowl to drizzle it over any of the ribs.

So while I was expecting something bland and disappointing, what I got actually went some way towards restoring my faith in supermarket ribs... and, having tried Iceland's Jim Beam chicken tenders, I'm far more inclined to give the boozy-sauce-enhanced ribs a try than I was before this evening.

Thursday, 25 December 2014

Christmas Dinner... Pizza-style

In a recent post, I explored the possibility of turning the humble pizza - whose leftovers can so often form a 'breakfast of champions' the morning after - into an actual all-day breakfast, with surprisingly good results. Coincidentally I had a similar sort of thing on my recent trip to LA, eating a 'Sunny Side Up Bacon and Potato' pizza - a seasonally inspired special at California Pizza Kitchen. Pizza is, after all, one of the most universally adaptable forms of food.

So, when my girlfriend and I started discussing how we would deal with Christmas dinner - since one of us would certainly not be partaking of the traditional turkey - one of the earliest suggestions, directly inspired by the All Day Breakfast idea, was 'Christmas Dinner Pizza'.

The most obvious necessity for my pizza was Gilbert's Turkey Roll Pastrami (bought at Morrisons) which, with its black pepper-coating, has made for some rather tasty sandwiches for my lunches during the working week. After that, it was a case of determining what other Christmas Dinner staples should be included. Potato would have involved rather too much wastage, sprouts and most other veg were easy passes. What I really wanted to include, somehow, was stuffing and cranberry sauce. We'd picked up some dried cranberries for some cookies that we've baked to take over to my folks tomorrow, but just adding dried fruit to the pizza seemed weird. Thankfully, I noticed, nestled in our fridge, a pack of Yorkshire Wensleydale with cranberries (also from Morrisons), and so chopped off a few small pieces to scatter around.

I'm a huge fan of 'pigs in blankets' - small pork sausages wrapped in streaky bacon - which tend to be served as part of Christmas dinner at my folks', so I also bought a pack of them - eight were arranged on the pizza, the last two in the pack were left separate. Upon reflection, I think I probably should have picked up the 12-pack rather than the 10-pack, since that would have given me four overs, which could have been kept aside for our evening meal.

The final ingredient was an idea borrowed from my girlfriend - she'd added pickled red cabbage to her vegetarian version of a Christmas pizza (featuring pieces of a Quorn 'Turkey' Burger), which made it all nice and colourful, so I figured I'd add some to mine as well.
Before. Note that the pigs in blankets had already had about 10 minutes in
the oven prior to being added to the pizza for this shot. The stuffing had
been cooked separately, according to its own instructions
So, after about 10-12 minutes in my oven, the pigs in blankets were done to perfection, the Wensleydale and cranberry had melted into the mozzarella, the stuffing was nicely crisped, and the end result looked like this:
After... But before I scoffed it all down. Obviously.
I must confess to some surprise that this turned out as well as it did - particularly with the addition of the Wensleydale with cranberry (that, being such an unusual and late addition to the range of flavours, was the wild card, but the overall effect worked very well). I mean, OK, it's unlikely that I'd ever complain about something involving pigs in blankets, I already knew the turkey pastrami was nice (rather more moist than the average roast turkey!), and stuffing is little more than additional herbs... but there was plenty of room for it to be terrible simply because it's a bit of a jumble.

The only thing that did go slightly wrong was the pickled cabbage, which could have done with a bit more draining before it was chucked onto the pizza, as it ended up soaking right through and causing a damp patch in the middle of the base.

I had been a little concerned about the stuffing, as my girlfriend started preparing the whole packet, where I'd intended only to make a small amount, rolling into balls to distribute around the pizza. However, even once cooked in an oven-proof dish, the stuffing below the crisp surface remains moist and malleable, and easily stands up to further time in the oven. I ended up not shaping it as it was still rather hot when we started making the pizzas, but I think that just adds to the 'hand-made charm' of my pizza.

A decidedly tasty and tidy Christmas dinner, with very little washing up required afterward... and so another success for pizza as a method of preparation.

Saturday, 26 October 2013

Quick Pie Roundup

A selection of boxed pies under special offer turned up at my local Morrisons a couple of weeks back (yes, it's taken me that long to write about them - they were eaten very quickly). The range is called 'Pie in the Sky' and, while the packaging is all bright colours and fun cartoons, it doesn't list a website or even a Facebook page... pretty strange for a new product which is otherwise unique and stylish. In fact, the packaging doesn't even go into any great detail about the makers, Kerry Foods Ltd. Still, that's just a weird choice about advertising rather than anything important about the product, and it just means I can't add a link to them for convenience.

I picked up three different pies from a selection of four or five on the shelves and tried them out over the course of a week, either on their own as a quick snack lunch, or with a selection of veg for dinner.

Cluck & Sizzle
Contained within a box sporting a cute cartoon of a pig and a chicken, this is - no surprises - a chicken and bacon pie. It claims smoked bacon on the packaging, and the meat is in a white wine sauce. The pastry is nice and light, not overly stodgy or dry, but the filling is a bit of a mixed bag. It quickly becomes clear that the white wine sauce is probably the largest component in the pie, and the filling is very liquid. There are a fair few chicken pieces of a reasonable size, but the bacon comes in tiny shavings, none larger than a grain of rice, and it's not exactly plentiful. What little is there tastes good but is pretty much overwhelmed by the white wine sauce, so I honestly couldn't tell whether it tasted like smoked bacon or not. The chicken comes out better - it has good flavour in and of itself (unusual enough for chicken, let alone in a sauce, in a pie) and the sauce complements it well. The sauce has a good, rich flavour to it, but it's far too runny for this kind of pie, especially when there's so little meat in there.

Overall, it's very much a case of 'could do better', particularly where the shameful dearth of bacon is concerned. I'd expected good, hearty chunks of bacon (most likely with large amounts of fat, but beggars can't be choosers) rather than the crumbs floating in a sea of white wine sauce. More meat overall would have been a better complement to the quality of the sauce.

Moo Achoo
Long-term readers of this humble blog will no doubt be aware of my scepticism toward anything claiming to be spicy, and that seems to extend to 'peppered steak'. More often than not, any seasoning would get overwhelmed by the sauce but, thankfully, not so here. The contents of this pie are described as 'tender braised beef with cracked black pepper and onion in a rich sauce', and it hits the mark perfectly. The chunks of beef are nice and large (with no discernible fatty bits in the pie I tried), but pepper is very nearly the dominant flavour (albeit far from sneeze-inducing). The onion is softened to the point where it's almost undetectable, other than in the subtle bite it ads to the flavour of each mouthful. The sauce is definitely rich - not to mention much thicker than the white wine sauce in 'Cluck & Sizzle' - but it's essentially just a garden variety gravy. Also, perhaps because the makers didn't think there was enough pepper in the sauce, there's a sprinkling on the pie crust as well.

This was my favourite of the three pies, largely because the plentiful chunks of beef were so well complemented by the thick oniony, superbly peppery sauce. It's very warming and very filling.

Hot Cow
This pie - billed as 'hot chilli seasoned minced beef with kidney beans in a spicy tomato sauce' - I'm in two minds about. One the one hand, it seemed to be literally filled to the brim, and that is quite rare for packaged pies these days. The filling appears to be proportionally more minced beef than anything else, and it's very well seasoned, so as to be hot without being eyewatering. On the other hand, it's not very successful as 'chilli' because the bean content is extremely low, and the tomato sauce would be pretty bland were it not for the seasoned meat.

It's certainly filling, and as a component of a larger dinner it's excellent. It's just the right level of spiciness to go well with whatever you'd normally serve with a beef pie, but will go equally well with more heavily seasoned accompaniments.

Wednesday, 30 January 2013

Quorn Bacon Style Slices

Without intending it, the latter part of this month has become something of an exploration of Vegetarian food. There are a couple of other things I'm intending to write up in future but, for now, I'm going to finish the month with one of two Quorn products I picked up recently in Waitrose.

The one I'm going to gloss over is their 'Ham Style Slices', affectionately know as sHam. Those slices don't smell like ham, they don't taste much like ham, and the texture is a bit spongy... but if you're a Vegetarian, yet unaccountably hankering after a ham sandwich, they're probably about the best you can do.

The one I'm going to go into more - but not much more - detail about is their 'Bacon Style Rashers' because, being a fan of both bacon and puns, I decided to make myself a very basic all-day-breakfast for dinner this evening... So I give you... Scrambled Eggs & Faken (Facon? I'm not sure of the best spelling for a contraction of 'fake bacon').

What you get in the pack is eight rectangular slices of flavoured, coloured mycoprotein that just don't look like food. Certainly not like bacon. I can understand why they wouldn't go to the trouble of marbling the colour, to look more like streaky bacon, but if the idea is to replicate bacon as closely as possible, they're certainly missing a trick.

Another issue with this stuff is that it has to be fried... No grilling allowed (though I'll probably give that a try, just to be sure). OK, frying is an option with regular bacon, but there are several other options too. Add to that the fact that the instructions state that the frying pan should be 'lightly oiled', when bacon - technically - needs no additional oil since it's own fat will generally suffice. The other drawback to frying-only is that if, like me, you're aiming to serve these strips of meat substitute with scrambled eggs, you basically need two frying pans, and need to be simultaneously operating two burners on your hob. Still, it's very quick - the instructions reckon only one minute per side, or until it's lightly browned.

Once it's done, what you have is a bunch of strips of a very strange substance that looks uncannily like a cross between leather and cardboard. Appetising it ain't. It doesn't crisp the way real bacon does, so it just as floppy cooked as it is when 'raw' but, equally, it doesn't dry out... Swings and roundabouts, I guess.

Flavour-wise, it's very subtle. Compared to your average supermarket-own-brand bacon flavour crisps, there's very little flavour at all, but what's there tastes more like real bacon than the aforementioned baked snacks. That said, just to give you an idea of how subtle the bacon flavour is, I served these up with basic supermarket eggs - the kind which are never renowned for their flavour - and yet the flavour of the eggs overloaded the bacon substitute in each and every mouthful.

That said, what it lacks in immediate flavour, it makes up for (if you can call it that) in aftertaste and... er... repeat value.

Overall, this is a bit of a failure... it doesn't emulate bacon well enough in any area, least of all strength of flavour. The fact that it's molded in a shape that's not dissimilar to streaky bacon, yet is coloured a solid pink means that it looks completely (and suspiciously) artificial. It might fool someone who turned vegetarian many years ago and misses bacon - just not enough to, y'know, cook up some bacon - but it's a pale imitation in every sense.

Well... at least the eggs look appetising...

Sunday, 5 August 2012

Mini Toad in the Hole

Considering how regularly I pig out on Iceland's £1 wonder, their 'Meal for One' Toad in the Hole, it's quite amazing that I've never tried to make it myself.

Let's face it, you just take a bunch of sausages, mix up some flour, egg and milk, then chuck it all together in a deep baking tray for about 25 minutes, and you're all set for a satisfying evening meal. The Iceland version - sausages frozen in batter in a foil tray, that literally just needs to be chucked into the oven - is my go-to product for something quick and filling after a hard day, when I can't be bothered to do anything requiring effort. I have noticed, however, that their sausages became substantially smaller some months ago. That's generally the point at which I'll start thinking "time to make my own!"

And it is ridiculously easy, according to any of the recipes you might find online. The batter is essentially the same as you'd use for Yorkshire Puddings and, believe it or not, pancakes. Proportions of ingredients may vary, but the principle is the same. Of course, being me, I wasn't about to put my toads in the plain and basic hole, so I chucked in some parsley and chopped onion - because both happened to be lying around - and then, for fun, wrapped some of my sausages in bacon.

You are aware, are you not, that it's been scientifically proven that bacon makes everything better?

And then, rather than make one large thing, I decided to make more use of my new muffin tray and make six small toads in holes.

So, here's how it goes:

Ingredients:
  • 100g Plain Flour
  • 1 Egg
  • Approx 200-300ml Milk (depending how thick you want your batter, and how many/much you're intending to make)
  • Chopped Parsley (I used Waitrose Cooks' Ingredients 'Organic A Generous Pinch of Flat Leaf Parsley')
  • Salt & Pepper to taste
  • Half a Small Onion, chopped
  • Bacon of Choice (I used Waitrose Unsmoked Wiltshire Cure Back Bacon)
  • Sausages of Choice (I used Richmond Skinless)
  • Cooking Oil
  • Dijon Mustard
Preparation Time: About 40 minutes total

Tools Required:
  • Small Mixing Bowl
  • Whisk
  • Small, Sharp Kitchen Knife
  • Muffin Tray
The Process:
While I said this was ridiculously easy - and it really is - the instructions I found online were rather deceptive... or just plain wrong. Or maybe my technique was wrong. Whatever it was, my first attempt at the batter was hopeless. The method is generally given as sifting the flour into a bowl, making a well in the middle, cracking an egg into the well, then beating it together and gradually adding the milk (occasionally a milk/water mixture).

The first time I followed these instructions, the end result was a lump of flour-encrusted egg which stuck to the whisk and didn't want to become part of the batter. While the remainder of the flour mixed in to the milk quite nicely, it left me with a very thin not-quite-batter with large clumps of useless gunk swimming around.

After a brief consultation with my mother on the subject of batter (in which I learned of the amazing multi-purpose nature of this batter, as mentioned above) I tried it again, this time whisking the egg a little before pouring it into the flour, and adding some milk before starting the beat it all together.

Another interesting point that came out in that conversation was about standing the batter. Some recipes recommend letting it stand, others say refrigerate, still others say there's absolutely no advantage to letting it stand... but here's the thing: for Yorkshire Puddings (and Toad in the Hole), you want the mixture to be fluffy and full of air, because that's how you get the right texture once it's cooked. For pancakes, however, bubbles in the mixture will make for holes in the pancakes, and standing will allow most of the air to escape. So now you know.

But anyway...

Once the batter was ready, I sprinkled in some of the parsley and ground in some pepper. Salt can be added as well, but I tend not to bother. The other embellishment I added was some chopped onion. I have a whole bunch of small onions stuck in my fridge, and am basically just trying not to waste them, so I'll stick them in almost anything I can think of. This recipe didn't have room for a whole onion, though, so half of a small one did end up going to waste.

Preheating the oven to 200C, I made a start on my sausages. Since I planned to make small, muffin-sized Toads in the Holes, my full-size sausages had to be cut in half. The bacon was likewise cut, so it could be easily wrapped around the sausages without too much excess but, just to keep it all together, a dab of Dijon mustard was applied to the sausage and the end of the bacon, acting as a sort of glue.

Being lazy, I ended up only doing two sausages this way. Since I only had four sausages anyway, I was going to be left with two Yorkshire Puds without any sausage, so I convinced myself there was a logical reason for this: 2 wrapped sausages, 2 plain and 2 holes without toads.

A small amount of cooking oil was poured into the bottom of each pit in the muffin tray, and the sausages placed within. They were cooked for about ten minutes before the batter was added in, then they were stuck back into the oven for another 25 minutes to cook thoroughly.

See? Easy.

Results:
Well, if there's one thing I know about Yorkshire Puddings and most Toad in the Hole, it's that they're made largely of empty space - they puff up with a small number of large bubbles, rather than fluffing up like a cake or a loaf of bread. These were no different. From the outside, they looked brilliant - though I may try a lower temperature next time. At first glance, I was honestly very pleasantly surprised.

Something else I know about Toad in the Hole is that the sausages actively interfere with the batter's ability to fluff up at all - frequently it peels away from the sausages entirely. That didn't happen as much as I was expecting with the plain sausages, but with the bacon-wrapped sausages, the batter barely rose. Not entirely sure of the mechanics of this, but I suspect either the fat or the salt (or both) were the cause of the problem, because the two onion-y Yorkshire Puds looked great.

Of course, the proof of even a Yorkshire Pudding is in the eating...

All three kinds were as full of air as I'd expect, but the plain sausage ones turned out the best over all - golden brown and reasonably fluffy. The two Yorkshire Puds, while similarly golden brown, seemed extremely undercooked on the insides, and yet were basically giant bubbles. The two with the bacon-wrapped sausages looked like a complete disaster, however. The batter had almost entirely retreated from the meat, and they weren't so much golden brown as slightly burnt.

The bacon cooked very well, but the sausages in both types didn't fare quite so well - they were fully cooked, just not to the degree that I'd normally do them and obviously not as burnt on the outsides.

Gotta say, though, all of 'em tasted great.


Mmmmm... Nom nom nom...

Saturday, 21 May 2011

Home-Made Veg & Bacon Bake

Yes, for the first time in far too long, I've made something from scratch, by randomly throwing stuff together and hoping for the best... The very essence of snacks & the single man, and yet I've spent months just writing up ready-made foodstuffs I've picked up from the supermarket.

Not so, today.

I'd been considering my options on this for quite some time. I wanted to make something like a shepherd's pie or cottage pie, predominantly vegetable-based, but with the addition of bacon. I definitely wanted onion in the mix, and looked at different shepherd's/cottage pie recipes for the other components. To begin with, I wasn't sure whether I'd need to add any liquid, since frying bacon will free some of its fats, and onion tend to release some of their fluids in the pan as well, but eventually I decided that addition a stock would be a good precaution. Other than that, I was essentially winging it - working out the timings by eye, and keeping my fingers crossed all the while. Daring, huh?

Now, I cannot stress this enough, but all the veg really needs to be fresh rather than frozen. Sure, you could use frozen, but you'd have to ensure it was fully thawed (and not overly saturated with water) before starting. The other advantage to using fresh is that you can be sure every component is in much the same state when you begin, which should make judging the stir-fry easier.

Serves 3-4! Wow!

Ingredients:
  • Grated Cheese (either buy a pack ready-grated, or grate some from a block)
  • Bacon Pieces (the chunks, often called 'lardons', though rashers can be cut down and the cooking time adjusted. I used a 150g pack of chunks from M&S)
  • Instant Mash of choice (I'm still running with Sainsbury's)
  • Knorr Vegetable Stockpot
  • Baby Corn (4-5 cobs)
  • Broccoli Tips (4-5 sprigs)
  • Carrots (two of a decent size)
  • Garden Peas (I used about half a 200g pack of M&S 'Fresh and Prepared')
  • Onion (one of a decent size should be sufficient)
  • Sugarsnap Peas/Beans (I used about 1/4 to 1/3 of a 200g pack from M&S)
  • Garlic optional
  • Salt & Pepper to taste

Preparation Time: About 30-45 minutes for the stir-fry, then 30 minutes baking

Tools Required:
  • Sharp Knife
  • Chopping Board
  • Frying Pan
  • Spatula
  • Saucepan
  • Pyrex Baking Dish
  • Cheese Grater (if grating your own)
The Process:
Start by chopping the onion, baby corn and carrot. They don't need to be chopped particularly finely, so it's very much according to your own preference - large chunks or small - but smaller chunks will probably mean the first phase of the stir-fry will be quicker. Put the bacon chunks into a frying pan on a medium heat, and add both the carrots and the onion. Keep it all mobile, as this will better distribute the bacon's fat around the pan.

As it begins to cook, prepare the stock by mixing the Knorr Stockpot in with 400-500ml of boiling water. When the bacon is becoming crispy and the onions are golden (about 10-15 minutes), add the stock into the frying pan, then add the baby corn pieces and broccoli tips (and garlic, if you so desire - a couple of cloves chopped or crushed should be sufficient). Turn the heat down low, and allow to simmer gently, stirring occasionally for another 15-20 minutes.

Finally, add the beans and peas (along with salt and/or pepper if desired) and simmer for a further 10 minutes. During this time, ready the mashed potato according to the instructions provided.

Preheat the oven to 200C. When everything is ready, pour the stir-fry mixture into the baking dish, then scoop on the potato and spread it evenly over the top, raking with a fork to break up the surface. Sprinkle grated cheese over the top, and place the baking dish into the oven for 30 minutes. Allow to cool briefly before serving, as it's going to be very hot.

The Results:
As usual, I managed to forget a few things I'd intended to do - the garlic was left out, and I didn't put any pepper into the stir-fry, so I was expecting something rather bland at the end. Thankfully, it was anything but. The bacon maintained much of its flavour, but it also mingled with the stock, enriching it somewhat. The veg that was added later on in the stir-fry remained fairly crisp, though the onion was almost undetectable... Next time I try this, I shall probably add it after the stock. I chopped all my vegetables quite chunkily, which almost certainly helped it survive the cooking time, and enabled the pieces to keep their individual flavours. The cheese topping may have been a touch overdone after 30 minutes, but it did add some extra bite to the potato. The biggest downside was that the stock/sauce ended up soaking into the mash during the baking phase (and moreso, when the leftovers went into the fridge overnight), so I wondered if perhaps I should have thickened it up with a little cornflour... Something else to try next time.

The vegetable component can be altered pretty much as you please - peppers of all colours would work, for example - and even leaving the bacon out altogether isn't out of the question, should you wish to prepare a more vegetarian-friendly bake. Also, the topping doesn't have to be mash... I can't remember what it's called offhand, but there's a 'potato slices in creamy sauce' product that would also be suitable for this recipe. If sticking with mash, though, you can sprinkle with breadcrumbs rather than cheese for a more crunchy topping, leave it as unembellished mash, or use a seasoned mash.

A final note - having stored it overnight in my fridge, I reheated the leftovers in the microwave for lunch the next day (3 minutes on high in a 700watt machine). The mash and the stock/sauce had blended further, but the flavour was still good.

Sunday, 3 April 2011

Inna Bun: Waitrose Sweet Cured Smoked Back Bacon with Black Treacle

Mmmm. Bacon.

I'm not sure what's happened to treacle recently, but the photo on the pack looks more like dark maple syrup than the opaque, glossy black ooze that was treacle in my youth... And, actually, that seems to hold true for whatever it was they used on this bacon. I picked it up recently on a whim, rather than just stocking up on 'plain old' bacon, because it sounded weird but potentially very tasty.

Waitrose describe it as "hand cured, coverd in black treacle (really, Waitrose? Really?) and beech smoked for a wonderfully sweet, smoky flavour. Prime British pork from outdoor bred pigs", but I have to admit there wasn't a great deal of smokiness or treacly flavour in evidence once it had been under the grill for a while. By the look of the pan afterward, most of the treacle was secreted out along with some of the fat as it cooked. Still, the end result is undeniably tasty. It's nowhere near as salty as some kinds of bacon, and I suppose there was a slight sweet tang to it.

I'm struggling to think how this could be served, except by itself. Just about any kind of sauce or accompaniment would drown out the bacon's own flavour. Serving it as part of an English Breakfast would probably be a huge mistake (that said, scrambled eggs alone might just make a decent partner on the plate), and it's almost certainly not a form of bacon you could wrap around a chicken breast.

Then again... That actually might be worth a try.

In any event, I just grilled all six rashers in one hit, and split the result between two buns because it had been sitting in my fridge for a good few weeks, and had just hit is Best Before date. Quality-wise, it's pretty excellent, and it has a good, distinctive and smooth flavour. As a quick, lunchtime bun-filler, this worked our very nicely.

I'll probably only buy something this extravagant again once I've figured out what I can do with it other than slap it into a bun, but that's something to look forward to.

Sunday, 9 January 2011

Thought for the Day

I really must stop buying ready-made Spaghetti Carbonara from shops and actually attempt to make my own with some halfway decent bacon.

For whatever reason, whichever the shop, whatever the 'high quality' subline, the one common factor in any and all ready-made Carbonara recipe is that the bacon chunks tend toward 70% fat, 30% meat... and the problem with a Carbonara is that the bacon never cooks to the point where the fat is crispy, and thereby palatable to me.

I'm sure there are many people out there who don't mind bacon fat... I just find it too chewy.. and chewy isn't good. It's entirely the wrong texture for something like a Spaghetti Carbonara.

Being entirely honest, I'm sure I've been to restaurants who serve Spaghetti Carbonara with bacon that's not much better... but at least it tends to be cooked a little more thoroughly than any of these ready-meal varieties.

But, let's face it, it's just spaghetti, bacon chunks, and a mild cheese sauce (or, occasionally a Béchamel sauce with cheese). I should be able to make one myself. Make the sauce, grab some thick-sliced bacon, probably cook it briefly on its own, do the spaghetti, add the bacon, add the sauce, stir it together...

How hard could it be?

Charlie Bigham's Breton Chicken

I can't say I was aware of the name Charlie Bigham before I happened to see this in a shop with a big '1/3 OFF' sticker on it. It's a pre-packaged centrepiece for a meal for two ("Perfect for two," it says, "Serve with a wink") described thusly:
"Fresh chicken breast in a handmade creamy mornay sauce with cheese leeks, lardons, Dijon mustard and fresh parsley. Perfect!"

It comes in two sachets - one, the chicken, bacon, leek, etc., the other being the creamy sauce. The first step is to stir-fry the meat and veg for about ten minutes, then the sauce is added, brought to the boil, and then simmered for a couple of minutes before serving. The packaging additionally suggests that this can be served with "new potatoes, mash, or even rice", but I must confess that I added nothing - it had been sitting in my fridge for a while, and I was eating alone, so I figured any additions would just increase wastage. It's a fairly large portion, after all.

It's certainly easy to cook, though... with the chicken and bacon pieces sizzling nicely as the leeks, etc. slowly brown. I did find the chicken had clubbed together in the packaging, and needed a lot of work to separate it all so it would cook properly, but it wasn't a great deal of hassle. Once the sauce went in, and I caught the scent of the meal to come, I was really counting the seconds till it was ready.

And the flavour fully lives up to the smell. It's a little sharp - perhaps the Cheddar was stronger than I'd normally choose, not being a fan of cheese, particularly - but it all comes together very well. The fact that it's stir-fried together, rather than baked together, or cooked entirely separately, with the sauce added at the end, serves to intermingle the flavours very well - the chicken picks up on the sauce, and the sauce picks up on just about everything else. The chicken remained tender, the leek managed to stay reasonably crisp and, while the bacon lardons suffered from the usual malaise - rather too much fat for my liking - it made a nice addition to the meal.

I did find the whole thing rather too rich, personally, but I suppose that's why you're not supposed to serve it without some addition, and I can see why potato of some form or another would be preferable. That said, plain rice would certainly work quite well. Either would help to soak up the sauce and, served as intended - as a meal for two - this would probably be fantastic. Eating it all on my own, I regret to say there was a fair bit of wastage... though it wasn't through want of trying to finish. Good stuff, but too much and too rich for my palate.

Must keep an eye out for more Bigham's stuff, though... The packaging is certainly unique, but perhaps a little over-the-top - almost selling a lifestyle rather than just the food.

Saturday, 4 December 2010

Margherita plus... M&S Festive Spiced Streaky Bacon

While I love pizza, I am a conscientious objector to the Margherita. I mean, honestly, what's the point? It's a pizza without any topping (no, cheese is not a topping, it's the default state - one may have extra cheese, but the presence of some cheese is a given). It's pizza for people who don't like pizza.

But it's also an excellent starting point. And, with this Blog going experimental with baking, it was surely only a matter of time before I had the epiphany that led to adding my own choice of toppings to the humble Margherita.

And what better way to begin, as ye Festive Season approacheth, than with Marks & Spencer Festive Spiced Streaky Bacon? The label describes it thusly: "With festive spices of cinnamon, ginger, allspice and nutmeg. Perfect for laying over turkeys or as part of Boxing Day breakfast". While I might query the grammar of the description (spices of? Really M&S?), I cannot deny its veracity. It seems to have been prepared in much the same way as yer average breaded ham - a great chunk of meat is coated, then sliced finely - in that the festive spices appear as but a thin layer around the edge of the bacon. Fret not, however, as the flavour suggests a slightly more extensive form of seasoning once the bacon is cooked.

And, yes, I'd sampled the bacon prior to this pizza experiment. A couple of slices made it into an all-day breakfast I'd prepared the night before. I normally steer clear of streaky bacon just because the proportions of meat to fat are damn near 50:50, and I prefer my meat to have more... well... meat. But the description piqued my curiosity, and I was intrigued enough to give it a try.

Hey, don't knock it - first, I may be experimenting with food, but I ain't stupid; second, the sampling of festive bacon actually helped to inspire this pizza.

Come on now, do I really need to list the ingredients? Oh, why not? Let's get specific...

Ingredients:
  • 1 Pizza Express Margherita (shop's own brands would do, but a trusted brand in pizza is preferable)
  • 4-5 Rashers M&S Festive Spiced Streaky Bacon
  • Nothing Else. Really. Move Along, Please.
Preparation Time: Approx 14 minutes

Tools Required:
  • Oh, Good Grief. Really?
  • Alright, then... A Pizza Slice. Or a Knife, if you prefer.
Process:
How specific do I need to get here? Preheat the oven to 190degrees. Open the Pizza Express Margherita box, remove it from its plastic wrap. Lay out 4 or 5 rashers of the bacon across the pizza, then place the pizza into the oven - being careful to separate the pizza from its polystyrene base beforehand - and cook for about 14 minutes. Remove from the oven and serve when fully cooked.

Did I miss anything? I don't think so... but, hey, let me know if there are any glaring omissions (such as "use oven gloves and exercise caution when placing the pizza in the oven and when removing it. The oven will be hot"... Except I guess I just covered that one...).

See how quick that was, both in preparation time and cooking?

The Results:
Well, lesson #1 in 'How to Make a Margherita Less Boring' was both simple and very successful. Normal bacon can be a little sharp and salty for adding to even the barest of pizzas - the oil from the cheese and the fat from the bacon would tend to make it rather unpleasantly slimey, which is why bacon normally appears on pizza in tiny chunks. This stuff, meanwhile, is subtle of flavour... not especially salty, and the spices serve both to bring out its flavour and supplement it. The effect, upon a pizza as otherwise bland as the Margherita, is nothing short of stunning.

On the downside, even having given this the full, recommended 14 minutes of cooking time, the bacon remained a little underdone for my taste: I prefer the fat to be fairly crispy, and some of it was still positively moist. Breaking the habit of a lifetime, I did not permit this to deter me... and I very much enjoyed this little upgrade.

I do feel, however, that I should apologise for having basically created The Christmas Pizza... I mean, all you'd need to do is add a few choice cuts of turkey, some sliced cocktail sausage and a touch of cranberry sauce, and you're right there.