Search This Blog

Showing posts with label Garlic. Show all posts

Monday, 25 February 2019

Crispy Tofu Katsu Curry

Hot on the heels of the shop bought Wasabi dish - and because I just haven't shut up about how good it is compared to supermarket own-brands - my girlfriend decided to look into katsu curry sauce recipes. The original intention was that she'd cook something to accompany it but, the moment she mentioned it, I told her I was basically honour-bound to do it myself - partly because I've done so little cooking recently aside from the occasional Gousto boxes we've ordered.

In all honesty, this was probably a bit more advanced than I'm used to, and the instructions were a little vague (not great when my grasp of my own hob is still a little shaky) and weirdly presented, so I'm going to detail it all here in my usual style...

Ingredients:
Kombu Dashi stock
  • 500ml water (approx. - a little more won't hurt)
  • Dashi Konbu dried kelp (1 section of approx. 10x10cm)
Preparation Time: About 30-45 minutes

Katsu Curry Sauce
  • 30ml Sunflower Oil
  • Red Onion (one should be sufficient - meant to be white, but we ordered Morrisons' Wonky Onions, and that's basically pot luck)
  • Ginger (for convenience, I used ready-chopped, frozen ginger - about 1 teaspoon)
  • Garlic (2 cloves, crushed)
  • Mild Curry Powder (1 tablespoon)
  • Plain Flour (2 tablespoons)
  • Kombu Dashi stock (made earlier, using ingredients above!)
  • Light Soy Sauce (2-3 tablespoons)
  • Honey (1 tablespoon)
  • Rice Vinegar (1 tablespoon)
  • Garam Masala (2 tablespoons)
Preparation Time: About 30 minutes

Crispy Tofu
  • Tofu (I used Cauldron's - a 396g pack)
  • Egg (ended up using 2)
  • Plain Flour (about 100g will be more than sufficient)
  • Panko Breadcrumbs (about 75g will be more than sufficient)
  • Salt & Pepper (a pinch of each)
  • Sunflower oil (sufficient to fill a frying pan to a depth of a little over 1cm)
Preparation Time: About 10-15 minutes, once the tofu is drained

Additionals:
Rice (for convenience, I used a 250g pack of Morrisons long grain rice, microwaved)
Spring Onions (to garnish)

Tools Required:
  • Sharp Knife
  • Garlic Press
  • Grater (if using fresh stem ginger)
  • Chopping Board
  • Frying Pan
  • Saucepan
  • Measuring Jug
  • Funnel
  • Coffee Filter
  • Receptacles for all the ingredients
  • Stirring Implements (several required!)
  • Heavy Book (to aid the draining of the tofu)
  • Kitchen Roll (also to aid the draining of the tofu) 
  • Tongs (to get the tofu into/out of the frying pan)
The Process:
First and foremost, the Kombu Dashi must be prepared. Cut a section of the kelp, about 10cm², and wipe off any salt residue with a damp cloth. Pour about 500ml of water into a saucepan, immerse the kelp and heat on a low setting on the hob - the idea is to get the water hot, but not let it boil... you're essentially brewing a weird, kelp-based tea - and simmer for about 25 minutes. Scoop off the froth that will start to build up every so often. After about 25 minutes, you should have a yellowish liquid, which you then need to filter into a jug for the time being. The easiest was is to stuff a coffee filter into a funnel and pour the liquid through. Set this aside to drain while you proceed with the other steps.

Next, the tofu will also need to be drained - it's generally packaged with a lot of water and absorbs quite a bit, but will need to be reasonably dry for this. Take the tofu out of the packaging and set it on a plate covered with some kitchen roll or a dishcloth. Cover the tofu itself with more of the same, then put something heavy on top (with some kind of non-absorbant barrier if you're using a book like I did - I used a small chopping board under a copy of How to Cook Everything Vegetarian by Mark Bittman). Leave this to squeeze the water out of the tofu, and move onto the sauce.

Start by dicing the onion, crushing the garlic and, if using a chunk of ginger, chop or grate about a teaspoon's worth. Add 30ml of sunflower oil to a saucepan and heat over a medium setting on the hob. Add the onion, ginger and garlic to the saucepan and cook for 2-3 minutes, by which time the onion should start to become tender. Add the curry powder and stir thoroughly, allowing it to cook for about another minute - a wave of curry scent will let you know it's ready. Slowly add the flour, stirring constantly to blend it into the mixture, but try to avoid letting it cake on the sides of the saucepan.

Next come the first of the liquid ingredients: slowly add the Kombu Dashi, mixing in the soy sauce and honey as you go. Allow to simmer so the sauce thickens, stirring occasionally to avoid a skin developing on the top. Finally, add the rice vinegar and garam masala and cook for about another minute. This now needs to be set aside - but kept warm - until the tofu is sorted. The aroma will start to whet your appetite, so it's best to move quickly from here on...

By this point, the tofu should have had most of the water squeezed out of it, so slice the block into strips about 1cm thick. Sprinkle or grind over a little salt, and leave them aside for about 10 minutes, on a sheet or two of kitchen roll. During this time, start preparations for the Panko crumb coating.

You'll need two plates and two shallow bowls. Pour the flour onto the plate and mix in a little salt and pepper for seasoning. Break an egg or two into the first bowl and beat it - adding a little salt here, if you wish. Into the last bowl pour the panko crumbs. Take each slice of tofu and first coat it in the flour. Next coat it in the beaten egg as evenly as possible, then quickly transfer it to the panko crumb bowl and try to ensure it's thoroughly coated. Put the coated strips onto the second plate, then fire up the hob with a frying pan filled to a level of about 1-1.5cm with oil. Once it's hot, transfer in as many of the crumb-coated tofu strips as you're comfortable frying at any one time (I managed three, though my frying pan could probably accommodate a couple more!). Fry each batch until they're nice and golden (depending on the temperature, it'll be about 1-2 minutes), then transfer out and allow to rest on some kitchen roll to dry out a little.

Stick the rice into the microwave and cook according to the pack's instructions - you'd generally be looking at 2 minutes but, obviously, if you prefer to cook your rice the traditional way, you'll need to start that a little earlier in the process, in another saucepan, and have it set aside for this step. Add half the rice to each of a couple of bowls, top with the fried tofu strips and pour over the sauce. If you're feeling fancy, you could add some sort of topping, like spring onion or grated carrot. Serve up, and scoff down.

The Results:
This was probably one of the more involved processes I've tried, but still reasonably easy to break down into stages so I didn't have to split my focus between two tasks. Having to make the Kombu Dashi stock was quite frustrating, and I'm not convinced that worked properly - the photos I saw online showed a clear, yellowish liquid but, even after filtering, mine was quite cloudy. Additionally, the packaging recommended steeping the kelp for 6-8 hours before heating it. Since neither Courtney nor I had seen or anticipated this instruction, we ended up using a 'plan b' method which took only half an hour... It's entirely possible this method wasn't as effective, so I may try to make another batch of the stock by the recommended method at some point.

Everything else is pretty straightforward - the sauce is really easy to make, though it does use quite a lot of different ingredients that have to be added at specific points. Personally, I'm always wary of adding any powdery ingredients into a pan containing very little in the way of liquid ingredients, since it tends to just stick to the sides of the pan and become really difficult to wash up afterward, but this one worked out OK. Once the sauce had thickened up, the rest of the recipe was quick enough that I was able to take the sauce off the heat entirely until just before serving up. It stayed warm, and needed only a little stirring now and then to prevent a skin forming. Admittedly, I put it back on the hob briefly just before serving, but only to ensure it was piping hot rather than just warm.

I'm still not used to working with tofu, and I'm not convinced I drained it sufficiently... but it's a difficult judgement call: it has to be able to pick up the flour, but it shouldn't immediately soak through the flour. The egg part was very frustrating, because it should apparently only need one large egg... but I ended up beating a second because, with nine strips of tofu to crumb-coat, I'd run out of egg by the sixth or seventh, even though some of the strips weren't as thoroughly coated as I'd have liked. The egg didn't bind very well with the flour-coated tofu, but ended up getting my fingers very sticky. Consequently, I ended up with more panko breadcrumb on my fingers than on the tofu strips... or so it felt. As it happened, I think they were all sufficiently coated. Frying them was nice and easy, though I ran out of sunflower oil and had to supplement it with some Crisp'n'Dry... which, upon reflection, would probably have been the better oil to start with, as we'd just got a new bottle that morning. Since I'm also not used to shallow frying, there was quite a range of shades in the finished crispy tofu strips - from slightly anaemic through to "Oh, shit! I'd better get that out of the frying pan now, or it's gonna burn!" - as the last batch seemed to need less cooking time than the previous batches.

Now, clearly I'm quite fussy about my katsu curry... While I certainly enjoyed this - particularly the delayed kick of spiciness in the sauce - I'm not entirely convinced it was actually katsu. Maybe it was the use of red onion rather than white, maybe I needed to add a bit of additional seasoning to the sauce (I was quite conscious of the salt being added to various things already!). Not to say it wasn't nice - I really liked it... but something about it wasn't quite according to what I think of as 'katsu curry' flavour. I think the quanity was just about as perfect as it could be for two people - enough to cover the tofu strips and rice without utterly swamping it. What was interesting - both to me and to Courtney - was that there's nothing especially unusual or unique about the curry itself: it uses a standard mild curry powder and garam masala. Perhaps using both is a little odd, but even the use of honey in something that's meant to be savoury isn't without precedent.


What I don't enjoy is wastage... and if wasting most of the second egg used for the crumb coating wasn't bad enough, the original recipe specified 125g of plain flour and 100g of breadcrumb. Frankly, I think one could easily get away with half that considering how much was left over - which is why I've reduced the quantities above and noted that they'd be "more than sufficient". I'm guessing the original quantities were given more to ensure sufficient volume of flour/crumb to roll the tofu around in rather than as any indication of actual usage within the recipe. One of the reasons I'm not used to shallow frying is that I really hate working with that much cooking oil. We've taken to filtering and recycling ours but, obviously, it has a limited lifespan (unless you want to turn it into biofuel for a car). Additionally, putting this together also piled up an awful lot of washing up even before the food was served up and eaten.

Still, if you can put up with that, it's actually quite a fun recipe and I'm definitely going to try this again sometime, perhaps ensuring I use white onion and truly fresh ginger, maybe adding some salt to the curry sauce... Certainly trying to do better with the crispy tofu.

Wednesday, 26 September 2018

Experiments with Gousto #9: Mediterranean Fish Stew & Sunny Aioli

Here we are with the final entry in the current run of Gousto recipes, and any others will be appearing on Instagram, while my more 'experimental' efforts, or anything particularly fun or interesting, will continue to appear - sporadically - on this blog. This recipe is the one where I ended up eating both portions because my girlfried was away - I had one portion on the Friday, when I did the actual cooking, and the second for lunch on the Saturday.

This turned out to be a Very Good Thing as it didn't all go according to plan on the Friday.

As before, I got the chopping out of the way ahead of time, attempting to be clever and using the mandoline for the onion, but mistaking the 'julienne' attachment for the 'fries' attachment and consequently setting the blade too low. This still gave me sliced onion, but with deep grooves cut into it rather than allowing it to separate into nice, small chunks. I did the carrots the old-fashioned way and chopped the garlic as finely as I could (news flash - still not that fine), where I'd grated it for a couple of the previous recipes and got uncomfortably close to grating my fingers. I should, perhaps, have used the garlic press for broadly similar results, but that didn't occur to me at the time.

The second step of this recipe confused me: heating a frying pan with "a drizzle" of olive oil and 15g of butter. Why so vague with one measure and so specific with the other? And using oil and butter? Surely one or the other would be more usual? Nevertheless, I followed the instructions as described. The stew part of the fish stew was easy enough, but puzzling on at least one other point: the inclusion of star anise. Now, clearly, I'm no expert in culinary matters, but star anise is described online as "one of the central spices in Chinese cooking", and supposedly has a strong anise flavour - whatever that may be - and a licorice-like aroma. I'm a big fan of licorice, and I have to say there was no licorice aroma. I couldn't say whether its presence in the making of the stew had any effect on the final flavour, but it had none that was discernible to my palate. I'd have to try cooking this again without star anise to be certain.

As with the previous recipe, I started preparing the stock ahead of time as well, though this one required the addition of turmeric to turn it into the required "yellow stock". Turmeric may well be the bane of my existance, but we'll get into that shortly... For now, let's focus on the stew. Any recipe which can be completed in one frying pan or saucepan is always going to be a winner, so I really liked that every stage of preparing the stew was simply a case of adding the next thing to the frying pan. With the onions, carrots and garlic cooked to the point where the onion was softening, the tomato paste went in, followed shortly by the stock and the olive, and the whole thing was left to reduce on a low heat while I switched over to preparing the sunny aioli and baking the rolls, which I'll go into separately. The fish caused an interesting complication, in that I was preparing the stew in a frying pan which has no lid, so I had to improvise - upending a wok and balancing it on the rim of the pan for the few minutes required to cook the fish. The final stage was simple enough - add in some of the fresh parsley, remove the star anise (which took longer than expected because it had managed to disguise itself very successfully), then serve with more of the parsley as a garnish, a ciabatta and the sunny aioli...

...Which is where it went awry for me. It's not often, even with an amateur like me working in the kitchen, that a recipe goes so wrong that something actually breaks. Sure, I've had cheap-and-cheerful bits of kitchen equipment break (most recently the Ikea can opener that was part of my kitchen starter kit, basically dissolved thanks to its cheap, plastic construction... it's almost 10 years old, but barely used). The sunny aioli seemed to be going swimmingly, too, until I lost my grip on the bowl I was using to mix it, allowing it to tumble to the floor - trailing sunny aioli - break unrecoverably and spill what little of the sauce wasn't already staining the white plastic/rubber of my fridge. Hence, the first photo features no sunny aioli.

It's probably a good thing my girlfriend wasn't around for this one, because I came very close to losing my temper over the breakage and spillage, and spent the evening grumbling to myself and cursing the bowl for its slipperiness. It had all been going really well up until that point, so falling at the last hurdle was a huge disappointment.

My second attempt, for lunch the following day, went far better, and the sunny aioli really added to the overall flavour. I may have to figure out other ways to use a similar sauce. This is a really lovely fish stew, and I'd definitely like to try making it again... though I'm not quite sure what the ciabatta adds to the meal, other than being something to soak up the last few drops of the stew.

In retrospect, I'm puzzled by the instruction to drizzle olive oil over the ciabatta rolls before sticking them in the oven. I ended up doing one with and one without the oil and, yes, there's a massive difference in the result... but the one with oil ended up extremely tough and crusty, while the other was more like what you might buy in a shop. I'm not massively keen on super-crusty bread, but each to their own...

Thursday, 31 May 2018

Experiments with Gousto #8: Wholesome Haddock & Apricot Tagine with Bulgur

And so we come to the penultimate post in this new round of Gousto recipes... and if there was a duffer in the selection, this would be it. Not that it was bad, just not as outstandingly good (or fun to prepare) as the others. This recipe also featured a couple of tasks that had to be kept on the go at the same time, which isn't something I find particularly easy in the kitchen. The daftest part, for me, was the opening instruction, which breaks down into three separate tasks: boil a kettle (the quantity of water isn't specified, but is more than my kettle can handle, for reasons I'll explain shortly), peel and chop the onion, peel and dice the carrot. Since I knew that peeling and chopping/dicing the veg would take more time that the boiling of a kettle, I did that - along with pretty much all the other chopping - before even filling the kettle, and feel that's the safest option. It's not as if step 2 (actually steps 4 and 5, if we're being fussy) makes use of the boiled water, and step 3 (AKA steps 6 and 7) doesn't start with "Meanwhile...", yet the actions in step 2 take 5-8 minutes. Thus, following the recipe to the letter would result in the water cooling off during that stage, throwing off the timing for the rest of the recipe.

Going from memory, I think I also prepared the vegetable stock before starting to cook the carrot and onion pieces, because step 4 (steps 8-11) includes making the stock as its last instruction before switching back to working on the onions and carrots in the pan.

I did, for a while, have the bulgur wheat and the early stages of the tagine cooking simultaneously, but the alarm going off for the wheat pretty much shattered my concentration. I also found that the full kettle of water I started out with wasn't sufficient for the 10-15 minutes cooking time... Not sure whether that means I cooked it for too long, or just that I need a bigger kettle (or to boil the water in the pan rather than using the kettle at all), but I had to boil the kettle again to top up the pan at about the halfway point, because it looked as though it would boil dry otherwise.

Like the previous recipe, the instructions say to add a lot of dry stuff to the pan ahead of the stock and, again, I find this counterintuitive. Not to say I didn't do it that way, or that I don't think it works, just that it doesn't make sense to me to add three lots of ground spices, chopped garlic and ginger and a relatively small quantity of tomato paste to a pan of onion and carrot, cooked in a drizzle of olive oil. Granted, the onions will start to sweat some of their fluids out, but it's still a fairy dry pan, and the spices will tend to clump. The next instruction is to cook "until fragrant"... which is tricky to follow, as I'm not sure I trust my nose in the kitchen... particularly with allergy season in full swing, and not long after chopping the onions...

Nevertheless, from here on, the recipe became much easier to follow, except inasmuch as I really need to figure out what constitutes 'low heat', 'medium heat' and 'high heat' on my hob... Its highest setting always seems a little too aggressive, but the general idea at this stage was to boil off some of the water to thicken up the sauce. That said, the instruction to aim for "a curry-like consistency" isn't especially helpful to one who doesn't tend to eat a lot of curry. I had a broad idea of what was meant, and did a fair job, I think, but still wasn't convinced by the finished product.

Probably the hardest part came when the fish was added, because ensuring white fish is cooked through when it's in a strongly-coloured sauce is a bit of a fine art - it needs to get to the stage where it flakes easily, but not so far along that it starts drying out. Since the instructions say to chop the coriander and mint at this late stage, I made sure to do it in advance to avoid any last-minute stress, or the risk of over-cooking the tagine.

Curiously, while the instructions say to "serve the haddock & apricot tagine over the bulgur wheat", all the photos show the two served side-by-side and very separately. The problem with following the instruction rather than the images is that the sauce is inclined to soak down into the wheat, so what I served up looks much less impressive... and not just because of my haphazard chopping of the coriander and the mint. It also seemed very anaemic - the photos depict a tagine that's bold and warm-looking, all browns and reds... mine ended up more beige and orange.


Now, I described this as the duffer of the set and should explain why. I liked this meal - as did my girlfriend, who actually had her share when she got back home late that evening - but the flavour wasn't as captivating as some of the other recipes. By comparison, I have to say I found it a little bland. It's worth noting that the recipe describes "diced apricots", but what was supplied was a bag of diced, dried apricot, so it's possible that working with fresh fruit would yield better results. Haddock doesn't have a particularly strong flavour of its own, but it didn't really pick up as much from the sauce as I'd hoped... and then the wheat was extremely plain. My girlfriend suggested some kind of seasoning for the wheat, so perhaps cooking it in another batch of vegetable stock would improve it... or, at the very least, adding more than just salt to the water.

With the end result of this being so underwhelming, I'm somewhat keen to try it again sometime - perhaps I missed something, perhaps the incredients weren't quite ideal in some way, perhaps I needed to chop the onion and carrot a little more finely. I'd also argue that, going by the photos on the recipe card, the quanity of mint and coriander supplied for the garnish was far in excess of requirement.

Wednesday, 30 May 2018

Experiments with Gousto #7: Crispy Baked Tacos, Refried Beans & Pineapple Salsa

Apologies for the delay in following up the continuing experiments with Gousto - it's been a good couple of weeks since I cooked the last of this latest batch (and ate all of it myself, as my girlfriend was away for the weekend). There's no particular reason for the delay, I just haven't felt like writing about my cooking efforts lately.

Not that they went badly (until the last one - but more on that when I get to it), just that I've been trying and failing to get all kinds of things done, and I wanted to give this the attention it deserved, rather than bashing out three perfunctory posts. This was, I think, the first recipe for the relevant week that my girlfriend and I flagged as a definite choice. Everything on offer looked great, but we're both big taco fans, and we'll often make the fillings from scratch anyway, so this wasn't a massive departure from the sort of thing we've made in the past, just a specific recipe we hadn't tried yet.

The first thing I need to say about this recipe is that it really needs some way of ensuring the tortillas keep their shape during the baking. I spent quite some time trying to even up the distribution of the tortillas in the dish, and ensure they were as close to U-shaped as possible, only for them to curl up, flop over and basically do their own thing in the oven. This led to several of the tortilla/tacos being very difficult to fill when the time came, and at least one had to be cracked to get it open far enough to drop in the refried beans. The salsa, being quite chunky, proved even more tricky.

On the whole, preparing this one went smoothly and was fairly easy - the 30 minute estimate is probably quite accurate though, as usual, I did a lot of prep work ahead of time. The salsa was the first thing I made up, since it required only chopping, mixing and then keeping aside until it was time to dish up. The cherry tomatoes and pineapple rings only needed to be chopped roughly, which is always a good thing in my books, as chopping finely is something I have still yet to master. Next time I do this, I'll probably quarter them as halves are a little too chunky... and, to be honest, I'm not sure cherry tomatoes were necessary, as normal tomatoes could be more easily chopped into smaller pieces while remaining suitably chunky. I'd also query the necessity of adding a teaspoon of juice from the tin of pineapple because, unless the chunks are fully drained, they come soaked with quite enough juice for a reasonable salsa, and deliberately adding more just seemed to leave me with way too much fluid in my salsa - it includes a tablespoon of olive oil as well, after all.

The only really substantial task in this recipe is making up the refried beans, which is surprisingly simple... So much so, in fact, that I may take to doing it more often, since my girlfriend and I both like refried beans. The specifics of the process, as dictated by Gousto, seem a little strange to me - adding the dry stuff (smoked paprika, ground cumin and chilli flakes) before the chipotle paste, tomato frito and the hundred millilitres of water was more than a little counterintuitive as the powders tended to clump rather than properly mixing in with the beans. I think I ended up cooking the beans for longer than the 5-8 minutes suggested, but I'm still not entirely sure what constitutes "a medium heat" on my hob, and probably spent too long adjusting it up and down, according to how it seemed to be going. The final stage - adding in the lime juice, seasoning and following the instruction to "gently crush a few of the beans" - is very much a personal taste thing. When ordering refried beans in a restaurant, you can expect anything from a full-on bean mash to something where the individual beans are still easily discernible... The photos on the recipe card seemed to suggest a middle ground, slightly beyond the "gentle" crushing of "a few of the beans" the text described, so I just aimed to mash them up to the exteny that I, personally, prefer.

I do feel obliged to quibble the quantities, as a single tin of beans (plus the other stuff) ended up equating to approximately half the quanity of refried beans I would want to divide between six tortilla/taco shells... perhaps that just proves what a porker I can be but, like I said, I really like refried beans. Put it like this: The first three tacos each received a heaped tablespoon of beans... after that, I had to start getting stingy and, by the last taco, I was literally scraping the bottom of the pan for a decent portion.

As mentioned, actually transferring the beans into the part-cooked tortillas was troublesome, and I think what's really needed is a sort of toasting rack, where the tortillas can be wrapped around a framework to ensure they keep the optimal U-shaped-ness for the 5-minute initial bake. Once done, these can be transferred to the oven-proof dish to be (ahem) filled with the refried beans, and returned to the oven for the final 5-minute bake.

Given that - as mentioned at the start - the salsa was rather more fluid than it needed to be, the finished and garnished tacos were somewhat flooded, and really didn't need any additional lime juice to be drizzled over. Portion-size aside, though, the tacos were very tasty, and I'll definitely be giving this recipe another try at some point.

One huge advantage to this sort of thing is that the recipe for refried beans is so easy to embellish - more or less of the herbs or the chilli flakes, dark chocolate could be added, pinto and/or kidney beans could be used along with the black beans, etc - so the possibilities in that alone are virtually endless. I'll certainly double the quantity of beans next time, even if I don't add another variety. I'll likely chop the pineapple a little more, use normal tomatoes rather than cherry, and absolutely not add any additional juice. A standard onion - brown or red - could be used in place of, or as well as the shallot, too... so, really, this whole recipe encourages experimentation.

Aside from the frustrations caused by the uncooperative tacos, this was great fun to prepare and, being very simple, could easily become a go-to, either in and of itself for a quick veggie meal, or as a component of a more diverse, Mexican-themed dinner, since both the refried beans and the salsa could be served on the side.

One sidenote is that, where a recipe card states, for example, "this is your pineapple salsa", I've previously been inclined to read an emphasis on "your", because it's often come straight after the bit about seasoning... Looking at this particular recipe card, I suspect I have done so in error, as this seems to be more matter-of-factly stating "this is your x" by way of saying "this portion of the recipe is concluded".

Puzzling...

Wednesday, 16 May 2018

Experiments with Gousto #6: Sweet Mixed Pepper & Chive Risotto

Of all the Gousto recipes I've tried so far (cooking myself, that is), this is probably my favourite so far. It turned out to be pretty much as quick and easy as the recipe suggests, but there were still a couple of things I didn't get quite right...

For starters, I've got into the habit of doing as much chopping as possible in advance, since I can never be sure I'll be able to keep to the timings if I have to chop on the fly. For this one, I also put the sweet tomato stock together in advance. This almost came a-cropper before I'd started, as my usual jug is far smaller than the 700ml required, so I had to resort to a crappy (but larger) plastic jug from my Ikea kitchenware set. I don't particularly like using it - especially for hot things - but there's really no rational reason for that... I just prefer working with glass/Pyrex jugs where available.

I got my girlfriend to explain how she would go about dicing onion, because my 'method' invaribly ends up making a lot of mess and leaving me with streaming eyes. In fact, in a previous recipe (not one I've documented, as far as I can remember) I diced an onion using our mandoline with the additional blades intended for slicing potatoes into French Fries. This time, I just used a standard kitchen knife, though I did have to sharpen it beforehand.

I was a little concerned by step 4 of this recipe, where smoked paprika, ground turmeric and chopped garlic are added in along with the dry arborio rice, as I don't feel especially confident about adding dry rice to anything where there's not much liquid available. One of these days, I'm sure I'll just end up with Rice Krispies... Not this day, though... thankfully...

Also, to be honest, it's only in the pan for about a minute before the stock is gradually added in, and this stage takes about 15-20 minutes for it to be absorbed by the rice, while the sliced peppers are being roasted in the oven. I think I started this stage a little too late - with only about 17 minutes remaining on the peppers' cooking time - so I ended up switching the oven off for the last few minutes of the risotto's cooking time.

The fact that almost everything for this recipe comes together in a single frying pan is a huge bonus. It means less to keep an eye on, and less to wash up at the end. I do have a few objections to the act of adding cheese to something that's already a hot, sticky mess in a frying pan, because I know from previous experience how troublesome that sort of combination will be to clean afterward. I also found the cheese supplied to be extremely crumbly, which made grating it an absolute chore, and I came dangerously close to grating my fingertips whenever a chunk broke off.

To be perfectly honest, I'm not certain whether or not any pepper was added for seasoning, along with the cheese and chives, but I'm pretty confident - having tasted the end results - that it would work well enough without. The final stage was a bit of a rush, as I had to dish out the risotto, add the remaining peppers, cheese and chives, drizzle on a bit of olive oil (also, I strongly suspect, surplus to requirement), and take some photos before announcing that dinner was ready... and I hadn't even brought the camera into the kitchen in advance this time...

This is the first of the new batch of Gousto recipes that arrived yesterday, so the rest have a hard act to follow now. The next few will be interesting as, after tonight's, I'll actually be cooking for myself for a couple of nights, as Courtney's out for the evenings, then away for the weekend... and I'm not sure keeping some of the ingredients till she's back - even keeping them in the fridge - will be viable. Chances are, I'll be cooking up the whole recipe as usual, but keeping a portion in the fridge (or the freezer) till she's back.

Experiments with Gousto #5: Scandi-style Mackerel & Potato Salad with Spinach

The final recipe of the first new Gousto box didn't really require that much actual cooking, and yet I still managed to balls up one of the simpler tasks on my hob. This is partly due to the wonky timings in the recipe - something of a running theme, I'm finding - but mainly due to me splitting my attention between two small tasks that shouldn't have been attempted simultaneously. Nevertheless, this turned out to be a rather anticlimactic finale to my first foray into preparing evening meals for two again.

It probably would have been a lot simpler to break this up into two entirely separate tasks - the potato salad being one, with everything else in the second.  The potato salad is the most complicated task, in that the potatoes have to be chopped in half, then boiled for about a quarter of an hour, then drained and, ideally, allowed to cool. It's entirely possible, given the length of time it generally takes me to chop things, that the whole point of the recipe as it's presented is that you complete step 1 (cooking the potatoes) before even starting on step 2 (preparation of the spinach salad). However, since I wanted to ensure everything was ready ahead of time, I'd chopped the dill, the spring onions, the garlic and the potatoes as one task, a couple of hours earlier than necessary, and put the results back in the fridge till they were needed.

Then again, this particular recipe was a little 'pre-disastered' by the fact that the yoghurt container had apparently exploded in transit. It was in a small, sealed plastic pot - a miniature version of the average yoghurt pot you can buy in a supermarket - contained within a plastic bag of its own. When we unpacked the box all the ingredients came in, the inside of the plastic bag was coated with yoghurt, so the whole thing had to be thrown away. Thankfully we had a large, open container of essentially identical yoghurt already in our fridge, and we had more than the 80g worth required by this recipe. I was a little worried during the last stage of preparing the mustard dressing, in that it initially seemed as though the lemon juice was curdling the yoghurt. Thankfully a good stir sorted that out. The real problem - but still not the balls-up I mentioned at the start - was that the potatoes were still quite warm when I added them to the dressing, so it immediately got thinner and runnier than it should have been.

Where it went undeniably wrong, and mostly down to my mismanagement of the tasks, was with the almond toasting, believe it or not. It should only take about 2-3 minutes according to the recipe, but it was at this point that I realised I hadn't sorted out the mackeral, so I started to remove the skin and flake the fish while the almonds were still on the hob, resulting in a selection of flakes ranging from 'lightly brown and toasted' to 'utterly burnt'. Next time I do this - and there almost certainly will be a next time for such a simple and delicious meal - I'll make breaking up the mackerel one of the first tasks because, once flaked, it can be put back in the fridge till it's needed. I'll also be sure to boil the potatoes further ahead of time so they have a chance to properly cool, and possibly put them in the fridge at that stage, rather than just after chopping them. Everything else is quick and simple - preparing the entire meal is timed at about 20 minutes, after all - though I reckon a more generous portion of mackerel would improve it no end. The other issue is that the spinach salad seems like a bit of an afterthought - a plate-filler - compared to everything else. It's literally just baby spinach drizzled with olive oil, then seasoned with salt and pepper. A more complicated dressing may have helped but, obviously, you wouldn't want it to clash with the mustard dressing in the potato salad.

The next batch of Gousto recipes arrived yesterday, and I've prepared the first of them already... but expect a slight delay in posting about it as I'm trying to get other stuff done in the meantime.

I just hope I don't leave it too long, resulting in another batch of drafts that I can't finish...

Friday, 11 May 2018

Experiments with Gousto #4: Roasted Portobellos, Garlic Bean Mash & Chimichurri

In an attempt to get back into cooking while I'm not working, I ordered a box of four Gousto recipes but, due to a bunch of 'real life' issues leaving me a little frazzled the week they arrived, my girlfriend ended up having to cook the first two. For the third, since she was headed out around the time we'd normally be eating dinner, necessity dictated that I get my act together and do some proper cooking.

Now, the distinct lack of new posts on this blog over the last couple of years has been partly as a result of a distinct lack of cooking on my part. Lack of practice has left me feeling a little uncertain of myself in the kitchen - perhaps moreso than when I started this blog because, back then, I had the benefit of ignorance. Having done a fair bit of cooking back then, I learned a lot... and a lot of what I learned was how complicated some recipies are, even when they purport to be 'quick and simple'. Hell, when I left my job, one of my leaving gifts was Jamie Oliver's book '5 Ingredients'. Reading through this, it becomes quickly apparent that the five ingredients are normally supplemented by some sort of seasoning or oil that, in any other cookbook, would count as another ingredient. Sure, some can be considered kitchen staples, but I wouldn't think that red wine vinegar, for example, is quite as common as salt or pepper.

But I digress.

Interestingly, while both Gousto and Hello Fresh seemed to be operating a subscription model when I first used them, Gousto now has an additional 'dipping in' option, whereby you can simply pick a number of recipes - four being considered optimal - which will be delivered, along with all the required ingredients (bar kitchen staples like salt, pepper, olive oil, etc.), precisely measured and securely boxed.

Courtney and I picked four recipes more on the basis of how delicious they looked than anything else, but we did also keep an eye on the preparation times, aiming to keep to about 30 minutes, since that often equated to more like 50 minutes when I was doing the cooking.

By sheer coincidence, the first of the four recipes I cooked - since Courtney was working her usual hours today, with an appointment in the evening when we'd normally be having dinner - was centred on mushrooms, just like the first Gousto recipe I ever attempted. It didn't require any particularly fussy chopping, though it did require potatoes to be peeled, and it did require a couple of things to be on the go at the same time, with some fairly precise timing to get everything onto the plate while still warm.

The design of Gousto's recipe cards has changed quite a bit since 2015, with clearer and more detailed nutritional information on the front, along with the inclusion of allergen information, with the trade-off being even smaller images of the individual ingredients. The steps in the recipe, on the back, are now vertically sequential, rather than horizontally, but they're just as clearly numbered as before. I've yet to encounter a recipe that goes beyond eight steps, but I think that's largely down to the creative way they define a 'step' in each process. It's perfectly acceptable to group tasks that need to be done around the same time, and using a specific group of ingredients, but some of these recipes do resort to starting a new step "Meanwhile..." so it's imperative that one read through the full guide and assess the tasks logically, rather than attempting to follow the steps on the fly, which is my usual, carefree method. For example, with this one, I prepared the chimichurri several hours ahead of everything else, and stashed it in the fridge till it was needed. I also peeled and chopped the spuds and garlic well ahead of starting the oven so, technically, I followed the recipe by starting at step 4-5, then skipping back to the middle of step 1, and only really started at the beginning of step 1 when it was time to heat up the oven.

Considering how frazzled I've been of late, and how nervous I was of taking the reigns on an evening meal after relying on my girlfriend to prepare dinner for so long, this actually went really smoothly. It's certainly not the most complex recipe, but it does feature two "Meanwhile..." steps, and it's a little imprecise in some directions - "drizzle with olive oil", for example, is used for preparing the mushrooms on a baking tray and for preparing the potato/cannelli beans to be mashed. I suspect I should have 'drizzled' a little more olive oil into my mash but, to be honest, I'm more used to using butter and milk in mashed potato (when I'm not copping out and using instant mash, to the eternal horror of my girlfriend's family)... It ended up OK... not dry, but not properly creamy either. It's also tricky to judge seasoning, particularly when there's something like this chimichurri involved. I didn't want to add too much salt or pepper to the mash, even, but I could probably have added more than I did without any ill effects.

Another thing I kind of take issue with on these new recipe cards is their wishy-washy guidance on the seasoning, mashing and dressing. The phrase "this is your x" comes up alarmingly often. I get what they're trying to say - that one should make it according to one's own preferences - but I tend to think it's better to follow a recipe precisely the first time, and make alterations the next time based on how it turned out. For example, I've never even heard of a 'chimichurri' before, let alone made one, so telling me to "Season generously with salt and pepper - this is your chimichurri" doesn't seem very helpful. I don't know what it's supposed to taste like, nor do I know what effect salt/pepper will actually have on the end result.

Still, this was fairly simple - easing me back into the kitchen reasonably comfortably - and the end results were delicious. I'm not entirely certain of the merits of the tomato as a component of the meal (hell, it doesn't even rate a mention in the title!), and I think I'll aim to cut the coriander a little more finely next time (perhaps grinding it, and the shallots, a little longer with the mortar and pestle), but I'm broadly happy with what ended up on our plates...


Hopefully I'll be cooking the last of this batch over the weekend, and we have another box of four recipes arriving next week... Round two of my attempts at Gousto recipes is definitely off to a good start.

Thursday, 27 October 2016

Smoked Haddock Paella (sort-of à la Slimming World)

I'd like to call it a tradition that I cook dinner while I'm off work but, over the last couple of years, Courtney and I have usually been doing something - like taking a holiday - which means there's actually not much of an opportunity to cook, and when I'm off work due to illness, cooking couldn't be further from my mind. This week - coming at a bad time for going away - has presented the first good opportunity (other than, y'know, every frickin' weekend) for me to get back into the kitchen and prepare some meals from scratch... But it didn't happen without a struggle. We'd talked about it a while back but, in the run-up to the week, Courtney became reluctant to pick meals for me to cook. I had previously become a little stressed during other stints in the kitchen and she felt that she wanted to spare me the upset.

Nevertheless, a handful of recipe suggestions were eventually teased out of her and, on the Wednesday, I tried my hand at an adaptation of a 'Syn-Free' Slimming World recipe for a vegetarian/vegan paella, with a bit of fish added because we happened to have it in the freezer, otherwise unused. There were a couple of other changes to the recipe, so I'll give this the full write-up...

Ingredients:
  • Smoked Haddock (a couple of small fillets should be enough)
  • Onion (one of a decent size is sufficient, to be sliced)
  • Garlic (a couple of cloves, to be crushed)
  • Peppers (one red, one yellow, to be sliced)
  • Tomatoes (four, to be sliced - the original recipe specifies plum tomatoes, but I used the normal kind)
  • Lemons (one to be juiced, one to be cut into wedges)
  • Peas (200g, frozen)
  • Artichoke Hearts (one 400g tin - equating to about 240g of artichoke when drained)
  • Arborio Rice (largely because we couldn't find anything called 'Paella Rice', 350g)
  • Paprika (2 teaspoons)
  • Cumin (1 teaspoon)
  • Turmeric (half teaspoon)
  • Saffron (just a pinch, however one measures that...)
  • Vegetable Stock Cubes (3 should be sufficient, to be dissolved in about a litre of water)
  • Salt & Pepper (to taste) 
  • Cooking Oil (to lubricate the wok in the initial stages)
Preparation Time: About an hour, less if you're better at slicing and chopping - or generally more organised - than I am

Tools Required:
  • 1 Large Wok or Frying Pan
  • 1 Saucepan (large enough to comfortably accommodate 1 litre of boiling water)
  • 1 Kitchen Knife
  • 1 Mandoline (because it makes slicing the onion far easier on the eyes)
  • 1 Garlic Press
  • Miscellaneous receptacles to contain the ingredients prior to adding to the wok
  • 2 Stirring Implements (one for the wok, one for the stock)
The Process:
This is one of those recipes where it pays to prepare in advance. Before even firing up the hob, I cooked the two haddock fillets (thawed overnight in the fridge, then approximately 5 minutes in the microwave, breaking halfway to drain the excess water, and then removing the skin and flaking the fish at the end), mixed up the spices in a small bowl (since it's easier to mix in the paprika, cumin, turmeric and saffron evenly if they're already mixed up and ready to be dumped into the wok) and chopped up all the veg. While I would never say that I've got chopping things down to a fine art, I do find it easy enough to deseed and slice up things like peppers. Slicing things like onions has become far easier for me since we acquired a mandoline (the Chef'n Pull'n'Slice mandoline from Lakeland, specifically) but, even so, I had to cover over the onion slices once finished to avoid getting all weepy. The tomatoes were slightly more complicated to slice up because they also needed to be deseeded, and that's the gooiest portion of the tomato. On the upside, none of the slicing needs to be especially fine, and all I did with the artichoke hearts was drain them and halve them. I made a lot of extra washing up by using bowls and plates to store things once prepared, so I could simply line them up and add them into the wok as I progressed. The frozen peas were measured out, then stored in the fridge till needed. One of the lemons was juiced, while the other, which only needed cutting into wedges, was set aside.

I also dealt with the stock before the main part of the cooking, putting just over a litre of water into a saucepan, dropping in the three vegetable stock cubes and bringing it to the boil. Stirring occasionally to help the stock cubes break up, I then made a start on the main event.

The wok received a spraying of cooking oil before turning on the hob to a medium heat. As a side note, I'm slowly learning how to set temperature levels on the hob - high and low being obvious, but 'medium' sitting somewhere below the median - so just about every stage of this recipe proceeded as intended. First into the wok were the sliced onion and the crushed garlic, these being cooked gently - and kept on the move to prevent them sticking to the wok - till the onions started turning golden (a little over five minutes). I did splash a spoonful or two of the stock in early as I suspect I didn't spray in quite enough cooking oil.

Next up came the peppers, with the whole lot continuing to stir-fry for about another five minutes. The next stage starts out with a flurry of activity before settling down for a long simmer: the tomatoes, rice (added dry) and the spice mix go in next, along with a small amount - about a tablespoon or so - of the lemon juice and then stirred up. The final part of this stage is adding the stock and, since I wasn't quite sure of myself on this point, I ended up adding it gradually rather than all at once. I ended up not using all of it, as the extra was just a precaution, but very little was left over. This then needs to simmer down for around a quarter of an hour or so, to allow the rice to absorb water and cook. It's worth giving it all a stir once in a while, as I did find that my rice sank to - and then stuck to - the bottom of the wok.

The final stage starts by adding the frozen peas and chopped artichoke, then simmering for another ten minutes or so, leaving you with something resembling paella, rather than a chunky vegetable soup - you want it moist, but not waterlogged. The last thing to be added to the wok, preferably in the last couple of minutes before serving, is the flaked haddock. After that, it's simply a case of serving up, seasoning to taste, then chopping the remaining lemon into wedges to squeeze over the top.

The Results:
Given the time I'd put in to preparation before I started, I was pleased to find this all progressed very smoothly. Because my worktop space is fairly limited, I'd dotted bowls and plates around the available space, piling them up as I emptied them into the wok. My biggest concern was getting the hob temperature right for boiling off the excess water to ensure the correct texture/viscosity in the end result, but the only problem with the simmering stage was that I didn't keep the rice moving, so quite a bit ended up as a congealed, crispy mass at the bottom of the wok... but even that wasn't a complete disaster, as Courtney likes crispy congealed rice.

The original Slimming World version of this recipe suggests garnishing with shredded parsley, but that's not something we tend to have in stock as it's not something we use a great deal of - it seems like a huge waste to buy some only to tear up a small amount to sprinkle over something like this. I seasoned mine only very slightly - a little salt and a touch of pepper - as I wanted to try it with as little extra flavouring as possible. I was a little concerned, for example, that smoked haddock might have too strong a taste in its own right, but that turned out OK - blending in without losing its own flavour. While the tomato pretty much fell apart, becoming part of the sauce and leaving only the strips of skin, the other veg held together well, maintained some of their bite and kept their individual flavours to a degree. Adding a squeeze of lemon juice didn't do much, and I suspect a sprinkle of fresh parsley may have been a worthwhile addition after all. I'm not entirely sure what the difference is between 'paella rice' and the arborio rice I used, but I can't imagine the results would have been massively improved by using the 'correct' rice.

Aside from all the preparation work and small amount of waste due to the rice getting stuck to the bottom of the wok, this was a simple recipe that turned out very well and restored some of my kitchen confidence. The recipe in the book isn't exactly comprehensive, assuming a certain amount of experience, but I was able to read between the lines and keep things progressing, without getting stressed out by re-reading the same lines over and over, trying to discern what I might be missing.

This is, at heart, a vegetarian dish, so it would be perfectly acceptable in its unadulterated form, yet it could easily support other white fish, or perhaps a full-on meaty component... as long as it's not something too strongly flavoured in its own right.

The quantities specified are meant to serve four, but we both had fairly generous servings, and Courtney took the leftovers for today's lunch. She had it cold, and reported that it was still quite flavourful, though she felt a bit of extra salt and pepper would have improved it, and hadn't taken any with her. She also reckoned it had reached the consistency where it could be turned into rice balls or patties, so that's perhaps something to investigate further in future.
Snapped prior to the addition of a little salt and pepper...

Friday, 10 April 2015

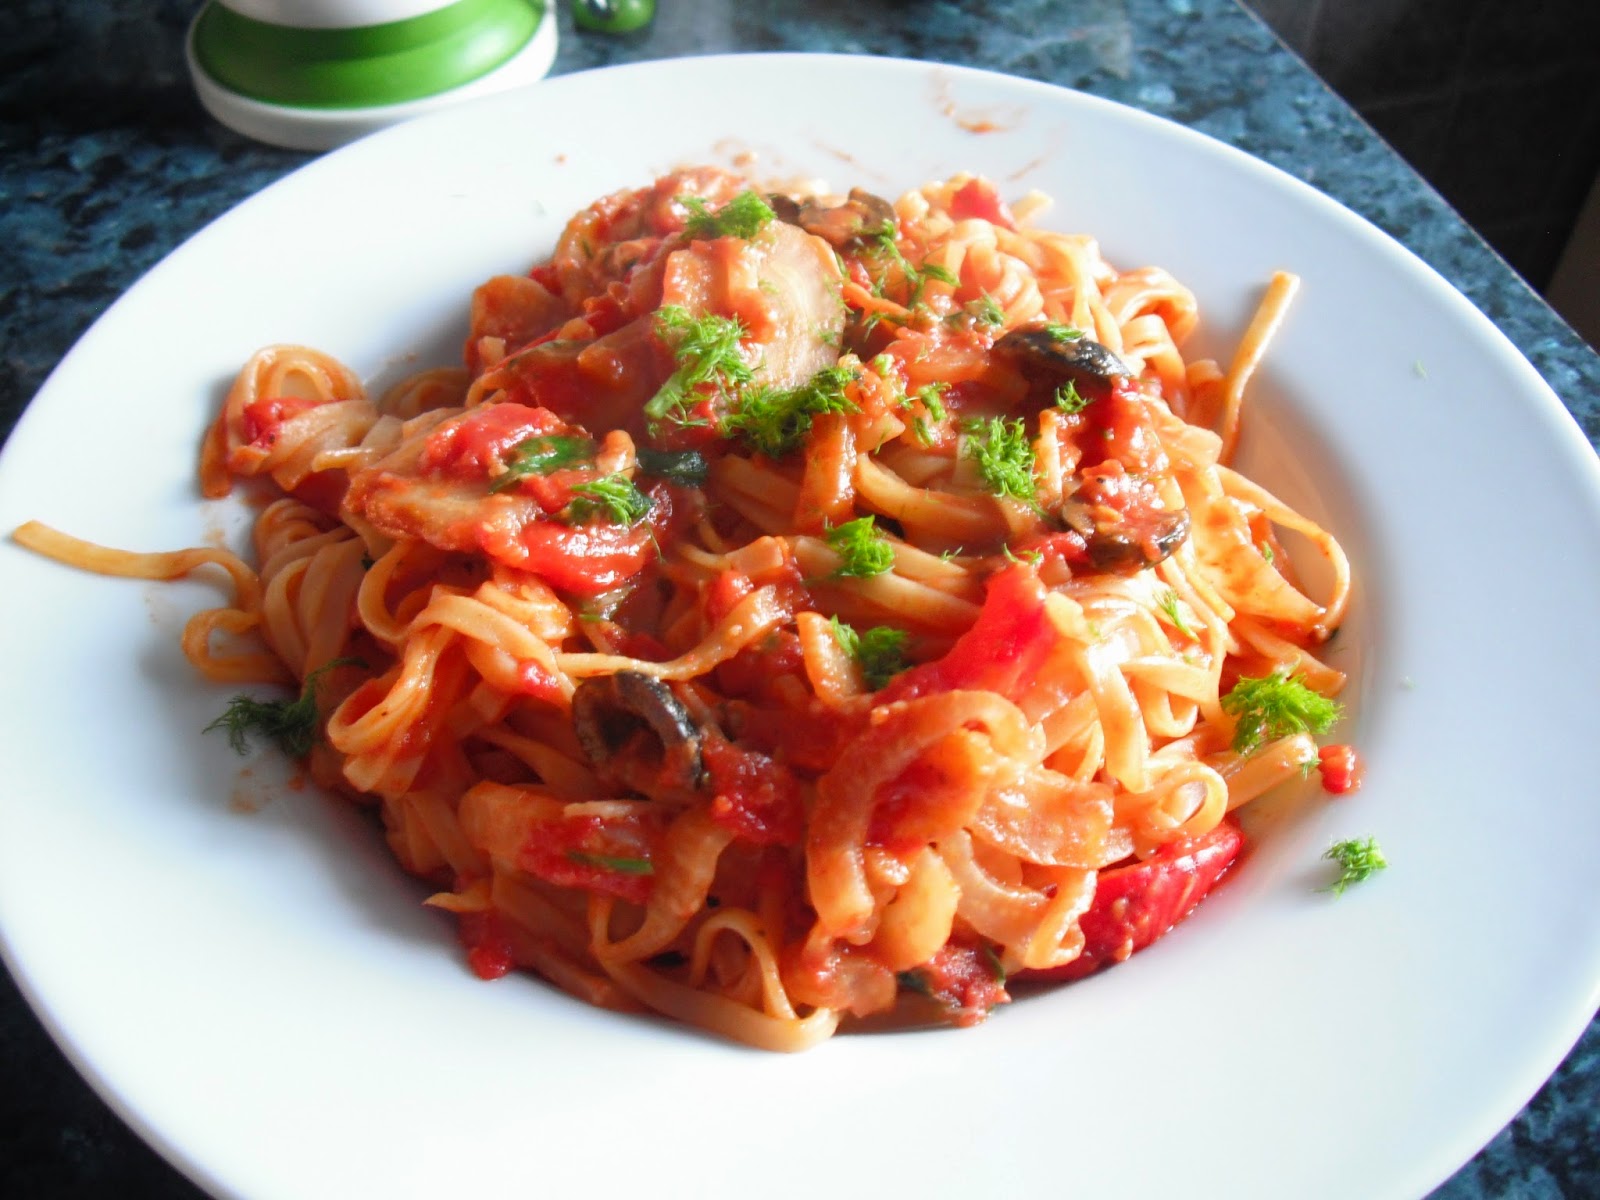
Experiments with HelloFresh #3: Fennel & Olive Fettuccine with Fresh Parsley

No, I haven't forgotten how to count, this should really have been the final post, but I'm temporarily skipping the second for reasons I'll get into when I finally post it. I'll also do the summing-up with that post rather than this one, as it'll make more sense that way.

As much as anything on this blog makes sense, that is.

After doing things in my usual haphazard fashion on the first recipe, my girlfriend mentioned that, when she's cooking, she'll often do snippets of preparatory chopping throughout the day, by way of a five minute break from her studies. While I wasn't quite that organised, I did make a start on this earlier in the evening than with any of my previous efforts, and did most of the chopping in advance of any of the actual cooking. I also followed another bit of her advice: she'd seen and heard my frustration with all the 'finely chop ingredient x' malarky in the first post and, when it came to the garlic, she suggested I simply use our garlic press. The end result is basically the same, if not better, and saves on an awful lot of effort. It was also nice to have a genuine reason to use my mortar and pestle for a change, grinding the fennel seeds - I knew I'd bought it for a reason...

I was particularly tickled, too, when the instructions helpfully suggested a mandolin for thinly slicing the fennel. My girlfriend picked one up a while back and, while it's not quite fine enough to generate the 'almost translucently thin' slices the instructions specified, it certainly made short work of slicing the awkwardly-shaped fennel bulb.

Once the chopping was out of the way, I read through the instructions several times over. Unlike the first two recipes, there weren't any massive glitches in the ingredient quantities (although specifying '2 cups' of sliced fennel bulb seemed redundant considering only one bulb was provided, and I kinda had to use the whole thing one way or another), so I really just wanted to be sure of what I needed to do next at every step, and to get a vague idea of the timings before starting things off. The second step in the recipe is cooking the red pepper strips, for which it recommends "15 mins or until lightly charred on the outside". The next step is cooking the rest of the veg in a pan, eventually turning it into a sauce for the pasta. The timings seemed to match up pretty well, so I started each process almost simultaneously, just to see if I could keep things on track.

The sauce comes together in several short stages that I found reasonably easy to follow since I had everything ready-prepared around me. The only hitch I'd had was that this recipe calls for black olives, and I definitely didn't get any black olives in the box. Thankfully, my girlfriend really likes olives, so we tend to have some in stock. The only real difficulty then was that, again, it specified the olive content as '2 tablespoons', which I still say is an utterly ridiculous measure for bisected fruit. Still, the definition gleaned from the first recipe helped me choose the appropriate number of olives for this dish. When the tinned tomatoes are added to the pan, the recipe suggests adding sugar but I've never found that necessary - tomatoes are sweet enough and, coupled with the rest of the veg, there's enough sugar in there naturally for my tastebuds. And that's saying something.

Once everything is in the pan, the recipe instructs that the heat should be turned down low so the sauce can boil down and thicken up, and it's at this point that the pasta needs to be cooked. Personally, I found it amusing that the card includes a definition of 'al dente' under the heading 'Tip', but your mileage may vary.

Just to prove that I'm not consistently terrible at cooking, the pasta was done only moments before the oven's alarm went off to tell me that the red pepper strips were ready, so both elements were added to the sauce in the pan in good time. The final stage was chucking in the parsley and the cheese (which strikes me as odd, and one of the Gousto recipes did the same, where my girlfriend and I would normally tend to add the cheese on top, once the meal had been served... not least because it means you don't end up having to scrape congealed cheese off your pan when you do the washing up). With a final garnish of - oh, for fuck's sake - 'finely chopped' fennel fronds, dinner was served...

Based on the two recipes I bothered photographing myself, I have to conclude that there's something wrong with HelloFresh's photography or their Photoshop work, as both this and the 'Easter' Ragu were depicted as rather brown in the stock photos, while they tended more toward red when I'd finished cooking... and I'm pretty sure I didn't get anything that significantly wrong on either of these.

As we were eating, my girlfriend commented that the fennel was identifiable in the sauce, but not overpowering, as fennel can sometimes be - being almost licorice in flavour. I certainly enjoyed the dish, but have to say I found it rather bland overall... it's possible I gave it too few "good grinds of black pepper", or that the chilli was just cooked for too long - it didn't have the spicy kick I was expecting, given that the first instruction says to "finely chop as much of the chilli as you dare". Perhaps I'll have to try this one again, and deliberately try to spice it up as much as possible...

This was definitely the easiest of the three HelloFresh recipes for me to follow, though how much of that was down to me doing more preparatory work in advance, and how much was because the recipe is actually easier, I cannot say. What I will say is that the card reckons this should be done in about 25 minutes, and I took the best part of an hour over it. Admittedly, most of that was due to taking my time over the preparatory work and my neurotic re-reading of the instructions, but that's a hell of a discrepancy. Not to say I particularly rate myself as any kind of kitchen ninja, but the folks at HelloFresh do seem to presume a level of competence far higher than mine.
Probably the neatest presentation I've ever managed when cooking
for myself and my girlfriend...

If you think you might fancy giving HelloFresh a try (and are within the UK mainland), please feel free to use my referral code MPMDQT for an introductory discount. Yes, that also gets me a discount on my next order, but further deliveries are currently on hold while I complete this first set of recipes and consider how this system fits in with my current... erm... 'lifestyle'.

Thursday, 9 April 2015

Experiments with HelloFresh #1: Greek Easter Ragu with Almond, Aubergine & Basil Couscous

Around the time I was making a start on my trio of Gousto posts, I was planning my first foray into HelloFresh. On the surface, both offer much the same sort of service, with a different range of recipes and a very different style of presentation. From the moment of delivery (quite late in the day, on their 0900-1700 delivery 'slot'), HelloFresh appears to be more of a brand, with a personalised box containing not only ingredients and recipes but a welcome booklet introducing the HelloFresh team and their suppliers, as well as offering hints and tips for getting the most out of the service. There was also a copy of their monthly newsletter, The Fresh Times, and a whole slew of advertising flyers offering discount codes for clothing, beers and a 'smoothie starter pack' courtesy of partner companies... some of whom also seem to share the design agency used by HelloFresh, as the style of their flyers is more than a little similar.

But, while I may work in publishing and occasionally spend my days creating such flyers, I'm not here to critique that aspect of the product. Hell, I'd need a whole new blog if I wanted to get into that...

The original Grand Plan for trying out HelloFresh was that I'd put the order in so that my first delivery would arrive while I was taking time off work, and then cook every weeknight during my holiday - not only to give my girlfriend a rest, but to keep up my culinary confidence and give myself a little more to write about on this little foodie blog of mine. Naturally, this being real life, things didn't quite work out that way and, rather than ordering five nights of meals I ordered only three. On the upside, this probably makes for a more balanced comparison with Gousto. Also, since I chose the vegetarian option, all three recipies were for dishes both my girlfriend and I could enjoy equally, without having to find substitute ingredients for anything.

Since Easter was only a few days ago, the first recipe I tried was the one featuring the word 'Easter' in the name... not that I have any idea why...

I made my first mistake before even starting to cook, in that the recipe cards arrived in a cardboard wallet and, clearly having a bad day, I failed to notice on which side the wallet was open, and so I tore it open via the glued flap. You could say that sets the tone for the entire experiment but, as I write, I've only tried two of the three recipes, and I'm hoping the last will go better.

Each recipe card is digitally printed on an oddly-sized sheet of light card, with a nice, large photo of the finished dish - as it's intended to look - along with a pictorial list of required ingredients and an estimated preparation time. The back of the card features the ingredients list - including notes on potential allergens - a nutritional breakdown and, of course, the instructions. There are also photos, but only four running down the lefthand side of the card, so not every step in the process is accompanied by a photo. That's not necessarily a problem, as some steps hardly require illustrating. I know I said I wasn't going to critique the design but, if I can complain about holes being punched through timing instructions on one of the Gousto cards, I feel it is within my rights to complain about a terrible and avoidable text orphan on one of these - the last word in one of the steps sits, on its own, at the top of the second column, looking a bit silly.

This 'Easter Ragu' was supposed to take only 35 minutes but, as usual, it took me a hell of a lot longer because I'm terrible at chopping and didn't organise myself very well. I'm not sure how much longer it took, but I'd guess the total time can't have been much short of an hour.

Part of that would be the difficulty I had in locating some of the ingredients. At first, I thought at least two - the tomato purée and feta cheese, specifically - were missing, but my girlfriend found one and I later found the other myself. Some of the ingredients - particularly those coming in plastic sachets - are branded products, and therefore very easy to identify... others are plain bagged and labelled with little stickers... still others are just plain bagged. The feta was the only content of a cool bag which I'd assumed was included to keep some of the loose veg cool and fresh, while the tomato puree just looked remarkably like one of the ingredients for another recipe, as both were reddish substances in plain sachets.

The first instruction is to pre-heat the oven, but the oven only comes into play - for 20 minutes - at the end of the third step. My oven tends to heat up quickly enough that I rarely, if ever pre-heat... though that's more because I know I'm going to be slower than the recipe expects on the intermediate steps.

I also groan inwardly whenever the instruction 'chop finely' or 'finely dice' appears in a recipe because my knife-wielding skills are pretty dire. 'Fine' is something I have yet to achieve... 'haphazard' is more my style. This recipe calls for just about all the veg to be 'finely diced', from the garlic to the aubergine, while the basil was to be 'finely chopped'.

Let's just say I chopped them all... OK?

The aubergine was a particular trial as my kitchen knives - seriously in need of sharpening at this point - had great difficulty penetrating the aubergine's skin, and yet came perilously close to penetrating mine, with alarming ease, on a couple of occasions.

My problems with the aubergine didn't end there, though, as the 20 minutes of baking was probably a little too long in my oven, any the coating I gave them of olive oil was inadequate to prevent large amounts of it sticking to the foil on my baking tray.

The remainder of the recipe went smoothly enough, even though I had to substitute a tablespoon of tomato purée from my own stock, as the sachet supplied didn't become visible to me until the next day. I did wrestle with the quantities specified, as they tend to use 'cups' as a measure, but their website states that they use a 300ml coffee mug as their 'cup', which is larger than the 'standard' US cup size (not that I'm especially familiar with them) and so somewhat confusing. Bizarrely, the recipe specifies '2 cups' of chopped aubergine, but only one aubergine was supplied, and I'd say that amounted to substantially less than 2 cups, by their measures. It also specifies '1 cup' of tomato passata, but two 200g cartons were supplied and I didn't feel like trying to be precise about measuring out part of a carton, potentially letting the remainder go to waste.

Also, in my humble opinion, any recipe that measures green olives by tablespoons (when 2 sachets were provided) is just insane.

Nevertheless, the process was fairly simple, if a little messy at times, and I was genuinely and pleasantly surprised to find that the couscous had behaved exactly as it should have - soaking up the stock - in the time it had taken me to breeze through the complicated parts of the recipe.

As I was getting ready to serve it all up, I forewarned my girlfriend that it would be coming without the feta as it appeared not to have been supplied. Thankfully, she fished it out of its hiding place within about five seconds, because she was a bit more thorough in her investigation of the packaging than I had been. Swiftly and inexpertly crumbling the soft cheese over our portions, adding a few more bits of basil ripped from the remaining sprigs, our first HelloFresh vegetarian dinner may not have been pretty, but the end result of a fairly confused period of flailing in the kitchen was completely delicious.

Aside from the couscous, which I found quite bland... and I wonder if I should have used the entire stock pot, rather than the half specified. Then again, couscous tends to be intentionally bland, and one wouldn't want it to overpower the ragu. I'll definitely try this recipe again, probably doing certain things a little differently, to see if I can improve upon my first attempt.
Definitely not the same colour as the photo on the card,
and certainly not as tidily-presented, but very tasty.
I am utterly flummoxed by the name of this dish, and how it relates to 'Easter'... but also the structure and punctuation of the name seem misleading to me - the almond and aubergine are part of the ragu, not the couscous, so surely it should be "Greek Easter Ragu with Almond & Aubergine, served with Basil Couscous"?

If you think you might fancy giving HelloFresh a try (and are within the UK mainland), please feel free to use my referral code MPMDQT for an introductory discount. Yes, that also gets me a discount on my next order, but further deliveries are currently on hold while I complete this first set of recipes and consider how this system fits in with my current... erm... 'lifestyle'.

Saturday, 14 March 2015

Experiments with Gousto #1: Introduction & Mushroom Bolognese

A few weeks ago, I started seeing ads on the Tube for a couple websites which offered a service potentially very useful to those of a culinary persuasion. The idea is that you sign up and receive boxes of produce and recipes explaining what to do with said produce. Now, obviously, there's no shortage of recipe books available already, and myriad websites out there with a grand selection of recipes... but they don't supply the required ingredients in the precise quantities the recipe needs. These options basically take out all the legwork and let one concentrate on the cooking.

Because it's been absolutely ages since I did any significant cooking at home, and this blog has been languishing in deplorable neglect while I do other stuff, I figured these websites offer me the ideal opportunity to get back into cooking slowly and so, with my girlfriend out of town for a few days this last week, I thought I'd try doing myself some fully home-cooked meals.

Gousto was my first port of call - a site where one must select three meals, indicate whether they are meals for two or four, and then select a delivery date from those available (typically Wednesdays or Fridays). Of course, the very fact of the need to have ingredients delivered almost scuppered everything: I wouldn't be around to received them, so delivery had to be scheduled for a date after my girlfriend's return anyway... Consequently, we agreed that, this weekend, I'd be doing most of the cooking. For a change.

Of course, things are never that simple. While Gousto have an excellent selection of recipes, each meal is tailored either to vegetarians or omnivores. My girlfriend is vegetarian, but I'm not... and, frankly, some of their meat/fish dishes were far too tempting to pass up. I selected only one fully vegetarian dish for this experiment, then one of the others looked as though it could be adapted for a veggie (Gasp! Deviating from a recipe? Creativity?!), while the other was something I - selfishly - just had to try, so she'll have to figure something out for herself.

Ahem.

Gousto's produce comes very well packaged and insulated, with each component separately bagged or in small plastic tubs, all labelled as appropriate and a with detailed inventory offering 'Enjoy By' dates for each dish. This makes for very easy storage, as ingredients for each recipe can be collated and stored together, should you so desire, and organised so each recipe can be used while the produce is good and fresh. My first box came complete with a set of the three relevant recipe cards and a binder in which to store them, along with a 'Welcome' booket, a flyer showing next week's recipes (available before midnight tomorrow!) and a couple of offers from other companies.

The first recipe I tried, shortly after getting home from work yesterday, was the Mushroom Bolognese. I shan't reproduce the recipe here, just launch into how it all went...

Firstly, since it had been so long since I last did anything 'big' in the kitchen, I was feeling pretty cautious about everything. I tried to read through the whole instruction set before even starting, but misunderstood a couple of points and made a couple of mistakes - largely because I'm not at my best of a Friday evening. One side of each recipe card has a large photo of the finished dish and a full, photographic list of the ingredients required from the inventory supplied. Details on the front also include an estimated preparation time (40 minutes in this case), the origin of the recipe (Italian), its calorific, fat and protein content (completely over my head) and a rough guide to how far it fulfills one's 'Five-A-Day' (2/5, apparently).

On the reverse is a step-by-step guide to preparation, each step accompanied by a photograph of the relevant ingredients at some point in the procedure. It's written as if you complete one step before moving on to the next, though whether that's actually the intention seems doubtful considering some of the directions given. For example, preparing the linguine is a single isolated step but, in the time between completing that step and reaching the next step in which the linguine featured, it had quite successfully gummed itself together and into the colander I'd used to drain it. In practice, it may be more efficient to deal with any and all chopping before making a start on the cooking steps.

Some of the photos also left me feeling a little inadequate (quelle surprise!) due to their neat arrangements of neatly sliced and chopped and diced veg and fungi. My fingers are well trained for the use of a mouse and a keyboard... my skills with a kitchen knife are dubious at best.

One step pretty much required at least half a dozen hands as the contents of the pan had to be stirred constantly while also crumbling in a stock cube, adding tomato paste from a plastic tub, adding soy sauce from two plastic sachets, then adding a teaspoon of sugar and black pepper 'to taste'. Those last two ingredients are not supplied as, I guess, they're common enough kitchen staples... but having to grab them from their storage space while also dealing with the contents of the pan was a little tricky for me... Then again, perhaps all that means is that I need to invest a bit of time beforehand in clearing more of my worktop so everything can be placed closer to hand...

The final instruction is also a little unclear, in that it says to "stir the drained linguine through the mushroom sauce, adding the basil and cheese", while I suspect the cheese should probably only be added separately, to each portion, once served (even though the photo on the front depicts the cheese sitting on top of a large amount of the finished bolognese in what looks like a large ceramic dish). Adding it in while stirring the linguine into the bolognese meant that the cheese melted into the mixture and, inevitably, some glued itself to the pan.

One other significant problem with the instructions was the step detailed on the upper righthand side, as the hole punched through for the binder obliterates the time stated for stirring in the mushroom and garlic. I guessed five minutes (assuming a single-digit number going by the space) and that certainly had no detrimental effect on the end result.

...Which was absolutely delicious. I was glad to see the linguine loosening up as I stirred it into the sauce, and it warmed up nicely in the few final minutes of preparation. The mixture of 'grated' (thank you, Pampered Chef food chopper, though I ain't looking forward to cleaning it!) and chunkily-sliced mushroom worked nicely, the carrot and onion still had some bite to them, the basil added its subtle flavour and the cheese increased the overall richness of the dish. My girlfriend went so far as to say it was "better" than the bolognese she'd put together for a Quorn-based spaghetti thing we had last week, though that was of the more usual tomato and red wine variety, so I said there was no real comparison.

The dish takes about 40 minutes according to the recipe card but, what with one thing or another, I think it took at least an extra five minutes, despite trying to get through some of the later grating/chopping while the pasta was on the go. I still managed to serve it up piping hot, though, and it's a nice, easy recipe to start me off. Definitely something we'll try again at a later date, so these Experiments with Gousto are off to a good start.

I am, however, a little confused by the fact that the supplied balsamic vinegar is referenced on the front of the recipe card, but isn't mentioned anywhere in the instruction set, though I'm not sure where or why balsamic vinegar might be used anyway.
Sadly only one rather blurry photo of this, as I rather wanted to eat it
while it was still hot.
If you think you might fancy giving Gousto a try (and are within the UK mainland), please feel free to use my referral code GORDO45552 for an introductory discount. Yes, that also gets me a discount on my next order, but further deliveries are currently on hold while I complete this first set of recipes and consider how this system fits in with my current... erm... 'lifestyle'.