Search This Blog

Showing posts with label Cheese. Show all posts

Sunday, 26 December 2021

Christmas Dinner Burritos

One thing my girlfriend and I have tried to do each year is make Christmas Dinner a little different. I've yet to complete a post about Christmas 2016's festive Salmon En Croute with Mixed Veg, which we prepared for my folks when we stayed with them for a couple of nights over the festive season, and last year's turkey burgers were a bit of a disaster because I'd foolishly assumed that a burger should be 100% meat, regardless of the type of meat.

This year, we didn't need much discussion to decide on our alternative Christmas meal style. I'd been considering burritos for some time before Courtney even brought up the subject of making Christmas dinner plans, so that was my first suggestion... and she agreed straight away. I then started researching options for Christmas-appropriate rice as part of the filling, while Courtney looked into seasonal 'slaw recipes. She opted to use What The Cluck? from The Vegetarian Butcher, while I picked up a couple of packs of Bernard Matthews turkey chunks. In place of a salsa, we both agreed that a dollop of cranberry sauce would be reasonably appropriate, and so the plans were in place.

For the rice, I came up with a shortlist of three existing recipes from around the internet:

After due consideration, the Festive Rice option was selected, but was prepared in a pan, on the hob, rather than by baking, the 1/4 cup of butter and the mint were both entirely omitted, while the Feta was added to the burrito rather than incorporated into the rice mix. Courtney's 'slaw was a mix of red cabbage and red onion (both sliced quite thinly) with pomegranate seeds, as well as lime and orange juice, seasoned with a little salt and pepper. She'd intended to also add some chopped Brussels sprouts - which she'd bought especially - but it slipped her mind at the time.

Now, since we all know that turkey tends to be a bit on the bland side, and mixing up some gravy for the purposes of a burrito seemed rather pointless and wasteful, I figured I'd heat it up in a pan after coating it with Peri-Peri Salt. This involved just dumping a bit of sunflower oil into a small frying pan and then chucking the coated turkey chunks in once it was heated up and stirring them about till they started to brown in places. I somewhat underestimated how much oil I'd need, which led to small pieces of turkey adhering to the pan, but it worked well enough aside from that.

Assembling the burrito was a simple case of serving out a portion of rice onto a tortilla (warmed for 10 seconds in the microwave to ensure they were flexible enough for filling and rolling), crumbling over some Feta, scooping over some cranberry sauce, then adding some of the slaw. Courtney further embellished her burrito with some jalapeños and coriander, but neither are particularly agreeable to me, so I just had to make do with the basic ingredients. As a finishing touch, the burritos were returned to the pan for a bit of browning, and to help seal the seam.

The end result turned out really well - we're both fans of burritos, but have previously tended to rely on supermarket-bought sets for making them, and we tend to omit staples like the rice, focusing instead on the seasoned meat (or meat substitute), packed-in salsa, some sour cream and, at most, a home-made guacamole. Having a somewhat seasonal rice recipe, further spiced up by the Peri-Peri Salt, then sweetened by the fresh pomegranate, it was a comparatively light and sweet burrito, but filling nevertheless. This was also probably the first time we - or I, at least - have tried to properly roll our burritos rather than turn them into makeshift tubular pockets. I had to look up a couple of YouTube videos for the technique, and still got a bit confused, to be honest.

All in all, this is one of the most successful 'alternative Christmas' ideas we've had so far, yet it's still ripe for exploration into alternatives. I'm particularly keen to try the Puerto Rican Rice option - I felt that was probably the best fit for a burrito, albeit at the risk of overpowering everything else, but that was a risk I was willing to take with Bernard Matthews turkey chunks - and, having thought about it a little more, I'm wondering if mixing up a little gravy for the turkey wouldn't be such a bad idea after all.

We have sufficient leftovers of the rice and slaw for a decent dinner tonight, as well... I'm considering some Boxing Day 'sushi' using some sliced salmon I picked up a few days back, along with some Christmas spiced streaky bacon acquired in Iceland... Hopefully will be adding a few photos of that in the next few days.

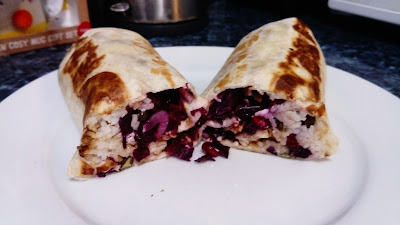
I'll leave you with a Binging With Babish-inspired cross-section, with apologies for the quality of the photo, as it was taken quite hurriedly, on my phone:
Wednesday, 16 May 2018

Experiments with Gousto #6: Sweet Mixed Pepper & Chive Risotto

Of all the Gousto recipes I've tried so far (cooking myself, that is), this is probably my favourite so far. It turned out to be pretty much as quick and easy as the recipe suggests, but there were still a couple of things I didn't get quite right...

For starters, I've got into the habit of doing as much chopping as possible in advance, since I can never be sure I'll be able to keep to the timings if I have to chop on the fly. For this one, I also put the sweet tomato stock together in advance. This almost came a-cropper before I'd started, as my usual jug is far smaller than the 700ml required, so I had to resort to a crappy (but larger) plastic jug from my Ikea kitchenware set. I don't particularly like using it - especially for hot things - but there's really no rational reason for that... I just prefer working with glass/Pyrex jugs where available.

I got my girlfriend to explain how she would go about dicing onion, because my 'method' invaribly ends up making a lot of mess and leaving me with streaming eyes. In fact, in a previous recipe (not one I've documented, as far as I can remember) I diced an onion using our mandoline with the additional blades intended for slicing potatoes into French Fries. This time, I just used a standard kitchen knife, though I did have to sharpen it beforehand.

I was a little concerned by step 4 of this recipe, where smoked paprika, ground turmeric and chopped garlic are added in along with the dry arborio rice, as I don't feel especially confident about adding dry rice to anything where there's not much liquid available. One of these days, I'm sure I'll just end up with Rice Krispies... Not this day, though... thankfully...

Also, to be honest, it's only in the pan for about a minute before the stock is gradually added in, and this stage takes about 15-20 minutes for it to be absorbed by the rice, while the sliced peppers are being roasted in the oven. I think I started this stage a little too late - with only about 17 minutes remaining on the peppers' cooking time - so I ended up switching the oven off for the last few minutes of the risotto's cooking time.

The fact that almost everything for this recipe comes together in a single frying pan is a huge bonus. It means less to keep an eye on, and less to wash up at the end. I do have a few objections to the act of adding cheese to something that's already a hot, sticky mess in a frying pan, because I know from previous experience how troublesome that sort of combination will be to clean afterward. I also found the cheese supplied to be extremely crumbly, which made grating it an absolute chore, and I came dangerously close to grating my fingertips whenever a chunk broke off.

To be perfectly honest, I'm not certain whether or not any pepper was added for seasoning, along with the cheese and chives, but I'm pretty confident - having tasted the end results - that it would work well enough without. The final stage was a bit of a rush, as I had to dish out the risotto, add the remaining peppers, cheese and chives, drizzle on a bit of olive oil (also, I strongly suspect, surplus to requirement), and take some photos before announcing that dinner was ready... and I hadn't even brought the camera into the kitchen in advance this time...

This is the first of the new batch of Gousto recipes that arrived yesterday, so the rest have a hard act to follow now. The next few will be interesting as, after tonight's, I'll actually be cooking for myself for a couple of nights, as Courtney's out for the evenings, then away for the weekend... and I'm not sure keeping some of the ingredients till she's back - even keeping them in the fridge - will be viable. Chances are, I'll be cooking up the whole recipe as usual, but keeping a portion in the fridge (or the freezer) till she's back.

Friday, 8 January 2016

Sriracha Tuna Melt

I am a big fan of the tuna melt and, despite having previously only done one write-up for a very cheaty home-made version and one shop-bought frozen version, it's something I have made for myself, from scratch, quite a few times by mixing up a tin of tuna, some mayonnaise and some capers, then slapping the result into what would otherwise be a humble toasted cheese sandwich.

This week, while I've been away from work due to a lingering illness, I had a moment of inspiration while searching my fridge for the capers: I noticed a small, squeezy bottle of Sriracha sauce (acquired from Yo Sushi months ago, as a result of ordering one of their specials) and wondered what that would taste like in a tuna melt...

...And so, here's the first post of 2016 - a quick, simple and spicy variant on an old favourite. Enjoy!

Ingredients:
  • Bread (2 slices per melt, I used Kingsmill 50/50)
  • Tuna Chunks (160g tin - 120g drained - makes 2-3 melts, depending on how generous you are with the tuna mix)
  • Mayonnaise (1.5 to 2 heaped tablespoons, depending on your preference and how high you heap)
  • Siracha Sauce (about 2 generous teaspoons, but basically according to your preference)
  • Mature Cheddar Cheese (grated or sliced according to your preference, I used Tesco ready-sliced from a 250g pack, but had to use just over 1 slice per melt due to the size of bread)
Preparation Time: Less than 10 minutes in total

Tools Required:
  • Tin Opener (duh)
  • Toaster (duh, again)
  • Small Bowl
  • Mixing Implement of Choice (such as a fork)
The Process: 
Preheat your grill to about 170C. Open the tin of tuna, drain thoroughly, then empty into the small bowl. Add mayonnaise and stir, then add the Sriracha sauce and stir in so it's all nice and even. Toast a slice of bread for the base of the melt, then spread the mix over evenly. Top with cheese, then place under the grille and start another slice of bread toasting for the top of the melt. While the timing may not be perfect for everyone, I've found that my toaster, on my preferred setting, finishes toasting at precisely the right moment for a nicely melted cheese topping, so the moment the second slice pops up, I took the melt out from under the grill and topped it with the second slice of toast.

The quantity of tuna mix makes at least 2 melts, so the most efficient way of doing it would be to make 2 simultaneously: toast 2 slices of bread, add the mix to both, top with cheese and pop both under the grill while toasting another 2 slices of bread.

The Results:
My only concern, going into this, was whether cheese was still a suitable accompaniment for a tuna melt imbued with the spicy power of Sriracha, but I needn't have worried. Just as supermarkets have so-called 'Mexican Cheese' which is basically cheddar with added chilli, the combination if spicy Sriracha and sharp mature cheddar is excellent. I'm not sure whether capers might still be able to add something worthwhile, or whether they would clash with the Sriracha, but I suppose there's no harm in finding out at a later date...

And if you're not a fan of the tuna melt, this concoction works equally well as the filling for a baguette, or if you fancy something hot in temperature as well as in spiciness, I'm sure it could be used as the topping of a baked potato.
Spicy Tuna Melty Perfection!

Thursday, 5 November 2015

Morrisons Kitchen Made to Share Selection

Well, who'd have thought it? Another Thursday, another post about guilty pleasure foodstuffs. Generous readers might be tempted to credit me with foresight, or think I actually planned this.

Truth be told, when I picked out a selection of (reasonably) quick and easy things from the Made to Share range at my local Morrisons, my girlfriend did suggest I could write it up for this 'ere blog but, since the last choice in my "3 for £5" selection was their Smoky BBQ Mini Ribs, there seemed a strong chance I was in for a very disappointing meal and I'd basically decided there would be no write-up. After all, long-term readers if this humble blog will know that my experience with ribs in the UK has been decidedly mixed.

The full Made to Share snack dinner I cooked just for myself this evening, aside from the ribs, featured the amusingly alliterative BBQ Pulled Pork Pockets and the old favourite Loaded Potato Skins. Setting them all up to cook should have been very easy, but my attention lapsed on the final stage and, having timed everything carefully up to that point (25 minutes for the ribs on their own, adding the potato skins for two minutes, then finally adding the pockets for the remaining 13 minutes of the 40 minute total) I neglected to activate the kitchen timer and had to guess when the final 13 minutes had elapsed. If anything, it all stayed in the oven a little too long, though. On the upside, I did notice that the instructions for the ribs state that they should be allowed to stand for a minute before serving. I doubt that's where I've gone wrong in the past, but it's something I'll look out for in future.

As far as the Loaded Potato Skins go, there's really not much to say... They never work especially well when home-cooked, often sticking to the baking tray and splitting apart when removed. They're ultimately just slightly hollowed out thick slices of potato filled with cheese and bacon and, in the case of this package, supplied with a soured cream and garlic dip. This kind of this is good and filling, but never really outstanding in any way.

The BBQ Pulled Pork Pockets were something reasonably new... kind of like miniature Cornish pasties, but filled only with pulled pork. I can't say the BBQ aspect was particularly impressive, but the pockets were at least properly full... if rather small. Probably the most outstanding feature of the pack was that it contained nine pockets - I guess they're acknowledging that a pack of these might actually be bought as part of a selection to be shared between three people, rather than the more usual two or four...

And so we come to the ribs... which were actually pretty good. Each rib had a decent quantity of meat attached and I didn't find any large blobs of gristle or fat (though there were one or two bone fragments). The meat looked good - with none of the rubberiness, toughness or over-dryness that can occur with supermarket ribs - and, while it didn't actually melt off the bone, it tasted more or less as I'd expect pork ribs to taste. The sauce was even fairly impressive for a supermarket own-brand product - not the strong barbecue taste that I prefer, but certainly not the disappointing non-flavour that is so often applied to this kind of thing. It was possibly a little oversweet, given the lack of full-on smoky flavour, but it wasn't sickly. Had I actually set them out in a more sensible ovenproof container than the small, circular Pyrex bowl I pulled out of the cupboard, so that they were all laid out flat rather than jumbled up, and given equal access to the sauce, they might even have turned out the way they look on the packaging photograph. As it was, the sauce didn't have much of a chance to crisp up anywhere. It did actually adhere to the ribs fairly well, though, and I didn't have to scoop the sauce out of the bowl to drizzle it over any of the ribs.

So while I was expecting something bland and disappointing, what I got actually went some way towards restoring my faith in supermarket ribs... and, having tried Iceland's Jim Beam chicken tenders, I'm far more inclined to give the boozy-sauce-enhanced ribs a try than I was before this evening.

Thursday, 22 October 2015

Iceland Let's Eat American Loaded Burger with Pulled Pork & BBQ Sauce

One of the guilty pleasures of the occasional evening when my girlfriend goes out is the option to eat something quick and dirty. More often than not, I've tended to pop to one of the local takeaways, or the local KFC but, since the latter recently gave me a case of food poisoning that lasted through at least half my recent holiday to Chicago, I'm starting to think better of all that.

Yet, still, the urge to have something quick and dirty is strong, almost undeniable... and so, while trawling my local Iceland for something vaguely sensible (their Pizza Pala range, while currently small, is worth a look), my wandering eye alighted upon a selection called Let's Eat American. Having only recently been in that very country, you can imagine my curiosity was piqued. There's quite a variety of products in this line, but there's nothing quicker or dirtier than a burger that you cook in the microwave.

Nothing, that is, other than a burger with pulled pork slapped on top that you cook in a microwave.

The product comes in a (frankly, oversized) cardboard box containing two separate bags - one with the burger and pork in a plastic tray, the other with the ready-cut sesame seed bun - which must be irradiated separately, the former taking four minutes, the latter a mere thirty seconds. After that, it's just a case of opening the bags, removing their contents, and throwing them together.

The result is, naturally, nothing like the picture on the box. For starters, the edges of the burger/pork crisp up and stick to the sides of the tray, so it doesn't look as moist or appetising as the promotional image. There's also some weird, gelatinous stuff in there which I generously presumed to be some sort of cheese component. The packaging does describe the contents as "A cooked quarter pounder beefburger, topped with a BBQ flavour sauce, pulled pork, fried onions and grated red Cheddar cheese", but it's clearly a miserly quantity of cheese that ends up as a mildly disturbing goop that's not even plentiful enough to ooze convincingly... it just sort of lurks, looking unappetising. And, if there are fried onions in there, I can't say I encountered any... but then, in all honesty, I can't say I encountered anything "BBQ flavour" either.

The pork itself is not bad, but it certainly lacks flavour - and not just the BBQ flavour of the questionable sauce. The texture is good and, for something that's been microwaved from frozen, it was nice to see it didn't turn out too soggy or too dry - microwaving frequently goes one way or the other, and it's very difficult to fine-tune the timings for a better result. The burger, meanwhile, was decidedly average for this type of product... which is to say of limited flavour, dubious texture, and with a quantity of gristle/bone flecks sufficient to make the likes of me wary of the next bite.

That said, for a mere £1.50, it's not offensively bad - the burger is certainly a decent size (slightly larger than the bun, in fact) and the quantity of pulled pork is reasonable - but given the underwhelming flavour and the typically rubbery nature of the microwaved bun, this isn't a product I'll be picking up again in a hurry.

Friday, 10 April 2015

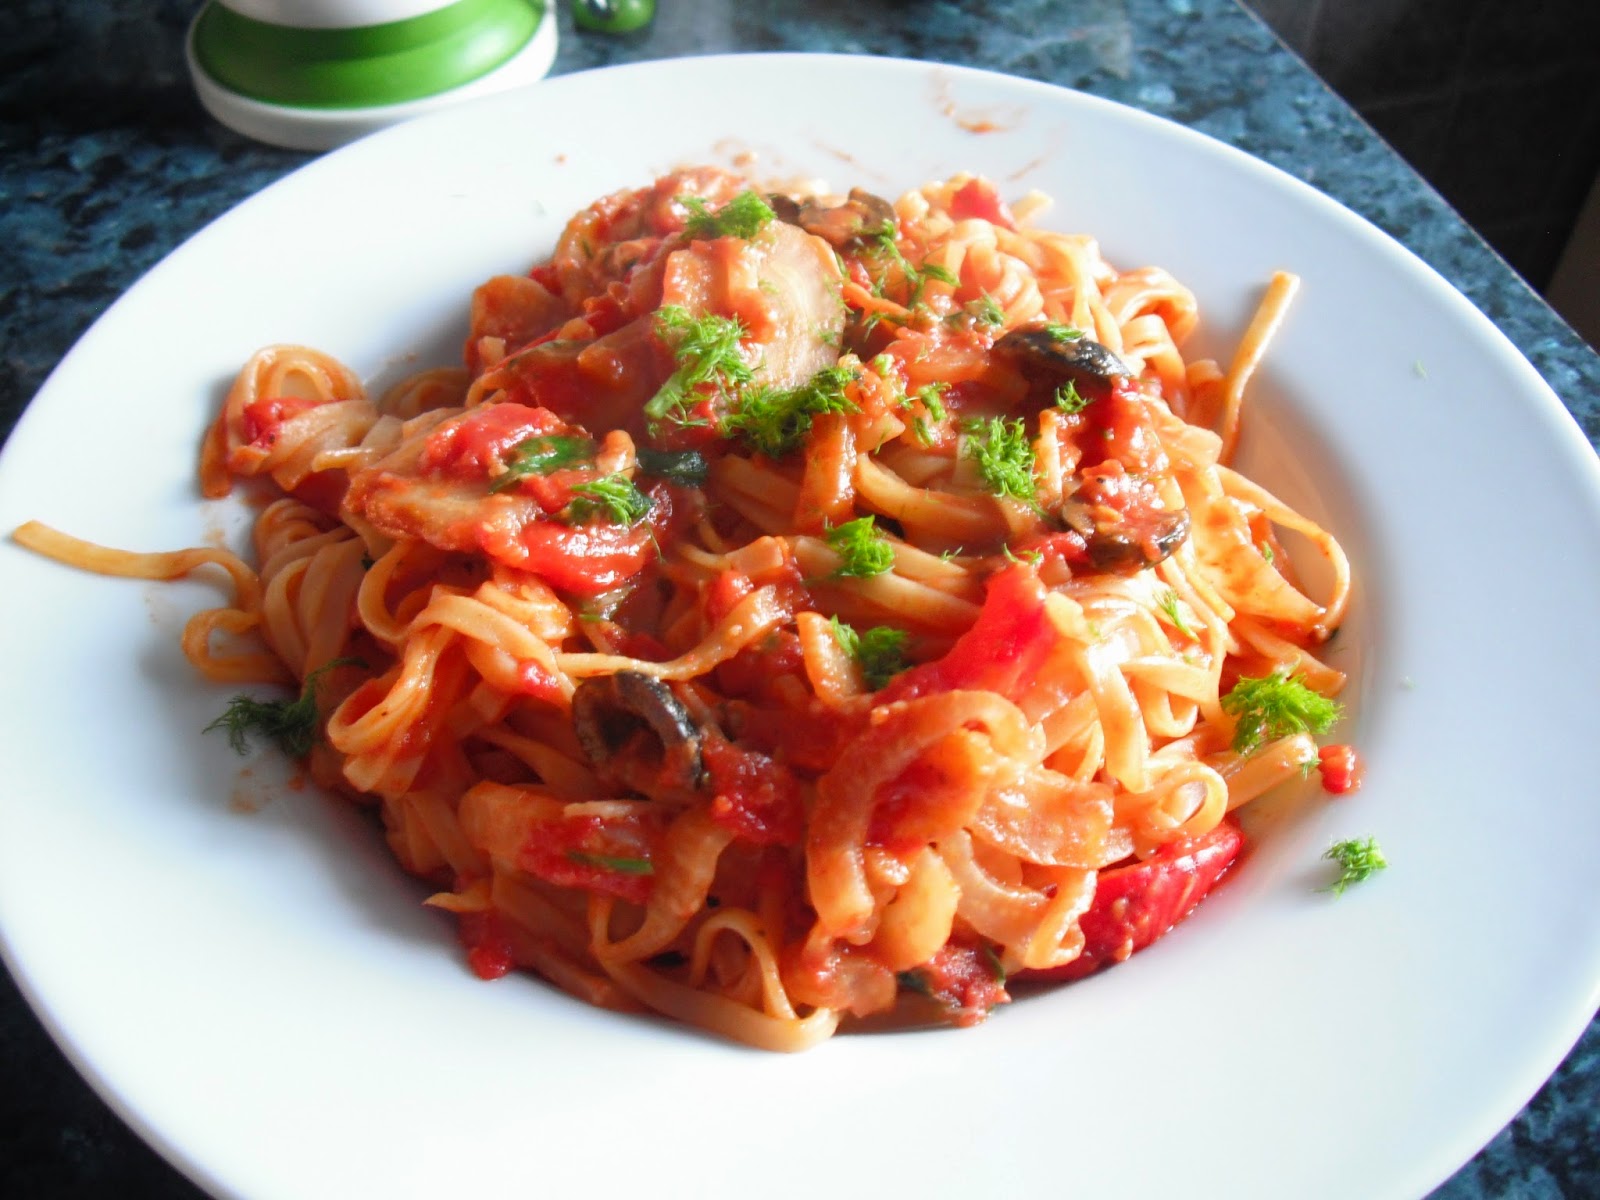
Experiments with HelloFresh #3: Fennel & Olive Fettuccine with Fresh Parsley

No, I haven't forgotten how to count, this should really have been the final post, but I'm temporarily skipping the second for reasons I'll get into when I finally post it. I'll also do the summing-up with that post rather than this one, as it'll make more sense that way.

As much as anything on this blog makes sense, that is.

After doing things in my usual haphazard fashion on the first recipe, my girlfriend mentioned that, when she's cooking, she'll often do snippets of preparatory chopping throughout the day, by way of a five minute break from her studies. While I wasn't quite that organised, I did make a start on this earlier in the evening than with any of my previous efforts, and did most of the chopping in advance of any of the actual cooking. I also followed another bit of her advice: she'd seen and heard my frustration with all the 'finely chop ingredient x' malarky in the first post and, when it came to the garlic, she suggested I simply use our garlic press. The end result is basically the same, if not better, and saves on an awful lot of effort. It was also nice to have a genuine reason to use my mortar and pestle for a change, grinding the fennel seeds - I knew I'd bought it for a reason...

I was particularly tickled, too, when the instructions helpfully suggested a mandolin for thinly slicing the fennel. My girlfriend picked one up a while back and, while it's not quite fine enough to generate the 'almost translucently thin' slices the instructions specified, it certainly made short work of slicing the awkwardly-shaped fennel bulb.

Once the chopping was out of the way, I read through the instructions several times over. Unlike the first two recipes, there weren't any massive glitches in the ingredient quantities (although specifying '2 cups' of sliced fennel bulb seemed redundant considering only one bulb was provided, and I kinda had to use the whole thing one way or another), so I really just wanted to be sure of what I needed to do next at every step, and to get a vague idea of the timings before starting things off. The second step in the recipe is cooking the red pepper strips, for which it recommends "15 mins or until lightly charred on the outside". The next step is cooking the rest of the veg in a pan, eventually turning it into a sauce for the pasta. The timings seemed to match up pretty well, so I started each process almost simultaneously, just to see if I could keep things on track.

The sauce comes together in several short stages that I found reasonably easy to follow since I had everything ready-prepared around me. The only hitch I'd had was that this recipe calls for black olives, and I definitely didn't get any black olives in the box. Thankfully, my girlfriend really likes olives, so we tend to have some in stock. The only real difficulty then was that, again, it specified the olive content as '2 tablespoons', which I still say is an utterly ridiculous measure for bisected fruit. Still, the definition gleaned from the first recipe helped me choose the appropriate number of olives for this dish. When the tinned tomatoes are added to the pan, the recipe suggests adding sugar but I've never found that necessary - tomatoes are sweet enough and, coupled with the rest of the veg, there's enough sugar in there naturally for my tastebuds. And that's saying something.

Once everything is in the pan, the recipe instructs that the heat should be turned down low so the sauce can boil down and thicken up, and it's at this point that the pasta needs to be cooked. Personally, I found it amusing that the card includes a definition of 'al dente' under the heading 'Tip', but your mileage may vary.

Just to prove that I'm not consistently terrible at cooking, the pasta was done only moments before the oven's alarm went off to tell me that the red pepper strips were ready, so both elements were added to the sauce in the pan in good time. The final stage was chucking in the parsley and the cheese (which strikes me as odd, and one of the Gousto recipes did the same, where my girlfriend and I would normally tend to add the cheese on top, once the meal had been served... not least because it means you don't end up having to scrape congealed cheese off your pan when you do the washing up). With a final garnish of - oh, for fuck's sake - 'finely chopped' fennel fronds, dinner was served...

Based on the two recipes I bothered photographing myself, I have to conclude that there's something wrong with HelloFresh's photography or their Photoshop work, as both this and the 'Easter' Ragu were depicted as rather brown in the stock photos, while they tended more toward red when I'd finished cooking... and I'm pretty sure I didn't get anything that significantly wrong on either of these.

As we were eating, my girlfriend commented that the fennel was identifiable in the sauce, but not overpowering, as fennel can sometimes be - being almost licorice in flavour. I certainly enjoyed the dish, but have to say I found it rather bland overall... it's possible I gave it too few "good grinds of black pepper", or that the chilli was just cooked for too long - it didn't have the spicy kick I was expecting, given that the first instruction says to "finely chop as much of the chilli as you dare". Perhaps I'll have to try this one again, and deliberately try to spice it up as much as possible...

This was definitely the easiest of the three HelloFresh recipes for me to follow, though how much of that was down to me doing more preparatory work in advance, and how much was because the recipe is actually easier, I cannot say. What I will say is that the card reckons this should be done in about 25 minutes, and I took the best part of an hour over it. Admittedly, most of that was due to taking my time over the preparatory work and my neurotic re-reading of the instructions, but that's a hell of a discrepancy. Not to say I particularly rate myself as any kind of kitchen ninja, but the folks at HelloFresh do seem to presume a level of competence far higher than mine.
Probably the neatest presentation I've ever managed when cooking
for myself and my girlfriend...

If you think you might fancy giving HelloFresh a try (and are within the UK mainland), please feel free to use my referral code MPMDQT for an introductory discount. Yes, that also gets me a discount on my next order, but further deliveries are currently on hold while I complete this first set of recipes and consider how this system fits in with my current... erm... 'lifestyle'.

Thursday, 9 April 2015

Experiments with HelloFresh #1: Greek Easter Ragu with Almond, Aubergine & Basil Couscous

Around the time I was making a start on my trio of Gousto posts, I was planning my first foray into HelloFresh. On the surface, both offer much the same sort of service, with a different range of recipes and a very different style of presentation. From the moment of delivery (quite late in the day, on their 0900-1700 delivery 'slot'), HelloFresh appears to be more of a brand, with a personalised box containing not only ingredients and recipes but a welcome booklet introducing the HelloFresh team and their suppliers, as well as offering hints and tips for getting the most out of the service. There was also a copy of their monthly newsletter, The Fresh Times, and a whole slew of advertising flyers offering discount codes for clothing, beers and a 'smoothie starter pack' courtesy of partner companies... some of whom also seem to share the design agency used by HelloFresh, as the style of their flyers is more than a little similar.

But, while I may work in publishing and occasionally spend my days creating such flyers, I'm not here to critique that aspect of the product. Hell, I'd need a whole new blog if I wanted to get into that...

The original Grand Plan for trying out HelloFresh was that I'd put the order in so that my first delivery would arrive while I was taking time off work, and then cook every weeknight during my holiday - not only to give my girlfriend a rest, but to keep up my culinary confidence and give myself a little more to write about on this little foodie blog of mine. Naturally, this being real life, things didn't quite work out that way and, rather than ordering five nights of meals I ordered only three. On the upside, this probably makes for a more balanced comparison with Gousto. Also, since I chose the vegetarian option, all three recipies were for dishes both my girlfriend and I could enjoy equally, without having to find substitute ingredients for anything.

Since Easter was only a few days ago, the first recipe I tried was the one featuring the word 'Easter' in the name... not that I have any idea why...

I made my first mistake before even starting to cook, in that the recipe cards arrived in a cardboard wallet and, clearly having a bad day, I failed to notice on which side the wallet was open, and so I tore it open via the glued flap. You could say that sets the tone for the entire experiment but, as I write, I've only tried two of the three recipes, and I'm hoping the last will go better.

Each recipe card is digitally printed on an oddly-sized sheet of light card, with a nice, large photo of the finished dish - as it's intended to look - along with a pictorial list of required ingredients and an estimated preparation time. The back of the card features the ingredients list - including notes on potential allergens - a nutritional breakdown and, of course, the instructions. There are also photos, but only four running down the lefthand side of the card, so not every step in the process is accompanied by a photo. That's not necessarily a problem, as some steps hardly require illustrating. I know I said I wasn't going to critique the design but, if I can complain about holes being punched through timing instructions on one of the Gousto cards, I feel it is within my rights to complain about a terrible and avoidable text orphan on one of these - the last word in one of the steps sits, on its own, at the top of the second column, looking a bit silly.

This 'Easter Ragu' was supposed to take only 35 minutes but, as usual, it took me a hell of a lot longer because I'm terrible at chopping and didn't organise myself very well. I'm not sure how much longer it took, but I'd guess the total time can't have been much short of an hour.

Part of that would be the difficulty I had in locating some of the ingredients. At first, I thought at least two - the tomato purée and feta cheese, specifically - were missing, but my girlfriend found one and I later found the other myself. Some of the ingredients - particularly those coming in plastic sachets - are branded products, and therefore very easy to identify... others are plain bagged and labelled with little stickers... still others are just plain bagged. The feta was the only content of a cool bag which I'd assumed was included to keep some of the loose veg cool and fresh, while the tomato puree just looked remarkably like one of the ingredients for another recipe, as both were reddish substances in plain sachets.

The first instruction is to pre-heat the oven, but the oven only comes into play - for 20 minutes - at the end of the third step. My oven tends to heat up quickly enough that I rarely, if ever pre-heat... though that's more because I know I'm going to be slower than the recipe expects on the intermediate steps.

I also groan inwardly whenever the instruction 'chop finely' or 'finely dice' appears in a recipe because my knife-wielding skills are pretty dire. 'Fine' is something I have yet to achieve... 'haphazard' is more my style. This recipe calls for just about all the veg to be 'finely diced', from the garlic to the aubergine, while the basil was to be 'finely chopped'.

Let's just say I chopped them all... OK?

The aubergine was a particular trial as my kitchen knives - seriously in need of sharpening at this point - had great difficulty penetrating the aubergine's skin, and yet came perilously close to penetrating mine, with alarming ease, on a couple of occasions.

My problems with the aubergine didn't end there, though, as the 20 minutes of baking was probably a little too long in my oven, any the coating I gave them of olive oil was inadequate to prevent large amounts of it sticking to the foil on my baking tray.

The remainder of the recipe went smoothly enough, even though I had to substitute a tablespoon of tomato purée from my own stock, as the sachet supplied didn't become visible to me until the next day. I did wrestle with the quantities specified, as they tend to use 'cups' as a measure, but their website states that they use a 300ml coffee mug as their 'cup', which is larger than the 'standard' US cup size (not that I'm especially familiar with them) and so somewhat confusing. Bizarrely, the recipe specifies '2 cups' of chopped aubergine, but only one aubergine was supplied, and I'd say that amounted to substantially less than 2 cups, by their measures. It also specifies '1 cup' of tomato passata, but two 200g cartons were supplied and I didn't feel like trying to be precise about measuring out part of a carton, potentially letting the remainder go to waste.

Also, in my humble opinion, any recipe that measures green olives by tablespoons (when 2 sachets were provided) is just insane.

Nevertheless, the process was fairly simple, if a little messy at times, and I was genuinely and pleasantly surprised to find that the couscous had behaved exactly as it should have - soaking up the stock - in the time it had taken me to breeze through the complicated parts of the recipe.

As I was getting ready to serve it all up, I forewarned my girlfriend that it would be coming without the feta as it appeared not to have been supplied. Thankfully, she fished it out of its hiding place within about five seconds, because she was a bit more thorough in her investigation of the packaging than I had been. Swiftly and inexpertly crumbling the soft cheese over our portions, adding a few more bits of basil ripped from the remaining sprigs, our first HelloFresh vegetarian dinner may not have been pretty, but the end result of a fairly confused period of flailing in the kitchen was completely delicious.

Aside from the couscous, which I found quite bland... and I wonder if I should have used the entire stock pot, rather than the half specified. Then again, couscous tends to be intentionally bland, and one wouldn't want it to overpower the ragu. I'll definitely try this recipe again, probably doing certain things a little differently, to see if I can improve upon my first attempt.
Definitely not the same colour as the photo on the card,
and certainly not as tidily-presented, but very tasty.
I am utterly flummoxed by the name of this dish, and how it relates to 'Easter'... but also the structure and punctuation of the name seem misleading to me - the almond and aubergine are part of the ragu, not the couscous, so surely it should be "Greek Easter Ragu with Almond & Aubergine, served with Basil Couscous"?

If you think you might fancy giving HelloFresh a try (and are within the UK mainland), please feel free to use my referral code MPMDQT for an introductory discount. Yes, that also gets me a discount on my next order, but further deliveries are currently on hold while I complete this first set of recipes and consider how this system fits in with my current... erm... 'lifestyle'.

Saturday, 14 March 2015

Experiments with Gousto #1: Introduction & Mushroom Bolognese

A few weeks ago, I started seeing ads on the Tube for a couple websites which offered a service potentially very useful to those of a culinary persuasion. The idea is that you sign up and receive boxes of produce and recipes explaining what to do with said produce. Now, obviously, there's no shortage of recipe books available already, and myriad websites out there with a grand selection of recipes... but they don't supply the required ingredients in the precise quantities the recipe needs. These options basically take out all the legwork and let one concentrate on the cooking.

Because it's been absolutely ages since I did any significant cooking at home, and this blog has been languishing in deplorable neglect while I do other stuff, I figured these websites offer me the ideal opportunity to get back into cooking slowly and so, with my girlfriend out of town for a few days this last week, I thought I'd try doing myself some fully home-cooked meals.

Gousto was my first port of call - a site where one must select three meals, indicate whether they are meals for two or four, and then select a delivery date from those available (typically Wednesdays or Fridays). Of course, the very fact of the need to have ingredients delivered almost scuppered everything: I wouldn't be around to received them, so delivery had to be scheduled for a date after my girlfriend's return anyway... Consequently, we agreed that, this weekend, I'd be doing most of the cooking. For a change.

Of course, things are never that simple. While Gousto have an excellent selection of recipes, each meal is tailored either to vegetarians or omnivores. My girlfriend is vegetarian, but I'm not... and, frankly, some of their meat/fish dishes were far too tempting to pass up. I selected only one fully vegetarian dish for this experiment, then one of the others looked as though it could be adapted for a veggie (Gasp! Deviating from a recipe? Creativity?!), while the other was something I - selfishly - just had to try, so she'll have to figure something out for herself.

Ahem.

Gousto's produce comes very well packaged and insulated, with each component separately bagged or in small plastic tubs, all labelled as appropriate and a with detailed inventory offering 'Enjoy By' dates for each dish. This makes for very easy storage, as ingredients for each recipe can be collated and stored together, should you so desire, and organised so each recipe can be used while the produce is good and fresh. My first box came complete with a set of the three relevant recipe cards and a binder in which to store them, along with a 'Welcome' booket, a flyer showing next week's recipes (available before midnight tomorrow!) and a couple of offers from other companies.

The first recipe I tried, shortly after getting home from work yesterday, was the Mushroom Bolognese. I shan't reproduce the recipe here, just launch into how it all went...

Firstly, since it had been so long since I last did anything 'big' in the kitchen, I was feeling pretty cautious about everything. I tried to read through the whole instruction set before even starting, but misunderstood a couple of points and made a couple of mistakes - largely because I'm not at my best of a Friday evening. One side of each recipe card has a large photo of the finished dish and a full, photographic list of the ingredients required from the inventory supplied. Details on the front also include an estimated preparation time (40 minutes in this case), the origin of the recipe (Italian), its calorific, fat and protein content (completely over my head) and a rough guide to how far it fulfills one's 'Five-A-Day' (2/5, apparently).

On the reverse is a step-by-step guide to preparation, each step accompanied by a photograph of the relevant ingredients at some point in the procedure. It's written as if you complete one step before moving on to the next, though whether that's actually the intention seems doubtful considering some of the directions given. For example, preparing the linguine is a single isolated step but, in the time between completing that step and reaching the next step in which the linguine featured, it had quite successfully gummed itself together and into the colander I'd used to drain it. In practice, it may be more efficient to deal with any and all chopping before making a start on the cooking steps.

Some of the photos also left me feeling a little inadequate (quelle surprise!) due to their neat arrangements of neatly sliced and chopped and diced veg and fungi. My fingers are well trained for the use of a mouse and a keyboard... my skills with a kitchen knife are dubious at best.

One step pretty much required at least half a dozen hands as the contents of the pan had to be stirred constantly while also crumbling in a stock cube, adding tomato paste from a plastic tub, adding soy sauce from two plastic sachets, then adding a teaspoon of sugar and black pepper 'to taste'. Those last two ingredients are not supplied as, I guess, they're common enough kitchen staples... but having to grab them from their storage space while also dealing with the contents of the pan was a little tricky for me... Then again, perhaps all that means is that I need to invest a bit of time beforehand in clearing more of my worktop so everything can be placed closer to hand...

The final instruction is also a little unclear, in that it says to "stir the drained linguine through the mushroom sauce, adding the basil and cheese", while I suspect the cheese should probably only be added separately, to each portion, once served (even though the photo on the front depicts the cheese sitting on top of a large amount of the finished bolognese in what looks like a large ceramic dish). Adding it in while stirring the linguine into the bolognese meant that the cheese melted into the mixture and, inevitably, some glued itself to the pan.

One other significant problem with the instructions was the step detailed on the upper righthand side, as the hole punched through for the binder obliterates the time stated for stirring in the mushroom and garlic. I guessed five minutes (assuming a single-digit number going by the space) and that certainly had no detrimental effect on the end result.

...Which was absolutely delicious. I was glad to see the linguine loosening up as I stirred it into the sauce, and it warmed up nicely in the few final minutes of preparation. The mixture of 'grated' (thank you, Pampered Chef food chopper, though I ain't looking forward to cleaning it!) and chunkily-sliced mushroom worked nicely, the carrot and onion still had some bite to them, the basil added its subtle flavour and the cheese increased the overall richness of the dish. My girlfriend went so far as to say it was "better" than the bolognese she'd put together for a Quorn-based spaghetti thing we had last week, though that was of the more usual tomato and red wine variety, so I said there was no real comparison.

The dish takes about 40 minutes according to the recipe card but, what with one thing or another, I think it took at least an extra five minutes, despite trying to get through some of the later grating/chopping while the pasta was on the go. I still managed to serve it up piping hot, though, and it's a nice, easy recipe to start me off. Definitely something we'll try again at a later date, so these Experiments with Gousto are off to a good start.

I am, however, a little confused by the fact that the supplied balsamic vinegar is referenced on the front of the recipe card, but isn't mentioned anywhere in the instruction set, though I'm not sure where or why balsamic vinegar might be used anyway.
Sadly only one rather blurry photo of this, as I rather wanted to eat it
while it was still hot.
If you think you might fancy giving Gousto a try (and are within the UK mainland), please feel free to use my referral code GORDO45552 for an introductory discount. Yes, that also gets me a discount on my next order, but further deliveries are currently on hold while I complete this first set of recipes and consider how this system fits in with my current... erm... 'lifestyle'.

Thursday, 25 December 2014

Christmas Dinner... Pizza-style

In a recent post, I explored the possibility of turning the humble pizza - whose leftovers can so often form a 'breakfast of champions' the morning after - into an actual all-day breakfast, with surprisingly good results. Coincidentally I had a similar sort of thing on my recent trip to LA, eating a 'Sunny Side Up Bacon and Potato' pizza - a seasonally inspired special at California Pizza Kitchen. Pizza is, after all, one of the most universally adaptable forms of food.

So, when my girlfriend and I started discussing how we would deal with Christmas dinner - since one of us would certainly not be partaking of the traditional turkey - one of the earliest suggestions, directly inspired by the All Day Breakfast idea, was 'Christmas Dinner Pizza'.

The most obvious necessity for my pizza was Gilbert's Turkey Roll Pastrami (bought at Morrisons) which, with its black pepper-coating, has made for some rather tasty sandwiches for my lunches during the working week. After that, it was a case of determining what other Christmas Dinner staples should be included. Potato would have involved rather too much wastage, sprouts and most other veg were easy passes. What I really wanted to include, somehow, was stuffing and cranberry sauce. We'd picked up some dried cranberries for some cookies that we've baked to take over to my folks tomorrow, but just adding dried fruit to the pizza seemed weird. Thankfully, I noticed, nestled in our fridge, a pack of Yorkshire Wensleydale with cranberries (also from Morrisons), and so chopped off a few small pieces to scatter around.

I'm a huge fan of 'pigs in blankets' - small pork sausages wrapped in streaky bacon - which tend to be served as part of Christmas dinner at my folks', so I also bought a pack of them - eight were arranged on the pizza, the last two in the pack were left separate. Upon reflection, I think I probably should have picked up the 12-pack rather than the 10-pack, since that would have given me four overs, which could have been kept aside for our evening meal.

The final ingredient was an idea borrowed from my girlfriend - she'd added pickled red cabbage to her vegetarian version of a Christmas pizza (featuring pieces of a Quorn 'Turkey' Burger), which made it all nice and colourful, so I figured I'd add some to mine as well.
Before. Note that the pigs in blankets had already had about 10 minutes in
the oven prior to being added to the pizza for this shot. The stuffing had
been cooked separately, according to its own instructions
So, after about 10-12 minutes in my oven, the pigs in blankets were done to perfection, the Wensleydale and cranberry had melted into the mozzarella, the stuffing was nicely crisped, and the end result looked like this:
After... But before I scoffed it all down. Obviously.
I must confess to some surprise that this turned out as well as it did - particularly with the addition of the Wensleydale with cranberry (that, being such an unusual and late addition to the range of flavours, was the wild card, but the overall effect worked very well). I mean, OK, it's unlikely that I'd ever complain about something involving pigs in blankets, I already knew the turkey pastrami was nice (rather more moist than the average roast turkey!), and stuffing is little more than additional herbs... but there was plenty of room for it to be terrible simply because it's a bit of a jumble.

The only thing that did go slightly wrong was the pickled cabbage, which could have done with a bit more draining before it was chucked onto the pizza, as it ended up soaking right through and causing a damp patch in the middle of the base.

I had been a little concerned about the stuffing, as my girlfriend started preparing the whole packet, where I'd intended only to make a small amount, rolling into balls to distribute around the pizza. However, even once cooked in an oven-proof dish, the stuffing below the crisp surface remains moist and malleable, and easily stands up to further time in the oven. I ended up not shaping it as it was still rather hot when we started making the pizzas, but I think that just adds to the 'hand-made charm' of my pizza.

A decidedly tasty and tidy Christmas dinner, with very little washing up required afterward... and so another success for pizza as a method of preparation.

Sunday, 10 August 2014

All-Day Breakfast Pizza

Yes, you read that right... All-Day Breakfast, but on a Pizza.

Oh, come on, it can't possibly be the most revolting pizza topping you've heard of unless you missed Teenage Mutant Ninja Turtles the first time round, when they were cool (allegedly - I beg to differ), back in the 80s (or was it the 90s?). I'm pretty sure I remember one TMNT-branded pizza that involved ice cream, for crying out loud.

And surely I need not mention Iceland's doner kebab pizza?

So here's the thing: my girlfriend and I have been home-making pizzas once in a while - sometimes baking the bases (made from a Wright's flour mix or Supermarket equivalent, though we will eventually make our own from scratch), other times purchasing a ready-made base. Once the base is sorted, pizza is the easiest thing in the world to prepare: slather on the tomato purée, chuck on some cheese, apply toppings with impunity, bake for 10-15 minutes, then consume while still nice, hot and melty.

I hadn't originally planned to make an all-day breakfast pizza. Originally, I was just going to be topped with halves of the pork and bacon cocktail sausages I'd picked up in Morrisons... But when my girlfriend decided to experiment by cracking an egg over her artichoke, olive and goat's cheese pizza, the thought occurred to me that adding an egg to something that already contained tomato, sausage and bacon (of a sort) basically turned it into an all-day breakfast.

The egg element turned out to be rather more complicated than expected... but that's where being second in line for the oven came in handy. Typically, when making a pizza with a ready-baked base, one cooks the pizza just long enough to get the beginnings of browning on the cheese - generally about ten minutes. The egg, we thought, should only take about five additional minutes at pizza-baking temperatures, making a total cooking time of fifteen minutes.

Whether it was the combination of ingredients already on the pizza, or the fact that she checked its progress by opening the oven, the egg on my girlfriend's pizza needed an additional ten minutes... and even then, the white was still quite runny, while the yolk was effectively soft-boiled.

So, for mine, I cooked the basic tomato/cheese/sausage pizza for only five minutes, then cracked the egg into the centre and slapped it back in the oven for ten minutes. Still the same fifteen minute stay in the oven, but without interruption. The end result for me was a much firmer white, but pretty much the same 'soft-boiled' yolk. Look on my works, ye Mighty, and despair:

It turned out pretty good... While I'm still rather dubious of the idea of egg on a pizza - and, frankly, the whole concept of an all-day breakfast pizza - I'm going to call this a success... While we normally stick to Mozzarella as our formaggio preferito, I had noticed bags of "Four Cheese Mix" on Morrisons' shelves - a melange of grated Mozzarella, Edam, mature cheddar and Monterey Jack cheeses which was just begging to be used as pizza topping. It melted nicely and evenly and had that little bit more bite, in and of itself, than Mozzarella on its own.

The flavour of both the sausages and the egg held up remarkably well against the tag-team of cheeses... the only caveat being that, in retrospect, it's rather an underachieving all-day breakfast. At the very least, it could have done with some seasoning - a little pepper, if nothing else.

The more I think about it, though, the more I wonder if it wouldn't have been better with plain pork cocktail sausages and separate bacon (strips or chunks)... maybe some mushrooms... chunks of potato... and possibly a base that's less tomato purée and more sliced tomato.

Though even I would probably have to draw the line before adding baked beans into the mix.

Saturday, 30 November 2013

Home-Made Pizza... From Scratch (ish)

As a long-time pizza lover, I've always wondered what it would be like to make it from scratch. I've tried lots of 'almost' options, such as putting tomato purée and cheese atop pittas, but they're never quite the authentic pizza experience. Ready-made pizza bases are available in some supermarkets, but that's still only 'almost from scratch'. What I really wanted was to make up some raw dough, pile on the toppings, and then watch as it rises and cooks in my oven.

On one of my whims one weekend, I suggested to my girlfriend that we make pizzas using some Ciabatta flour I had in my cupboards (somewhat past its use-by date but, hey...) and the last few dribbles in a tube of tomato purée. All we needed was some Mozarella and then whatever our hearts desired to scatter upon the top. For me, that's an easy choice - Pepperoni, or some variation on the spiced meat theme. My girlfriend tends to be a bit more adventurous...

The most interesting thing to note in this is that different flour mixes - that is to say, the same type of bread, but mixes from different sources - have different preparation/kneading/rising requirements and working with them tends to be a very different experience. The Waitrose stuff, despite being past its prime, worked out well, so we followed up with a second round of home-made pizza, this time using Wright's Ciabatta mix for comparison, and in an attempt to rectify the one obvious problem we had the first time round.

Ingredients:
  • 500g bag Ciabatta flour (Waitrose the first time, used Wright's the second)
  • Plain Flour (to coat a work-surface for kneading)
  • Tomato Purée
  • Grated Mozzarella
  • Toppings!
Preparation Time: approx 15 minutes (plus rising time) to prepare the dough, then about 12 minutes to cook

Tools Required:
  • Large Mixing Bowl
  • Baking Tray or Biscuit Tray
  • Rolling Pin (if you wish)
The Process:
As mentioned, the two versions of Ciabatta bread mix had rather different preparation instructions. The best bet, always, is to simply follow the instructions on the pack. If it has a subsection of instructions for making rolls, that's probably the set to follow, since you'll very likely want to divide the dough.

The Waitrose version needed to be mixed, kneaded, set aside to rise (I believe about 50 minutes was recommended, the idea being that the dough should virtually double in size), then kneaded some more before getting it ready to bake. The Wright's version only instructed one round of kneading - prior to rising - and ended up slightly stickier and more difficult to work with, even after being left to rise. Both wanted to be smeared with olive oil for that authentic crust. It's not absolutely necessary for a pizza, but it's certainly worth trying.

The first time, we cut the dough in half and each half became a pizza base. The second time, we cut the dough in half, then divided one of those halves again to make smaller, thinner bases, and used the remaining half to bake a Ciabatta loaf. On both occasions, tomato purée was squeezed onto the dough, spread out, then coated generously (much more generously that a ready-made supermarket pizza, I should add) with Mozzarella.

My topping, in both cases, was sliced German peppered salami - whole slices the first time, then chopped up pieces the second. My girlfriend first went with peach segments, even more Mozzarella (pretty much the remainder of the bag, since we bought ready-grated) and a drizzle of balsamic vinegar, then chose tomato and basil the second time.

The Results:
It's just possible that the second round of kneading for the Waitrose flour mix - since it required a floured work surface - is what helped dry the dough out and make it less sticky to work with. The Wrights mix recommends doing all the kneading in one hit, so it's taking on less extra flour. It's also possible that we added just a bit too much water, because the quantity listed in the instructions didn't seem to be enough at the initial mixing stage...

Either way, the first attempt worked out well, but the central part of both the pizzas hadn't cooked especially well, despite the edges of mine being slightly burnt (largely because mine was on the middle shelf, and so one edge was right up against the fan, and I didn't think to turn it!). Where it rose, it rose very well, and the result was a nice, light and very tasty base... but it was basically deep pan, and even the cheese overload on the Peach & Balsamic Drizzle pizza wasn't quite enough to support a deep pan pizza... Hence the reduced quantity of dough the second time around.

While I don't have photos of the second attempt, I can honestly say they weren't as elegant. The stickier dough was tricky to work with - my one attempt to use a rolling pin very nearly destroyed my pizza base entirely - and neither could be called 'round'. Weirdly, the thinner base didn't have a great effect on how well cooked it was at the end, but I'd certainly say it was more thoroughly cooked.

The interesting thing to note is that dough can be frozen, so one could mix up an entire bag of flour, divide it into two, three or four pieces, then store some of it away to make home-made pizza some other time, without all the waiting around and kneading.

Making this almost from scratch was certainly a rewarding experience, and it's one I'm keen to repeat in future... If only because the toppings are limited only by my imagination and, if I put my mind to it, I can imagine pizza with something other than pepperoni/salami.

...Though it probably won't stop me visiting my favourite pizza restaurant from time to time...

Whole slices of German peppered salami
Peach in a great sea of Mozzarella, with a balsamic drizzle

Sunday, 3 November 2013

Feta & Griddled Peach Salad (BBC GoodFood '101 Veggie Dishes' Recipe)

This one may sound a bit weird, but bear with me. It was actually one of the first recipes my girlfriend and I tried from BBC GoodFood's '101 Veggie Dishes' book, but I completely forgot to write it up and left it aside for months on end. Oddly, I cannot find this exact recipe on the GoodFood website (the two recipes that are up there both include chicken in one form or another), so hopefully I can get away with listing the ingredients and details of how it's made. We didn't follow the recipe precisely as specified anyway (it was written to serve four!) and it's not as if I'd be reproducing it word-for-word...

Ingredients:
  • 1 Lime
  • 2 Peaches
  • 1 Red Onion
  • 1 Bag Mixed Salad
  • Approx 250g Penne Pasta
  • Approx 150g Feta
  • Fresh Mint (enough for approximately 1 tbsp once chopped)
  • 1 tbsp Olive Oil
Preparation Time: about 15 minutes

Tools Required:
  • Griddle Pan
  • Medium Mixing Bowl
  • Kitchen Knife
The Process:
Start the pasta off as per your preference. This should take about 10-12 minutes, so you can safely leave that going while getting on with other bits.

Cut the peaches into wedges and squeeze the lime juice over the pieces. Since I don't have a griddle pan, we had to make do with basically toasting our peach wedges under the grill. The peaches we picked up weren't especially ripe (typical supermarket stuff), so they didn't work out very well. They're meant to go on a high heat for only two or three minutes a side, which should leave them "nicely charred". This is probably easier to accomplished with a griddle pan and with ripe peaches.

Slice the onion thinly, cut the feta into manageable pieces and chop the mint. Mix them all together with the salad leaves, pasta and olive oil in your bowl. Serve up, topping with a little pepper if you wish.

The Results:
Mixing fruit with any kind of traditionally savoury dish always sounds wrong, but gammon has been served with pineapple for years, and my local pizza place offers both pineapple and peach as toppings, so maybe I need to open my mind to fruit in my main course.

This certainly turned out more pleasant than I was expecting. The mint softened the bite of the feta and rocket, either of which can be overpowering under some conditions. The pasta component was not a part of the original recipe, and was included here to bulk up the dish, as it just seemed a bit too light and salad-y... Though perhaps that's because we cut the quantities of the ingredients. We didn't mix everything up quite as well as we could, essentially ending up with a very layered salad topped with pasta and peach, but it's certainly a good dish to try during the warmer months of the year

Monday, 14 October 2013

Grilled Halloumi & Mushroom Burgers

One of the most interesting things about having a vegetarian girlfriend is the clever and creative spin that gets applied to food whenever we cook together. It's tempting to think that vegetarians 'must be missing out' on certain kinds of foods but, even without the likes of Quorn and Tofu, there are many ways to get the feel of common dishes with all manner of wholesome substitutes. Some I'm familiar with, having gone through an almost vegetarian phase myself but, coming from a family of unabashed carnivores, most meals were very meat-oriented.

I'm familiar with several different kinds of 'veggie burgers', too, but I'd never considered the humble mushroom as the main player in a quick, simple and very tasty variation on the cheeseburger.

Ingredients:
  • 2 Crusty Bread Rolls
  • 2 Large Flat Mushrooms (ideally Portobello)
  • Small pack of Halloumi
  • Small pack of Spinach
  • Olive Oil
  • Herbs/Spices/Seasonings, as preferred
Preparation Time: About half an hour

Tools Required:
  • A Sharp Knife (to cut both the bread rolls and the Halloumi, and to lop off the mushroom stalks if they're too long)
  • That's about it
The Process:
This one's fairly simple, relying mostly on looking in on the grill regularly to check the progress of the mushrooms and halloumi. Mushrooms, it should be noted, will release an awful lot of moisture while grilling, and may need to be drained/squeezed (by pressing down on them with a fish slice or tongs, for example) to ensure the burger buns don't end up as soggy lumps.

To begin, preheat your grill to about 200C. Wash the mushrooms, chop off the stalks, then lightly score the domes of the mushrooms. Drizzle olive oil over the mushrooms and rub it in. Cut the Halloumi into slices about 1cm thick, ensuring there's enough to cover each burger.

The Halloumi will need about 5 to 10 minutes under the grill, while the mushrooms tend to need 15 to 20 minutes and will need to start dome-upwards. Both will need to be turned about halfway through their grilling time. Once flipped, sprinkle over whatever herbs, spices and seasoning you feel like adding to the Halloumi, noting that salt shouldn't be required as it's a fairly salty cheese as standard.

While the grilling is in progress, cut the rolls and prepare them with your desired salad, condiments and whatever else you like to add to a burger. One suggestion was to add spice mixes made by a certain chain of chicken restaurants into mayonnaise, or even use the spice mixes on the mushrooms/Halloumi themselves.

Once the grilling is complete, pile the mushrooms and cheese slices into the buns and devour mercilessly.

The Results:
There's no doubt in my mind that large mushrooms such as the Portobello are meaty enough to serve as a burger. These were made with only the barest additional seasoning, so the flavours of the mushroom, cheese and spinach were clean and prominent in every mouthful. Crusty rolls are preferable simply because, however well you drain your mushrooms during and after grilling, a certain amount of fluid will remain, and it will begin to soak into the buns. Standard burger buns would end up saturated and dripping far too quickly.

It's not often I'll cook something entirely vegetarian when I'm eating on my own, but this is quick and simple enough - as well as tasty and filling enough - to experiment with when I'm otherwise stuck for ideas for a straightforward and satisfying lunch.

Monday, 10 June 2013

A Couple of Shout-outs

Apologies for the lack of updates recently (again)... My most recent job has now wrapped up, so there's a slim chance I might do a bit more 'proper' cooking in the next couple of weeks, depending on levels of motivation (currently a little low, but it is Monday...)

In the meantime, a couple of shout-outs to foodie places I discovered last weekend (1st June) at the Brent Cross Food Market.
  • Wildes Cheese - had a selection of their awesome cheeses. Now, I'm not massively into cheese, but I like their style, and rather enjoyed their creamy Number 3 (with herbs) and absolutely loved their brie-beating Number 4 (aka the Londonshire). I still have a chunk of Number 6 (aka Ally Pally) sitting in my fridge. Amazing stuff.
  • Franchini & Figli (fb/tw) - my lunch that day was one of their 'Ultimate Beef Sandwiches' and, frankly, I lack the superlatives to do it proper justice. The meat was literally melt-in-your-mouth tender, and the smoky flavour was subtle, but surprisingly distinct. You know how 'barbecue' and 'smoky flavour' things invariably just taste like HP Sauce? Well, forget that... this is how smoked meat should taste. Nick, manning the stall that weekend, took a photo of my ecstatic face as I munched on the sandwich, saying it was for Twitter... hasn't gone up yet, so I may have to pop back another weekend for another sandwich... or two. Or just some sliced, smoked beef. Or both. They also sell on Hubbub which, sadly, does not yet deliver to my area.
There were plenty of other cool stalls despite the relatively small area the market occupies and, when the weather is fine, it's worth going to Brent Cross just for the market.

Sunday, 19 May 2013

Red Onion, Feta and Olive Tart

Don't expect this to become a habit, but this is a home-made dish that I didn't even cook myself. Yep, I really can be that lazy sometimes!

Seriously, though, this was a fairly quick and light dinner for a warm spring day, which my girlfriend put together for me as a thank-you. The recipe originates in the BBC Good Food book 101 Veggie Dishes, but some minor changes were made to suit what was available in my fridge and at the local shops.

Ingredients (versus the original recipe):

  • 4 Small Onions (rather than 2 large)
  • Dark Muscovado Sugar (instead of the light kind)
  • 130g olives (rather than 175g (correction: 130g minus one - she just had to check they were alright before putting them on the tart...))
  • Approximately 150g Feta (compared to 100g)
  • The puff pastry was actually the ready-rolled, reduced fat kind

Preparation Time: The original recipe in the book states 45 minutes (or 30 on the website!) but, versus the breakdown, this was quicker to prepare at some stages and longer at others... so probably still about  30-45 minutes work, in total.

Tools Required:
  • Sharp Kitchen Knife, for to cut things
  • Chopping Board
  • Small Saucepan
  • Large Baking Tray (about 26cm x 38cm)
The Process:
Without duplicating the text of the BBC version, there's sadly very little to write about here. The onions were chopped, seasoned, fried, mixed with sugar and balsamic vinegar, then cooked till an appropriately syrupy consistency was achieved. This was done during the course of an afternoon, so the resulting caramelised topping for the tart had adequate time to cool before the next stage of preparation.

With the pastry being the ready-rolled variety, it was a case of fitting it to one of my baking trays, then assembling the toppings, doing the final baking stage (five minutes longer than the original recipe, since the pastry was not the kind it called for and thus reacted differently), and finally scattering on the shredded basil leaves prior to serving.

The Results:
One of the great miracles of home cooking, I find, is that traditionally savoury ingredients can often become very sweet when cooked in a particular way. Now, granted, caramelising the onions involves some sugar, and that's always going to affect the end result, making the onions artificially sweet. In this tart, we have the perfectly-pitched sweetness of caramelised red onions with counterpoints in both the bitterness of the olives and the saltiness of the Feta. Served warm, not long out of the oven, and accompanied by a light salad (most definitely not the sharp, bitter sort recommended by the recipe in the book! Why is rocket so popular?) it made for a pleasant, delicate meal for a warm spring evening (which gives you an idea of how long this post has been waiting!). The flavours complemented each other well, and the Feta's bite was nicely mellowed both by the baking and by being mixed in with the onion.

More than that, though, the remaining half became part of my lunch for the next two days, without any need for reheating. Some of the Feta's piquancy returned when eaten cool, but it never overpowered the caramelised onion, and the bitterness of the olives remained undiminished.

It has been suggested that, perhaps, a little more onion would have improved things. Comparing this tart to the photos in the book and on the BBC website, the depth of the main topping does appear to be a little lacking, but at least part of the reason is that my baking trays are far larger than those recommended by the recipe. I'd say the content was very well-balanced, especially since it tasted just as good cold as it had when warm.
Classy! (the 'wine' is actually Fentiman's Rose Lemonade (honest!))

Monday, 6 May 2013

Menu from Waitrose Ham Hock & Camembert Crepes

For anyone beginning to doubt my carnivorous credentials, I should point out that I'm not suddenly turning into a vegetarian just because I'm going out with one. If we eat out, I'll still have something meaty and it's just for the sake of convenience that we eat vegetarian at other times.

I mean, hell, if I can barely be bothered to cook one proper meal for myself, you can't expect me to cook two different meals now, surely?

And so, without even a "don't call me Shirley!" joke (oh, damn!), we have one of my most recent spur-of-the-moment purchases. It kinda helps that 'ham hock' seems to be the in thing, and thereby ubiquitous, in just about all the supermarkets at the moment (not sure it's quite penetrated Iceland, but I think we're all aware of my feelings toward certain kinds of Iceland meat products). Mostly, you'll just see packs of plain ham hock, ready to add into some elaborate main course, or ham hock in some kind of fancy sauce, so it was rather a surprise to see a full, light dish featuring ham hock in my local Waitrose's 'cheap introductory samplers' endcap. I'm a big fan of crepes (or 'pancakes' to those of us who aren't into pretentiously Euroticising our foodstuffs), though normally only the sweet ones... perhaps it was about time I gave savoury a chance.

My only worry, before I had them, was the Camembert angle. I'm not big on cheese, and have been known to give things a wide berth if they contain any cheese I'm not familiar with (which would be... erm... Cheddar, Mozzarella, Edam, Brie, Feta... that processed stuff you get in burgers... and not much else. Maybe Gouda at a push. Oh, and Halloumi) so the prospect of Camembert was at once enticingly exotic and alarmingly for'n. The fact that one side of the packaging described its contents as 'creamy ham hock & camembert crepes' gave me that little bit more confidence and so, in a fit of pique, I decided to try them out.

The first thing to note is that crepes are notoriously difficult to cook in an oven, be it traditional or microwave. Something about them just loves to bond unbreakably to the surface upon which it is cooked, so it's no surprise that the instructions mention - perhaps a little casually - that "Placing foil onto a baking tray prevents crepes from sticking to the base". Of course, no mention is made of the precautions one should take to prevent crepes from sticking to the foil, but perhaps that's beside the point.

The second thing to note is that the sprinkling of smoked Cheddar and herbs on the top will naturally have a tendency to migrate away from the crepes, and I found it rather difficult to separate it from the packaging so I could sprinkle it back where it was meant to be. That which I could scrape away from the plastic seemed to melt all-too-readily in the heat from my fingers, and so became rather unwilling to be 'sprinkled' anywhere. Seems like a shame, but that's the way it goes, I guess.

So, after a mere fifteen minutes in the oven, these parcels of creamy, cheesy ham had a very sparse, very crisp layer of cheddar on top, and had basically glued themselves to the foil. There's no way to separate them keeping the crepe intact, so don't even try... Though I did wonder, dimly, in retrospect, if a little oil might have helped.

Still, they're going to be opened up sooner or later, so the fact that they were served up already spilling their luscious contents all over my plate was hardly a problem.

Now, perhaps my expectations were hopelessly off target, but I'd rather expected the ham in something like this to be salty. Not full-on bacon salty, maybe not even gammon steak salty... but the shredded ham in these was exceptionally mild. It added more texture than flavour to the rich, creamy créme fraîche sauce and, since I'm no expert on cheese, I probably wouldn't recognise Camembert if it declared my fridge an Independent Republic of Free Cheeses. Suffice it to say, the sauce pretty much overloaded everything for the first few bites. Even the spinach barely registered though, having been cooked inside the crepes, it was well and truly softened and so had lost much of its texture and bite. When it came to the very last portion, I did find the saltiness I had expected from ham, and it actually made a pleasant counterpoint to the almost excessive creaminess of the sauce.

On balance, I can recommend this... but wonder if cooking longer, at a lower temperature might be better for the crepe (or would that dry it out more?). I'm also sorely tempted to get a pack of plain ham hock and attempt to make something like this myself, not least so I can use freshly-made pancakes that don't go crispy, as I'm sure that would be the correct way of serving a dish like this. I'd probably dial down on the créme fraîche, too.

Tuesday, 16 April 2013

Adventures in Omelette #6 & 7: Spinach & Feta / Mozarella & Olive Frittatas

A dual post, possibly to make up for another very long break - I honestly didn't think it had been two and a half months since my last post, but at least I've been otherwise occupied rather than just being completely lazy.

I mean, I've been completely lazy as well, but managing to get a few things done - including some cooking - along the way.

These two were quick Frittata experiments with my girlfriend, who's vegetarian and so not very interested in the meaty/fishy kind of thing I normally throw together. Naturally, the process is the same, so I won't go into details... you may simply revel in the photographs and read the brief comments which accompany them.

This one in particular is essentially one of my normal frittata concoctions without the meat. Spinach and feta can go along with salmon or tuna, certainly, so it was nothing unusual, really.

If I remember correctly, this one ended up being either five or six eggs, simply because I was using the larger frying pan to ensure two decent portions. Many ready-made things one tends to find in shops consider a 20cm pan adequate for serving two... I do not. I prefer a proper portion, thank you very much.
Of course, many of those ready-made things assume you're going to be serving the frittata with something additional - a salad, perhaps... I do not. I prefer omelettes and frittatas to be the whole meal, in and of themselves, perhaps accounting for my preference for larger portions.

The end result was just as tasty as it would have been with the addition of meat or fish, just that little bit lighter, and without all the fuss of scooping out the suspicious-looking meaty/fishy bits. An excellent, quick, light lunch.


Mozarella and Olive, meanwhile, was a semi-deliberate attempt at something even lighter. Mozarella is a very soft, creamy cheese, so it seems as ideal for omelettes and fritattas as it does for pizza topping. Olives provide a little bite.

This frittata seemed to rise a little more (and a little more evenly), possibly because I turned it under the grill a few times - looking at the way my grilled food comes out, it sometimes appears that one side is more effective than the other.
There were two downsides to using mozarella as the cheese component in this particular fritatta. First, its tendency to form long strings when pieces are cut off and separated. Second, it's an incredibly light, mild, creamy cheese... so it didn't add much by way of flavour to the end result. Not to say this wasn't tasty... just that the olives and the eggs were really the only things providing any actual flavour. I suspect that a mixture of black and green olives, or some other additional component, would have been worth considering for this version.
Both of these turned out well, and certainly filled a lunchtime hole but, in purely flavour terms, the former is the clear winner. Both the spinach and the feta offered the most bite, not to mention a little more variation in texture. The latter recipe certainly needed a little something extra, whether it be something as simple as seasoning, an additional cheese, or more chunky ingredients to supplement the olives in the otherwise creamy mass.

This calls for some experimentation!