Search This Blog

Monday, 27 September 2021

Iceland/Ed's Easy Diner Selection

I've been a bit of a fan of Ed's Easy Diner since a friend dragged me into one some years ago. I'd seen them around - frequently wandering past a London branch while on the way somewhere - but, having eaten in a few diners of that style while on holiday in the States, I had been understandably reluctant to sample a British attempt at replicating the classic American Diner experience. Seemingly Ed's Easy Diner has had some financial difficulties in recent years, and it appears all the London branches have now closed... So perhaps it's fortuitous that Iceland have partnered up with them to create a line of microwaveable foodstuffs from their diner menu.

I picked up an initial selection of these almost two weeks ago, and had planned to write about each one individually, but ended up losing momentum and deciding to make a single, collective post instead. Unfortunately, in the meantime, popular YouTuber and microwave gourmet, Stuart Ashen has already covered some of them.

Still, this is snacks & the single man, so I'm pretty much obliged to mention them, if only to break the excessively long hiatus I've had from this blog.

'Breakfast' Options
3 Pancakes with Bacon & Maple Syrup
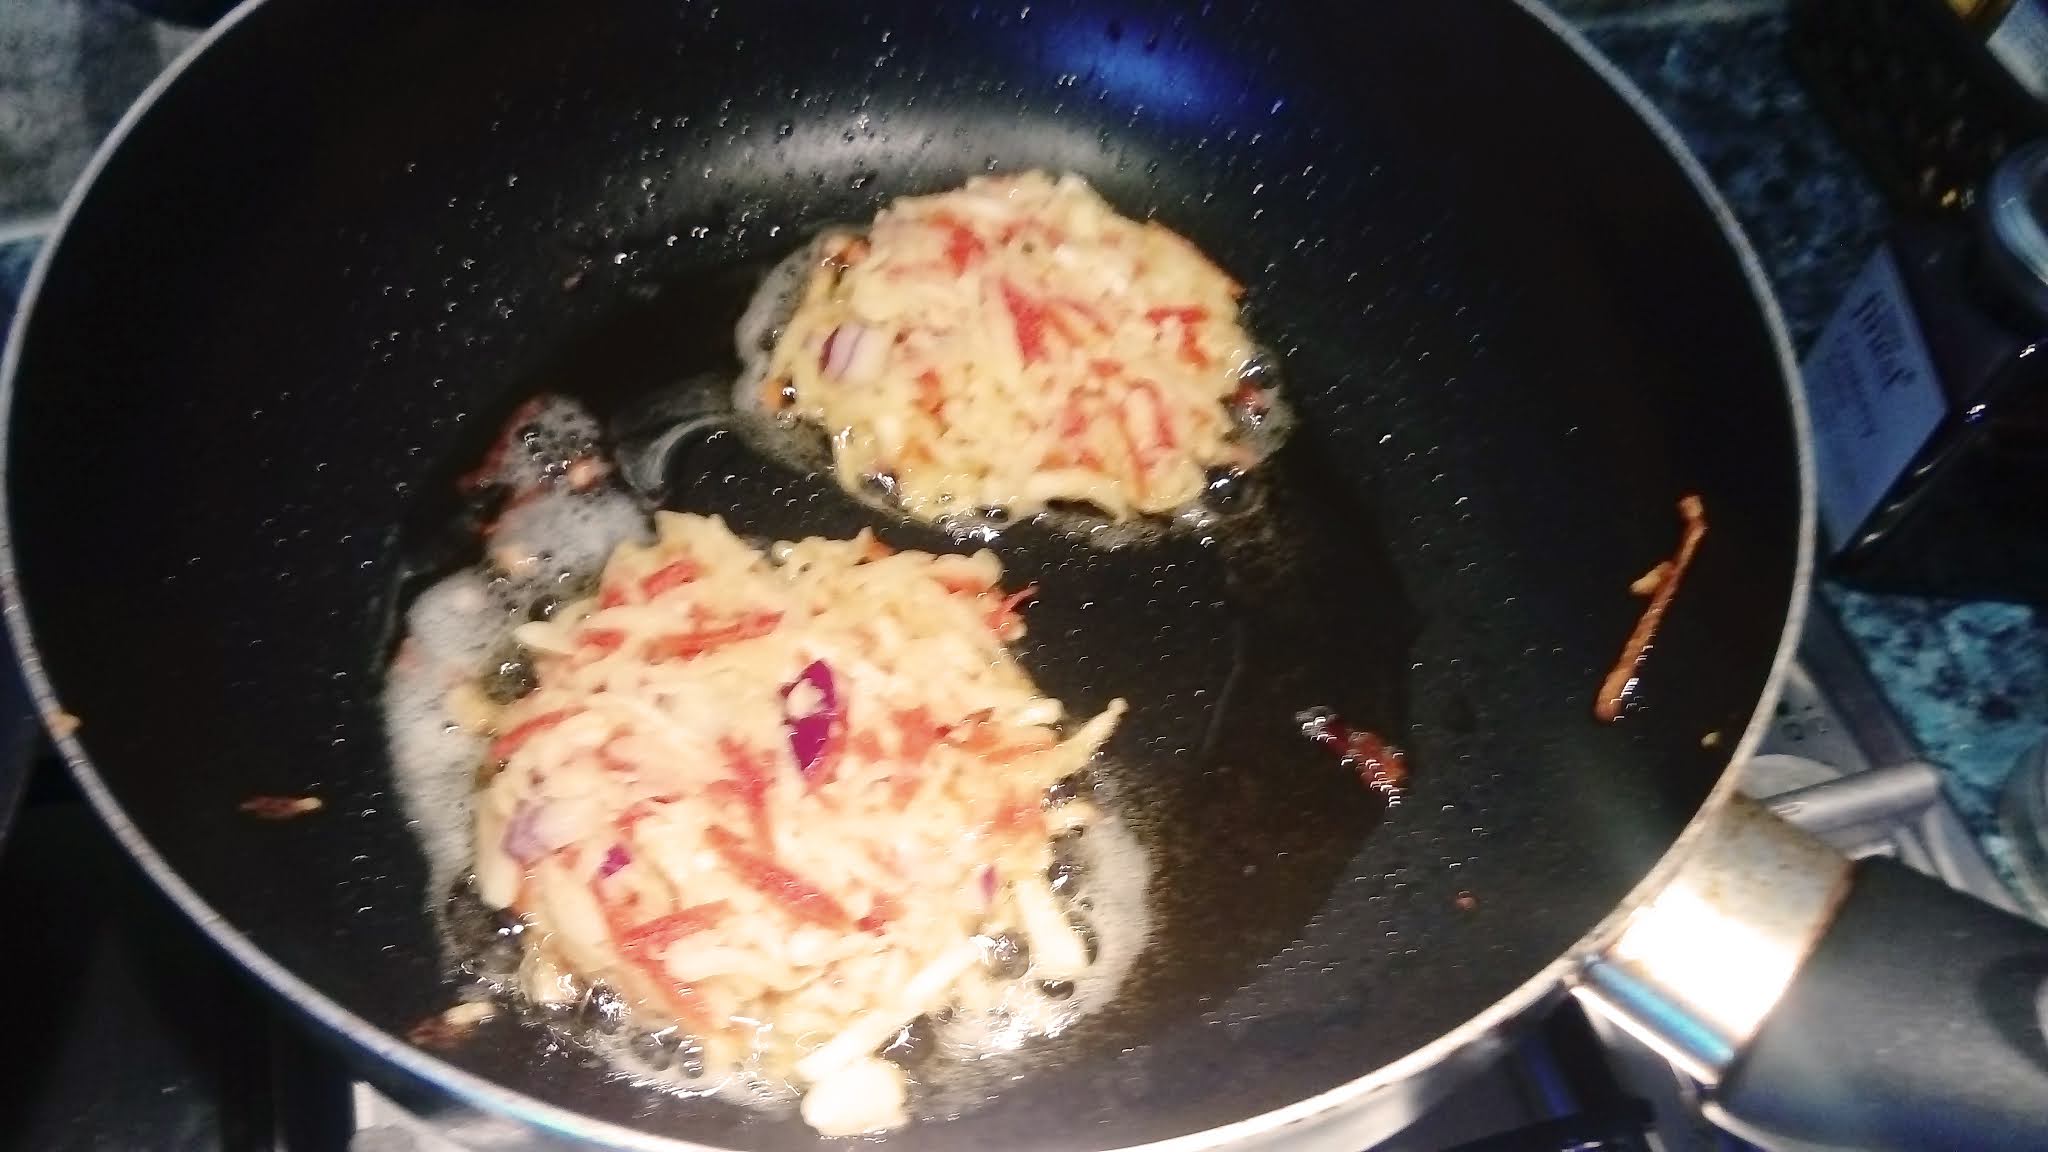
I'd always been a bit dubious about the sweet-savoury combination that is pancakes with bacon topped with maple syrup but when I tried it for the first time while while on holiday, as a hotel breakfast, I loved it. Pancakes, bacon and maple syrup shouldn't work, but it does... and the same - more or less - can be said about this frozen option. It works as pretty much a simple 2-stage process in terms of 'cooking' (technically reheating), with the pancakes going in separately, side-by-side, then the bacon going on the side with the pancakes stacked. Once everything's cooked, the bacon gets put on top and the maple syrup poured over the top.

I don't think I've ever had microwaved pancakes before (then again, I wouldn't necessarily know, in some diners) but these were surprisingly good, if perhaps a touch soggy due to condensate. The bacon is a little undercooked by my standards, and not especially flavourful, but I wouldn't tend to expect much from microwaved bacon. The maple syrup is actually genuine maple syrup rather than maple syrup-flavoured goo, and a decent amount is provided. Perhaps not enough for everyone, but certainly sufficient for me. I think my only real complaint would be that there's really not enough bacon... but, as a snack breakfast/brunch/lunch option plucked from the freezer and prepared in so short a time in the microwave, it's better than I'd expected.

A pretty good start to my experience of this new selection, overall, though my second experience of this was somewhat less positive due to the very much not-crispy bacon being, in fact, rather rubbery.

Breakfast Muffin with Hash Brown & Sausage Pattie
This was in my second sampling of the Ed's Easy Diner range, and I had my suspicions that it ran the risk of being pretty plain even as I picked it out of the freezer cabinet. It's literally just a single hash brown, a sausagemeat pattie and a muffin. Frankly, I was surprised that no sauce of any kind was included and somewhat concerned by the absence of any form of egg. Hell, even Iceland's own brand had a mini-omelette. A hash brown is nice, but it ain't a proper breakfast muffin without some egg. Cooking is another multi-stage affair, with each part getting some time in the microwave prior to final assembly.

The end result doesn't taste bad - the sausagemeat pattie is a touch plain, and the hash brown lacks any seasoning, but both came out moist after being blasted in the microwave. Even the muffin survived quite well, without becoming overly soggy at the bottom. However, the absence of any condiment, some egg, or even a slice of burger cheese, renders this a very dull snack. Pretty sure that, if this is on the menu at Ed's Easy Diners, there'd be a bit more to it than this

Burgers & Hot Dogs
Mac'n'Cheese Burger With Bacon
Here's where the selection started to go a little downhill, for several reasons. I have to admit that I wasn't sold on the idea of a burger with added bacon and mac'n'cheese that had to be prepared in a microwave, but this thing let me down before I even started cooking it. It's supplied with the bun frozen together, the tiny portion of bacon frozen to the underside of the bun, the burger stuck to the bacon and the most miserly portion of mac'n'cheese you'll ever see, taking up less than half the capacity of the plastic bag it's supplied in.

Trying to separate the bun led to the top half breaking. Microwaving led the bun to become dry and crumbly. The mac'n'cheese just gets dumped in a bowl of hot water to thaw, then heated briefly in the microwave, while the burger and the bacon worked about as well as could be expected in a microwave. Assembling the finished burger probably would have been easier if the bun hadn't broken.

However, since the burger is part beef, part chicken, it looks anaemic and has very little flavour - some additional seasoning may have worked wonders, but an increased beef content would have been preferable. The mac'n'cheese isn't so vile an addition to a burger as I'd expected, but it's both unseasoned and not particularly cheesy. The main disappointment was that there was barely enough bacon to add any flavour to the finished burger.

There are instructions included for part-cooking this (basically just the bun) with a toaster rather than the microwave but, personally, I'd say the better option would be to set the bun aside ahead of time to thaw on its own. Toasting it at that point might prove more effective, but use of a microwave is absolutely not recommended for the bun.

Chilli Dog
This is another one I didn't have high hopes for, not least because my relationship with hot dogs generally hasn't been great. I like the idea of hot dogs - particularly the smokiness of a really good one - but some of the ones I've had, even in bricks-and-mortar diners, let alone from supermarkets, have been pretty awful. Add to that, my experience of any chilli other than freshly-made has been diabolical, and so-called 'nacho cheese sauce' is frequently vile.

So imagine my surprise when this turned out to be pretty delicious... Although, thinking back, I can't say that any individual component was outstanding. The sauce is fairly inoffensive, pretty bland, even. The chilli is a little thin, but the flavour is OK and, coupled with a halfway decent hot dog, it works quite well. The main downside - and this is kind of a running theme with the line - is that the bun doesn't do well in the microwave. The outside becomes dry and flaky, and the cut for adding the hot dog isn't really deep enough so I ended up cutting it a little deeper before loading it up.

This one had also cooled down quite a bit before I took my first bite - I wasn't very organised, and didn't bring a camera into the kitchen until after I'd assembled the hot dog. These kinds of things really have to be eaten piping hot, lest the unnatural textures and weak flavour become too apparent.

Classic Hot Dog
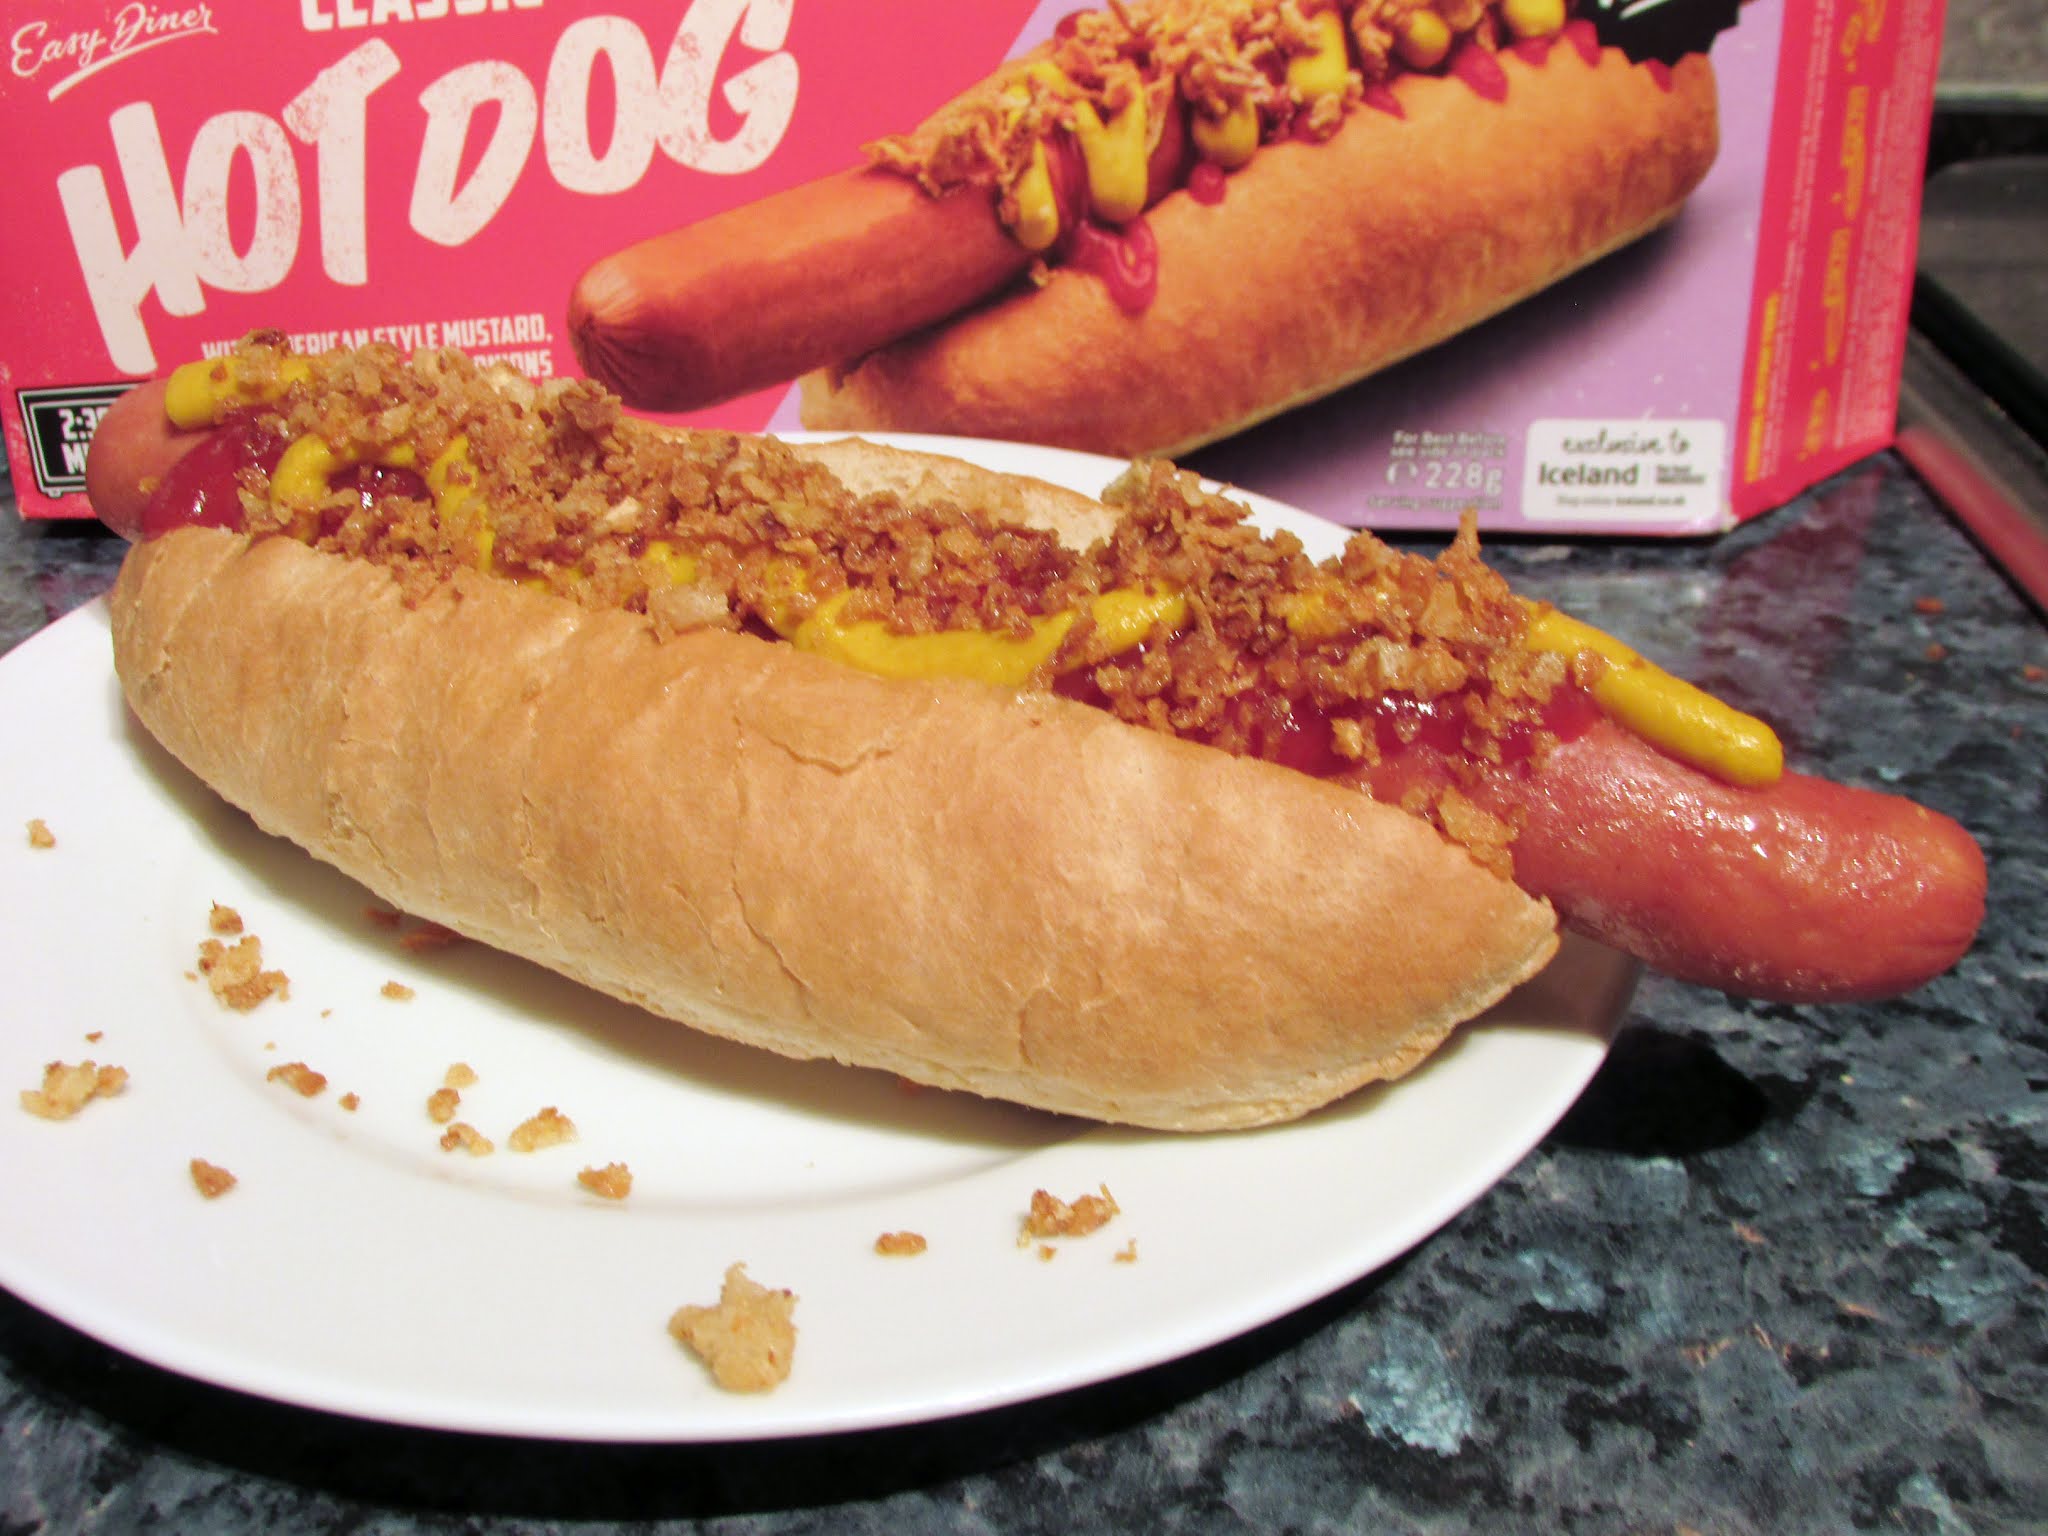
My subjectively positive experience with the Chilli Dog encouraged me to give this version a whirl, since it's a more traditional, simple hot dog. Coming just with a sachet each of mustard and ketchup and a sachet of crispy onion pieces, its preparation is far simpler - thaw the sauces, irradiate the bun, then the hot dog, put the two together, add the sauces, and then sprinkle over the onion...

...Unfortunately - and surprisingly, given that the hot dog itself is surely identical to that included in the Chilli Dog box - this one really didn't work for me. The bun dried out so much that it just broke in half when I tried to put the hot dog into it, the sauces were beyond bland, the onion was virtually flavourless and not remotely crispy, while the hot dog had the consistency (and something approaching the flavour) of rubber. I was able to finish it, but it's left me less enthusiastic about picking up the Chilli Dog again, in case I just got lucky with the first.

Pizza
Pepperoni Stonebaked Pizza
While I'm a conscientious objector when it comes to microwaving pizza (with the exception of leftovers from the night before - they're fair game), I'm quite a fan of frozen pizza generally, even though the excessive oiliness of some - Iceland's own brand in particular - can sometimes upset my stomach. My first impression of this, just going by the box, was that it was small to the point of being wholly inadequate as anything other than a snack, or as just one part of a larger meal. Opening up the box revealed - to no-one's surprise - that the pizza itself is appreciably smaller than the box, not least in terms of height when laying flat... You could probably fit three of them in the box, two at least.

Nevertheless, after a brief burst of microwave radiation, I'd have the describe the pizza as reasonably competent. Naturally, it's more base than topping, and there's a paltry fraction of the cheese depicted in the product shot on the box. Naturally, the act of microwaving it leaves the underside a little sweaty, but the same can be said of any and all microwave pizzas.

Taste-wise, it's certainly not bad, though I found the pepperoni a little anaemic, lacking the punch even of some of Iceland's own brand products, and certainly not as good as the Chicago Town 2-pack mini-pizzas or pizza subs which, I would say, are one of this product's closest analogues. As expected, though, I was still rather hungry after polishing this off.

Desserts
2 Waffles with Chocolate Sauce
I had a great sense of foreboding about this since, when microwaving things from frozen, there's a certain inevitability of one of two outcomes: it'll be too dry (like the burger and hot dog buns above) or it'll be desperately soggy... and neither is conducive to the enjoyment of waffles.

Granted, as with the burger buns - and even the pancakes - there's the option to heat them in the toaster and, upon reflection, that would seem to be the better - perhaps only - method for this dessert. Because, following the microwave instructions to the letter here, the end result was droopy, soggy waffles. Sure, they tasted OK, but part of the waffle experience is the delightful, subtle crunch surrounding the still-moist innards, and the way they soften as the sauce or ice cream start to soak in. There's something truly sad about a waffle that sags, since their lattice structure is intended to keep them rigid while minimising the amount of mixture needed to make them.

The only other let-down was the chocolate sauce, which was very, very sweet and not particularly chocolaty. This is fairly common with things called 'chocolate sauce', which can sometimes be so sugary they burn the back of my throat. This was was just a bit gunky, so I'll probably give the version with salted caramel sauce a go at some point... Making sure I cook the waffles in the toaster.

The Ed's Easy Diner range presents very much a hit-and-miss selection, not just in its individual products, but in repeat experiences of those products. Having now had a second set of the pancakes'n'bacon, I've been put off trying them again because the fat on the bacon was like chewing gum. I wouldn't touch most pre-packaged burgers with a bargepole simply because my experiences of supermarket meat-based burgers have been largely regrettable. I may try the Chilli Dog again but, having disliked the 'Classic' version so thoroughly, I'm not convinced it would be worth the risk, even at the typically low Iceland price.

The bottom line, I guess, is that none of these would be especially difficult or time-consuming to make from scratch, seasoning to taste, and adding such condiments as are desired. Hell, I've already done it myself. The Breakfast Muffin was particularly dull and, given that sauces were included in pretty much every other product, it's baffling that there wasn't even a sachet of ketchup included.

Your mileage may vary. Your experience and expectations of burgers, sausagemeat patties and hot dogs may be very different from mine. However, I can be reasonably certain that either thawing the buns naturally, rather than relying on a microwave, or using the toaster where possible, would yield better results.

Monday, 28 December 2020

Christmas Dinner... Burger-style!

I have to confess that, despite largely eschewing this blog this year, in favour of quick-and-easy, hashtag-enhanced Instagram posts, I'd thought my Christmas Dinner pizza was a more recent event than it actually was... Perhaps my recollection had become 'slightly' skewed by the emergence this year of Pizza Hut's take on my idea (which is heartily recommended, BTW - the Red Wine Gravy base alone is delicious, though the use of rotisserie chicken rather than turkey makes it a little less authetic), but it was way back in 2014... and I didn't even get round to writing up my 2016 magnum opus, the salmon en croûte with cream cheese, cranberry sauce and orange zest that Courtney and I made for my parents as Christmas Dinner that year.

Nevertheless, it had occurred to me a month or so back that it'd be nice to follow that up with another form of junk-food-ised Christmas Dinner, and the most obvious option seemed to be burgers... While Courtney and I have eaten fewer burgers at home this year than previously, I did end up visiting the McDonald's round the corner from my last Temping placement, in Islington, a little too frequently while I was there.

She was very much on board with the suggestion, so I went ahead and started looking into how best to make turkey burgers from scratch. In the end, largely through lack of care and attention, I made the most basic option in the world - just turkey mince (500g of 2% fat turkey mince from Tesco), seasoned only with salt and pepper, and formed into two patties. These were pan-fried, one at a time, in a little vegetable oil, with the use of a meat thermometer to ensure they were properly cooked all the way through, since I couldn't easily eyeball it.

Turkey is only part of a good Christmas Dinner, though. I also wanted to add a patty of stuffing and a Christmassy hash brown at the very least, while thoughts of cranberry sauce and lightly toasted slices of Brussels sprouts seemed to round off the concept nicely. Courtney mixed up a red cabbage coleslaw, because we had some red cabbage, and it went well with her planned vegetarian option.

For the stuffing patties, I had the option of going for something simple, like sage and onion, but ended up choosing a pork, chestnut and onion stuffing from the Tesco Finest range - a 400g pack divided up into four patties. The hash browns were home made, using a mixture of parsnips, rainbow carrots, onion and potato with egg and potato flour added to aid binding. These were pan-fried and still didn't hold together especially well, but the rainbow carrots added some seasonal colour to what could otherwise have been quite anaemic hash browns (hash beiges?). The sprout slices were simply chucked in the oven, unadorned, alongside my stuffing patties and Courtney's vegetarian sundries, while the hash browns and burgers were being cooked on the hob.

Of course, it wouldn't be Christmas without pigs in blankets and, rather than buy them oven-ready, I decided to piece together my own using a combination of Pork and Caramelised Onion cocktail sausages and Chestnut Smoked Streaky Bacon, both from the Tesco Finest range. Weirdly, the packs were of different sizes - 18 cocktail sausages versus 16 slices of bacon - so I ended up with a couple of unwrapped sausages. However, about 30-35 minutes in the oven created a tray full of pigs in blankets, with enough leftovers to cover my lunches for the following couple of days.

Bun-wise, I'd originally ordered a pack of Warburtons' Brioche Burger Buns but, with the only delivery slot available to us being the 18th December, these would have been out of date and probably growing stale before Christmas Day, so we ended up using them for other things and buying a pack of standard sliced buns locally, a couple of days ahead of time.

The buns were assembled with a helping of Courtney's red cabbage 'slaw on the bottom, the stuffing patty, the turkey burger, some cranberry sauce, and the toasted sprout slices substituting for that old burger staple, the pickled gherkin slices. I only got one of the hash browns, because Courtney miscounted, and they hadn't held together very well anyway, so much of the mixture ended up in a pile on her plate. I served my pigs in blankets on the side, and nicked one of her Brie Bites (Tesco's own brand) for a bit of variety, since my plate was largely made up of meat.

The results were a little mixed... and, unfortunately, my hastily taken, blurry, poorly-lit photos don't help...

The pigs in blankets were excellent and, for once, I was able to taste the difference between fancily-smoked bacon and the normal kind, these rashers having a pleasantly sweet, spicy edge to them rather than just being super-salty.

The stuffing patties tasted great, but I misjudged their size before baking them: their circumference shrank, while their height increased - I'll know to take that into account if I try this again in future, and make them shallower and wider before putting them in the oven... though the chunks of chestnut might make that a bit tricky. Courtney's red cabbage 'slaw was nice on its own, but ended up becoming rather overwhelmed by the rest of the burger, including the bun itself. The hash browns turned out really well other than their tendency to fall apart - we'll really need to research how to make them stay together... Personally, I suspect a mold may be used for the shop-bought kind or, at least, some sort of press to compact them together rather more before they're cooked.

Less impressive were the turkey burgers, since they ended up very dense and very dry. I'd definitely like to try making them again, but actually following one of the myriad recipes out there, in the hope of a more succulent result. At the very least, there should have been some additional seasoning - I had been reluctant before starting, since the other contents of my burger were, theoretically, going to be seasoning of a sort. Some of the recipes available online also feature things like egg white and breadcrumb, and these may have helped considerably. Part of the problem, though, was that I split a 500g pack of minced turkey into two 250g patties, which ended up being far too large in and of themselves. Considering a Quarter Pounder burger would only be a little over 100g, I really overdid it. Another part of the problem is that minced beef - the main constituent of a normal burger - would tend to comprise more than 2% fat... and the leanness of this minced turkey contributed to the dryness of the end result. Topping the burgers with cranberry sauce added surprisingly little to the flavour but, again, a smaller burger may have made all the difference.

Possibly the most disappointing part was the toasted sprout, which ended up getting utterly lost in the burgers. In retrospect, I suspect they should have been seasoned and oiled... So I'll know better for next time.

We're already considering options for next year's non-traditional spin on the traditional Christmas Dinner, and a curry is the front runner. We just need to look into how things like nutmeg, cinnamon and ginger into a curry sauce that can accommodate both turkey and whatever vegetarian substitute Courtney ends up using...

Monday, 8 June 2020

Beaver Tails with Maple Buttercream Icing

Sometime after my girlfriend moved in with me, we started introducing each other to things like our favourite movies, books, TV shows and YouTube channels. In the latter category, one of Courtney's favourites is Simply Nailogical - ostensibly a nail art channel which has more recently branched out into a nail varnish brand (Holo Taco) and a stream-of-consciousness/discussion podcast (SimplyPodLogical). This may seem like a strange subject to bring up on what is technically still a food blog (even though it's been without updates in over a year because I started using Instagram for the majority of my foodie output), but there's a connecton, honest.

Basically, one of the recent episodes of SimplyPodLogical was devoted to discussing some common Canadian stereotypes and, during the course of the conversation, Cristine and Ben mentioned a chain of pastry shops called 'BeaverTails'. They are purveyors of what is essentially a flatbread version of the classic fried doughnut, with a variety of toppings on offer, from classic cinnamon sugar to various types of icing, chocolate spreads, crushed biscuits, fruit, etc.

Naturally, I was hooked.

Since they don't have any UK branches (and, y'know, there's the Lockdown to consider anyway) I looked into recipes for making Beaver Tails myself, and realised it was something I could probably manage quite comfortably, despite the fact that I've done very little cooking from scratch in ages, and what little I have done used recipes from Gousto, where all the ingredients came supplied in the proper, premeasured quantities, and the instructions were given in clear, simple stages. I've not bothered writing those up here because it seemed a little rude (not to mention legally shaky) to recreate their recipes, and because it worked better to simply photograph and Instagram the results.

But Beaver Tails... They're precisely in line with the raison d'être for this blog, so I couldn't resist going the longform option... Not least because I can demonstrate how adaptable these fried delicacies can be.

Ingredients:

Maple Buttercream
  • Room Temperature Butter, salted or unsalted - I used salted (225g)
  • Icing Sugar (120g)
  • Maple Syrup (120ml)
  • Vanilla Extract (2 teaspoons)
  • Salt (a pinch, only if using unsalted butter)
Preparation Time: 5-10 minutes

Beaver Tails
  • Hot Tapwater (60ml)
  • Sugar (50g)
  • Yeast (7g)
  • Milk (60ml)
  • Butter (3 Tablespoons)
  • Egg (1)
  • Salt (1 Teaspoon)
  • Plain Flour (335g)
  • Oil for Frying
  • Topping (cinnamon sugar being the usual recommendation)
Preparation Time: Approx 2 hours, including resting

Tools Required:
  • Large Mixing Bowl (for the dough)
  • Medium Mixing Bowl (for the icing)
  • Small, Microwave-safe Bowl
  • Stirring Implements, eg. spoon, spatula, whisk (some form of electric mixer is recommended for some parts!)
  • Sharp Knife
  • Rolling Pin
  • Frying Pan or Saucepan (of sufficient size to accommodate at least one portion of the dough)
  • Tongs (because you don't want to burn your fingers with hot oil!)

The Process:
Let's start by making the buttercream, because doing that after making the Beaver Tails could be problematic. Cube the butter and dump it into the medium-sized bowl, then add the icing sugar and start to stir. While I'd heartily recommend some sort of electric mixer (either a stand mixer or an electric whisk), it's best to start this process off manually, either with a spoon or spatula, because the icing sugar will be inclined to puff out all over the place under the influence of an electric mixer. Once the icing sugar is at least partially bound into the butter, it'll be safe to switch over to electric. Add in the Maple Syrup, the Vanilla and, if using unsalted butter, a pinch of salt. Personally, I found it perfectly acceptable to cut out the middle-man and simply use salted butter - the combination of icing sugar, Maple Syrup and Vanilla is easily sweet enough to take the edge off the saltiness of the butter, and vice versa. Keep mixing till everything is as smooth as possible, then set aside.

Note that this mixture will be inclined to separate over time, and may not even bind into a particularly smooth consistency in the first place. This is a common issue with adding liquids to buttercream, but we're aiming for an authetic Maple Syrup flavour, and genuine Maple Syrup is very much a liquid. As long as you're not seeing clumps of butter, it's probably good to go, and will just need a little extra stirring before it's applied to the Beaver Tails.

Making the dough for the Beaver Tails themselves is rather more complicated a process than I've encountered for bread and cakes, largely because I've normally only dealt with ready-made mixtures. I think the only other time I've used yeast anywhere on this blog was in my failed attempt at crafting home-made Cream Soda, but we seemed to have some more recently-purchased yeast in our cupboards.

Start by pouring the hot tapwater into the larger mixing bowl with a teaspoon of sugar (this can be taken from the measured 50g - that still leaves plenty for the remainder of the recipe), add the yeast, stir and set aside for a few minutes so it can proof. What you'll end up with is an off-putting, yeasty-smelling, frothy beige mess. Believe it or not, this is a good thing.

Add the butter, milk, and the remaining sugar to a small bowl and microwave (carefully!) to melt it all together. Stir it up and allow it to cool for a few minutes before adding to the yeast mixture in the large bowl - it needs to be hotter than room temperature, but if it's too hot it could ruin the yeast. Stir the two mixtures together, then crack in the egg, add the salt and whisk together. Start slowly adding in the flour, a little at a time, and keep stirring until a dough is formed. Knead this for a few minutes, adding flour as necessary. The end result should still be quite sticky, but very definitely a dough rather than a paste.

Cover the bowl - if it has a lid, so much the better, otherwise cling film will do the job - and leave it aside somewhere warm to allow the dough to rise. About an hour should be sufficient, but I had to make way for Courtney to take an online cookery class at this point, and only returned to my dough quite late in the afternoon, by which time it was very puffy and smelt strongly of yeast. Beat the dough back down to its original size, then divide into eighths - I rolled mine into a fat cylinder, as that seemed the easiest way to cut it into portions semi-accurately. Roll these out flat, to something in the region of half a centimetre in depth, then set aside for frying. Just for fun, I cut a grid pattern on one side of mine... Not sure why, but the idea had occurred to me, and I was curious to see how they'd end up after frying.

Fill your chosen frying pan or saucepan with cooking oil, just enough that the dough sections will be able to float, then put on what's described as "a medium heat". I gather from the recipes I found online that you'd be aiming for about 180°C/350°F, but it's a tricky thing to judge because hobs aren't marked that way, and they often have different sized burners available, each offering a different range of temperatures. For me, "a medium heat" usually seems to be the lowest setting on the mid-sized burner, but that isn't entirely consistent so your mileage may vary. I ended up tearing off a small chunk of the dough and using that to judge whether the oil was hot enough.

Place the dough pieces into the oil carefully to avoid spitting or splashing. Depending on the size of your chosen vessel, you may have to do them one at a time, or you may fit two or three. Fry each side till golden brown - depending on the vaguaries of the hob and the actual temperature of the oil, this may be anything between 30 seconds to a couple of minutes... though I suspect I may have overdone a couple of mine. Once done, pick them out of the oil (allowing the excess to drain off) and add the topping of your choice while they're still warm.

The Results:
To be honest, this went better than I'd expected, albeit perhaps not perfectly. For starters, I didn't get all my ingredients ready and set out before waking up the yeast, so that was left going rather longer than recommended in any recipes (maybe about 15-20 minutes, while I got everything else together?). I'm not sure if there's an ideal point in the proofing process, after which something can go wrong... but certainly nothing exploded. I actually started the yeast off in a tiny bowl of its own rather than in the large mixing bowl and, by the time I started bringing everything together for the dough, it looked as though it would have overflowed if I'd left it there much longer.

Still, the dough came together very well, but it did leave me coveting those mixers with dough hook options, because mixing what ends up as quite a tough, sticky dough was not fun with a standard spoon. I also had trouble with the dough's stickiness... Sure, it's described as "sticky" in recipes, but how sticky is that? Once I'd mixed in all the flour and started kneading, quite a bit of the dough stuck to my hands. I suspect I should have added a little more flour at that point, but didn't want to overdo it. This is probably something I'd know better if I made bread regularly (and from scratch). Nevertheless, it rose very well in its covered-over bowl... and ended up being left for several hours rather than the recommended "one hour or so". Whether or not this worked in my favour, I'm still not sure. Beating it down and dividing it up was easy enough, so I figure I can't have gone too far wrong. My only concern was that there was a very strong yeasty smell to what was supposed to be quite a sweet dough - or so I thought.

Frying went well, but I'm still pretty vague on hob temperature settings, particularly with large quantities of oil. Plus, the dough had a habit of developing pockets of air underneath, so some of the individual doughnut-things ended up with patches on the underside that looked undercooked. Still, they puffed up nicely, and I was pleased to find that my grid patterns looked pretty good after frying. I tried one 'bare' after letting it cool a little, and have to admit that the yeasty smell persisted after I tore it open. It was light and fluffy, though, so a coating of cinnamon sugar would probably have overpowered whatever yeastiness was left.

I was aiming slightly higher than mere cinnamon sugar, though... and my Maple Buttercream icing made for an excellent topping. However, I'd got a bit of a bee in my bonnet about the icing the day before I started making the dough. I first tried a small batch using a fraction of the necessary ingredients, and that turned out OK... But then I decided to make the full batch late in the evening, because I realised that my time in the kitchen would be interrupted by Courtney's cooking lesson, and I figured getting the icing done ahead of time would help. Storage presented a problem that I hadn't fully considered, though. I didn't want to leave it out overnight, so ended up stuffing it in the fridge. This naturally made it harder to dole out, even after stirring it thoroughly again to undo the separation that occurred, and it never quite became as smooth as one would normally expect of a buttercream icing.

I think I was a little hyperactive for a while after eating a completed Beaver Tail slathered with icing, so I didn't have a second. Later on came the sugar crash, which left me feeling a little unwell and headachy for part of the evening. The four Beaver Tails left after dinner were boxed up and stuck in the fridge, with the excess icing (because there was quite a lot!) scooped into a small plastic tub for storage in the freezer.


Not even the threat of another sugar crash was enough to deter me from having one of the remaining iced Beaver Tails for breakfast, and chilling them overnight certainly took the cloying edge off the icing, though the Beaver Tail itself had become a little dry and hard. They're definitely a dessert to be best enjoyed when fresh.

At Courtney's suggestion, I had another one - topped with three rashers of unsmoked bacon - for lunch, since the concept wasn't too far removed from some of the breakfast/brunch options I've seen available in American hotels. This, too, turned out to be delicious... and I'm not normally one to mix sweet and savoury on a single plate.